
Spec Miata 101: Building a Competitive Track Car Under Racing Regulations
Spec Miata keeps cars equal so racing comes down to skill, setup, and consistency—not budget. For first-time racers and HPDE drivers, a competitive build means a straight, reliable chassis, weight, and rulebook details—100% legal, zero shortcuts.


Spec racing keeps the cars nearly identical so the fight is about driving, setup, and your skill, not the biggest budget. Spec Miata (SM) does that for 1990–2005 MX-5s and it’s everywhere in club racing, which is why fields are deep and drafting battles are epic. The rulebook’s whole vibe is simple: production-based cars, limited mods, safe for true door-to-door, affordable enough to bring more people in. This article is for first-time club racers stepping up from HPDE, track-day Miata owners wondering what it takes to go legal, and sim racers who want a grounded picture of a real build. The thesis is straightforward: a competitive SM is a straight, reliable chassis with safety done right and obsessive attention to the allowed details, alignment, blueprinting within stock tolerances, weight, and tire management, while staying 100% inside the rules.
Sanctioning Bodies, Classes, and Rulebooks
Most builds target either SCCA Spec Miata or NASA Spec Miata, and many regions also run local variants. Tires, minimum weights, compliance checks, and licensing formats can differ, so you pick a home series first and build to that exact book. “Close enough” is how cars fail tech. Rules live in the SCCA GCR and NASA’s dedicated SM PDF, and both get updated, so read them line by line and keep your own checklist.

Eligible Cars and Choosing Your Generation
All the usual suspects are covered: 1990–93 1.6 NA, 1994–97 1.8 NA, and 1999–2005 1.8 NB (with 2001–2005 VVT “NB2”). Balance comes from minimum race weights and, for the punchier years, restrictors. The 1.6 cars are light and lively but short on grunt, early 1.8s sit in the middle, and NB/NB2 usually dominate big fields thanks to torque and aero, at the cost of more weight. The smartest choice is whatever wins near you, is available rust-free, and fits your budget and spares pipeline.
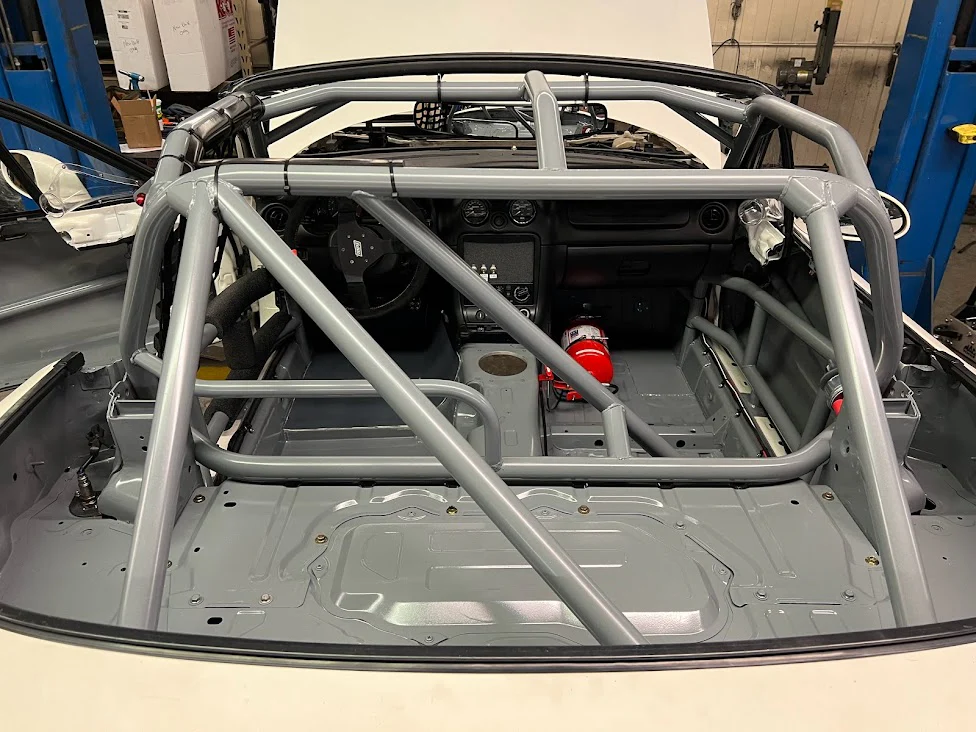
Safety, Cage, and Driver Restraints Done Right
The cage is where you never cheap out. Follow tube spec, attachment points, door-bar style, foot plates, and weld quality to the letter. Strip the shell where the book allows, keep the required dash/door bits, and paint the interior so you and tech can see everything. Mount an FIA seat to reinforced points or the cage, get your hips and shoulders low and centered, and install belts, window and driver nets, and a head-and-neck restraint that all meet current dates. Add a fire bottle or plumbed system with properly placed nozzles, and an external kill switch with correct labeling.
Legal Weight Reduction
Pull carpets, sound deadening, insulation, audio, A/C, and airbags as the rules allow, but be careful with dashboards, door cards, glass, and regulators. The goal isn’t the absolute lightest tub, it’s making minimum race weight with you in the seat and using bolted ballast low and central to nail the scales. Different years have different minimums and some engine combos require adders, so weigh the car in several fuel states and plan ballast accordingly.
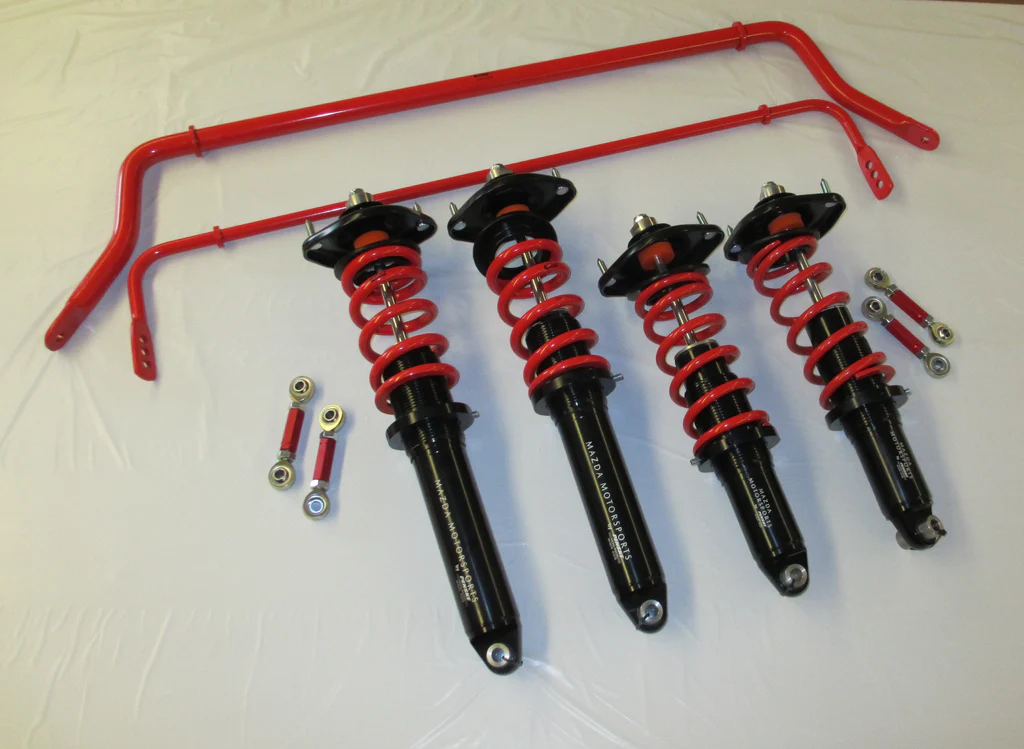
Spec Suspension, Ride Height, and Alignment Hardware
Modern builds use the spec shock and spring package with matching sway bars. Don’t slam the car; bump travel is your friend when you’re living on curbs. Stick to allowed bushings and factory-style adjusters (eccentrics/shims) to reach alignment, and avoid any geometry tricks the book doesn’t allow. A proven starting point: front camber roughly −2.5 to −3.0, max even caster, and a hair of toe-out; rear camber roughly −2.0 to −2.5 with close to zero toe or a whisper of toe-in. That’ll get you in the window, then tune to your track and style.
Wheels, Tires & Heat Cycles
You’re on 15×7 wheels with a minimum weight and a spec 205/50R15 tire that depends on series. Pick a legal wheel that’s strong and easy to mount. Track tire heat cycles, rotate aggressively, and keep a fresher pair for qualifying if you’re chasing tenths. Start with known-good cold pressures, read a pyrometer and the wear, and adjust to keep the tire in its sweet spot while balancing turn-in bite vs stability.
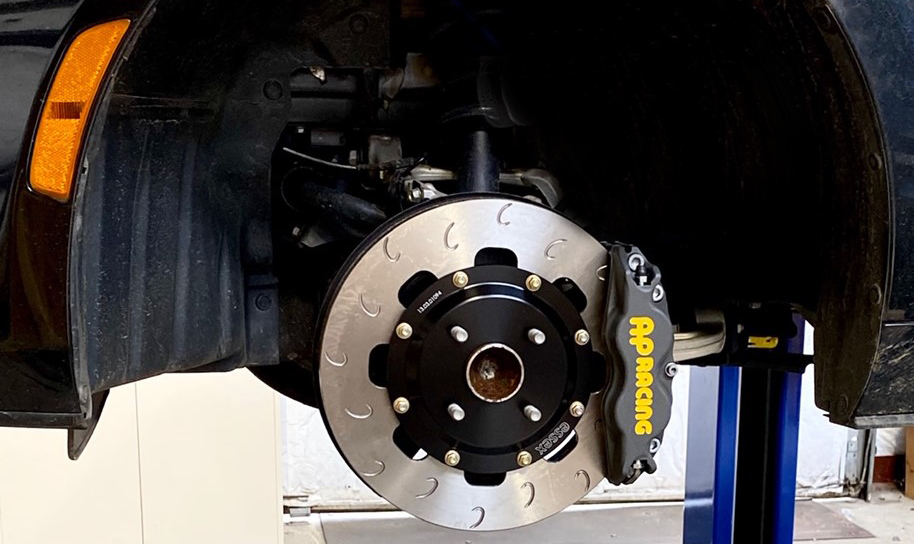
Brakes, Fluids, and Cooling
Calipers and rotor sizes stay stock; pads are free, so pick a compound that actually survives sprints and enduros. Run real high-temp fluid, bed pads properly, and expect fronts to be frequent consumables. Brake cooling is allowed in specific ways, route ducting cleanly and secure it for curb hits. Bias tweaks come from pad choices and tire pressures if proportioning hardware is restricted.
Engine, Intake, Exhaust, and Drivetrain
The motors are “stock,” but blueprinting within factory tolerances is where the power hides: compression at the top of the legal range, deck height set precisely, valve springs in spec, balanced bottom end. Overbore, minimum weights for components, and compression caps are spelled out, live in those tables. Late cars typically run a restrictor and all air must go through it; intakes and airboxes have specific rules. Exhaust is controlled and you must meet sound; the ECU stays stock per the book. Trans ratios are stock, legal clutch options focus on reliability, and a healthy Torsen or viscous diff is mandatory for pace.
Scaling, Corner Weights, and Fuel Planning
Minimum weights vary by year and engine, so work backward from your finish-line fuel target. Scale the car with you in the seat and a repeatable fuel load, shoot for a neutral crossweight (often around 50% on symmetric tracks), and move ballast to fine-tune balance. Weigh car-plus-driver at full, half, and “checkered flag” fuel so you never dip under the minimum after a long green run.
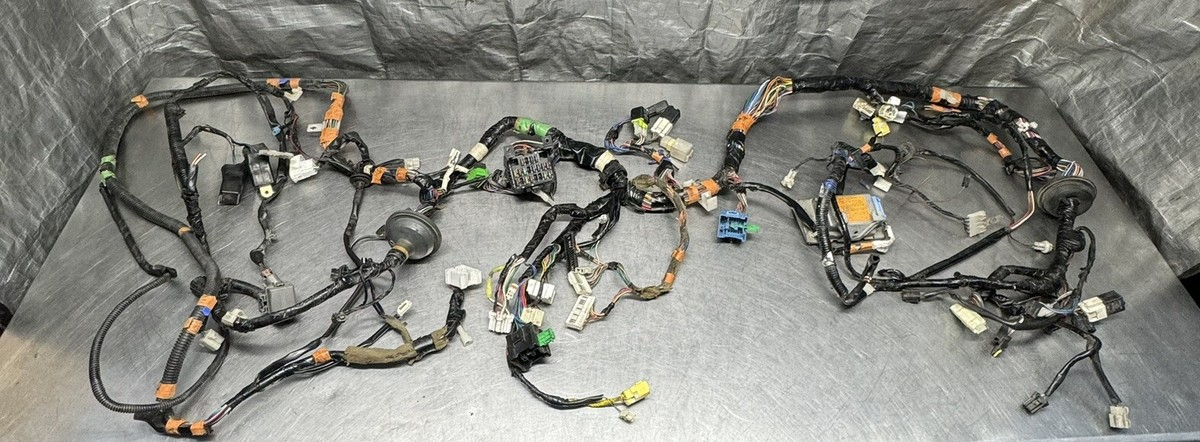
Electrical Simplification, Data, Radios, and Ergonomics
Trim the harness legally and keep any required lighting or wipers for rain. Use easy-to-read oil-pressure and coolant-temp info with clear warning lights. A basic data setup (GPS speed, RPM, lap timing, plus video) is a huge driver-development tool in a spec field. Add a reliable crew radio with a properly mounted antenna, a comfortable quick-release wheel, smart pedal positioning within the rules, a solid dead pedal, and driver cooling ducts for hot days.
Compliance, Tech Inspection, and Documentation That Saves Weekends
Read your rulebook end-to-end and build a checklist before touching the car. Photograph parts and measurements, keep invoices and part numbers, label ballast and cage, and carry a tidy binder to tech. Get your initial logbook inspection once the cage and safety are done, track expiration dates on belts, nets, and suits, and expect dyno or other compliance checks in some regions. Common traps include non-approved bushings, wrong shocks, missing or incorrect restrictor bits, ECU tampering, and sketchy ballast mounting.
Leaks, temps, re-torques, and alignment sanity. In racing, your lap time is often the draft and your exits, not your hero braking. Learn to manage runs, plan passes two corners ahead, and use data/video to overlay with faster drivers and find where they breathe less, turn the wheel less, and roll throttle sooner. Mid-pack in a healthy SM region is already an achievement; progression is finish clean, run with the pack, make the front train, then fight for podiums.
Where This Build Can Take You Next
A well-built SM can jump between SCCA and NASA with minor changes and may slot into certain regional classes if your area offers them. Many drivers start here because the class teaches the fundamentals that matter everywhere, momentum, setup discipline, data literacy, and clean racecraft. Plenty never leave because the fields stay deep and the racing stays close. Build it right, keep it legal, and you’ll have years of hard, fair fights ahead.


