
NB Miata 100k-Mile Maintenance Overhaul
NB Miata rubber, seals, plastics, hydraulics, bearings, sensors, and fluids are aging out even if the car “runs fine.” This guide resets known weak points on NB1/NB2 engines and treats timing service as mandatory to ensure a solid next 60–100k miles.


At ~100,000 miles (and/or 20–25 years), age-sensitive bits, rubber, seals, plastics, hydraulics, bearings, sensors, and fluids, are past their prime even if the car “runs fine.” The goal here is to preempt common NB failures and reset baselines for the next 60–100k. Both NB1 (’99–’00, BP4W) and NB2 (’01–’05, BP-Z3 with VVT) are non-interference, so a snapped belt usually won’t bend valves, but the downtime and collateral damage still hurt. Treat timing as non-negotiable maintenance.
Timing Belt + Front Seals + Cooling Stack (Non-Negotiable)
What to do: Timing belt, tensioner/idlers, water pump, thermostat, front cam and crank seals, accessory belts. Inspect or replace the radiator (plastic end tanks love to crack with age), all hoses (upper/lower/heater), and the thermostat housing gasket. Refill with fresh long-life coolant and bleed properly.
Why now: Most owners service timing around 60k intervals for safety. Old plastic tanks and hoses split without warning.
Callouts: On NB2, listen for a brief startup rattle from the VVT sprocket; chronic noise may point to a worn unit, diagnose before button-up. Use an OE-style thermostat and mind torque on the aluminum housing.
Oil Leaks You Should Erase While You’re There
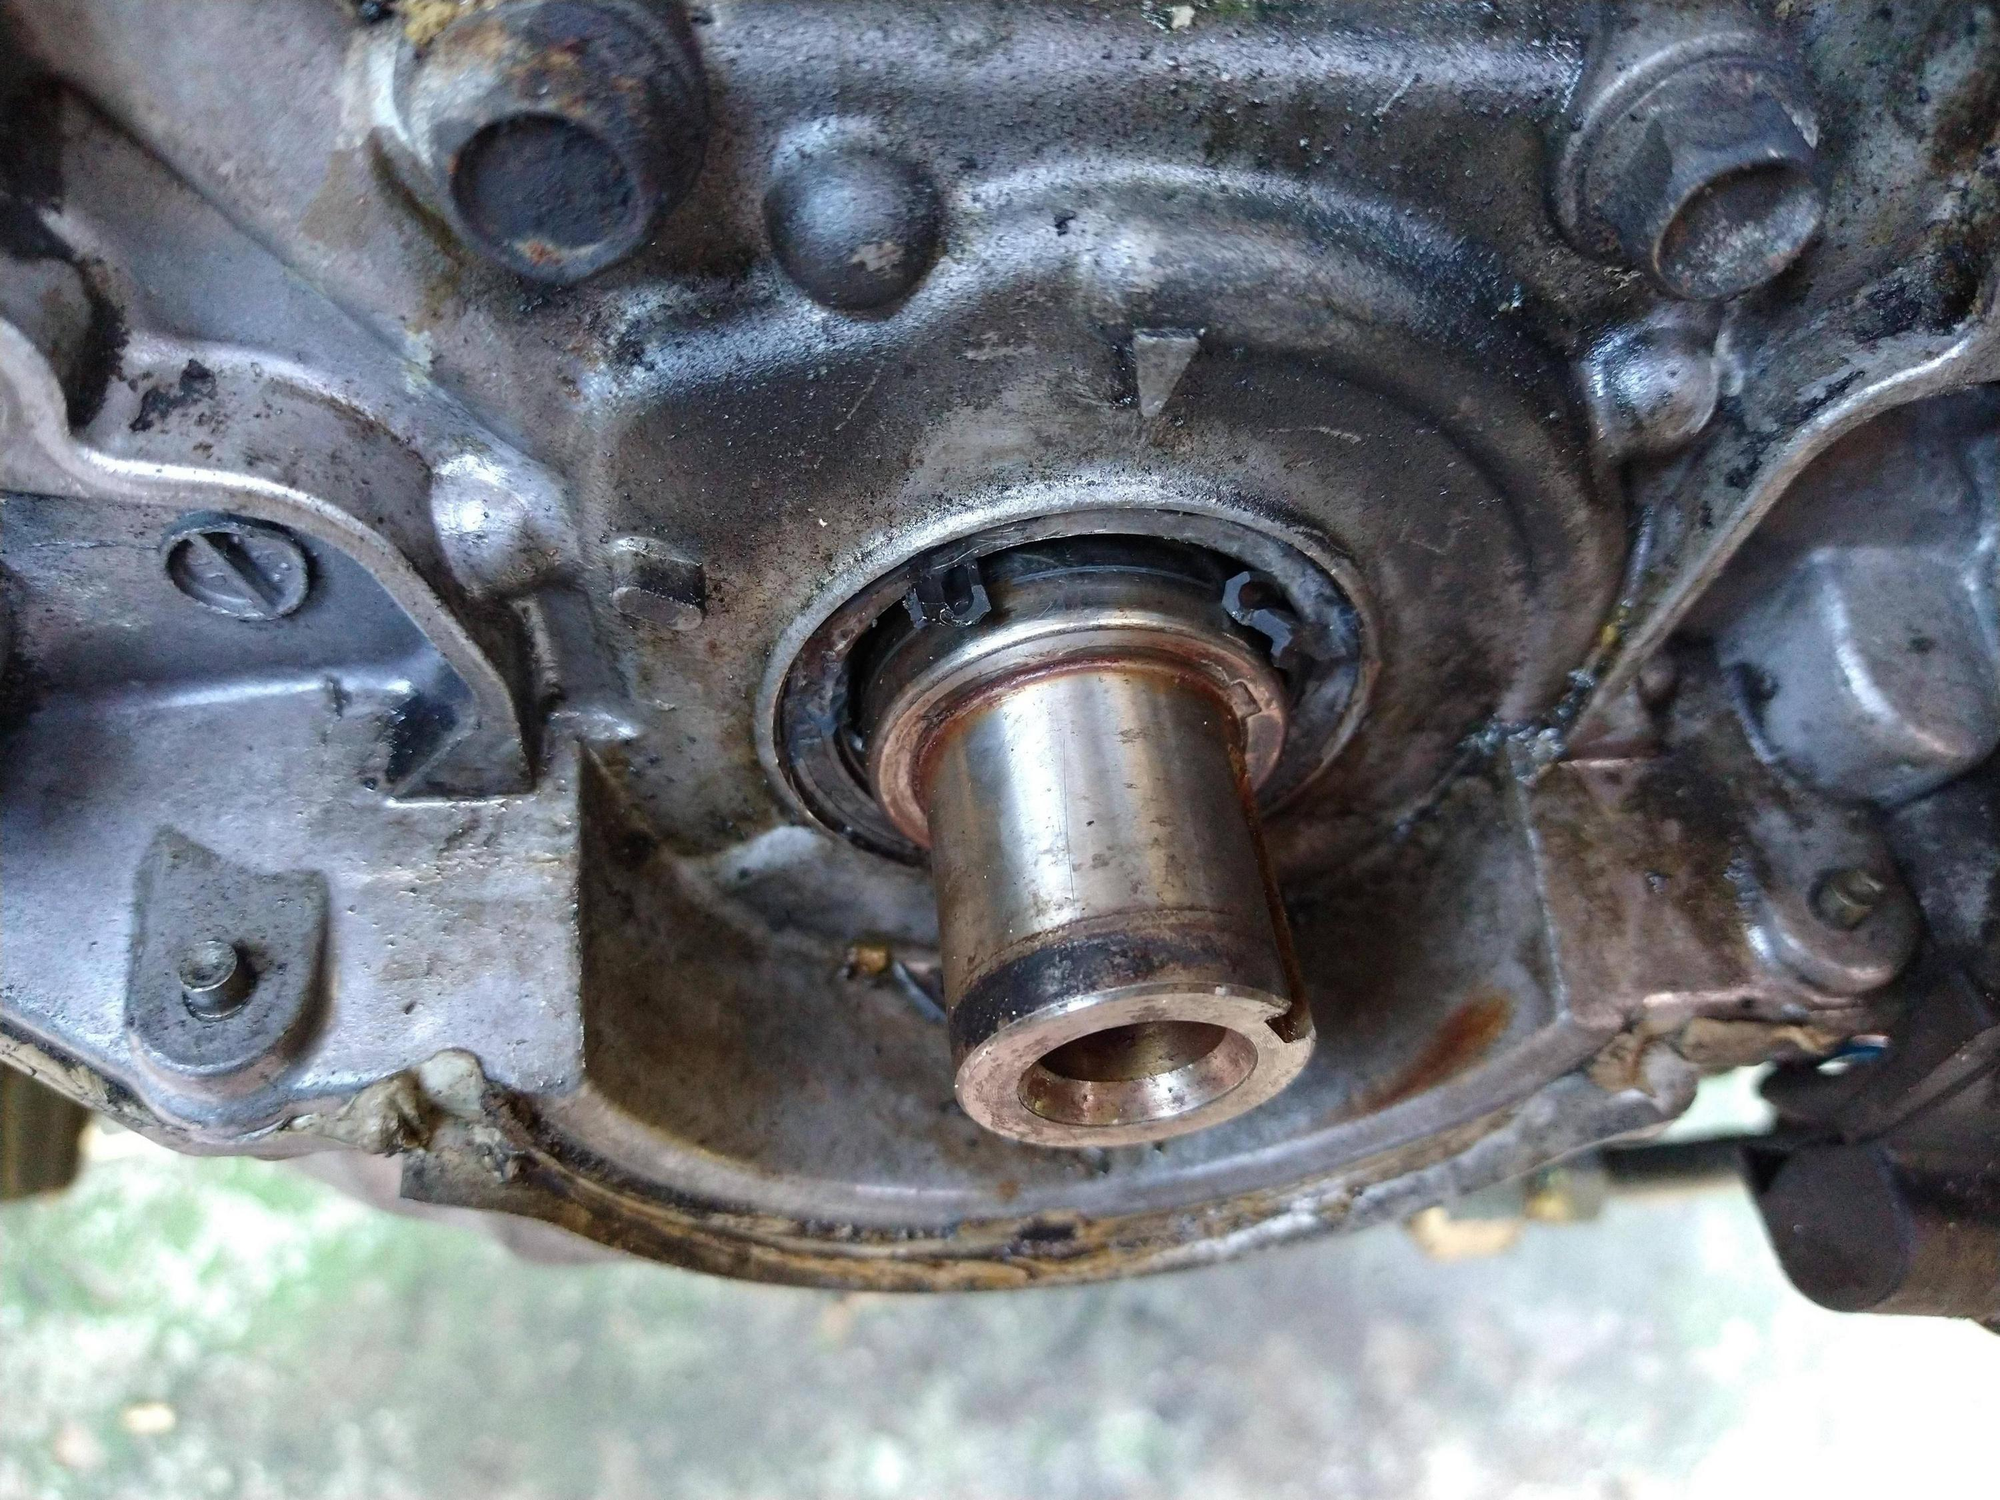
Tackle the valve cover gasket (common seep that floods plug wells), and since the front of the engine is open, do the cam and crank seals. At the rear of the head, NB doesn’t have the NA’s CAS O-ring, but you can still get seepage around the cam cap/blanking plug area, clean, reseal, and don’t confuse that mess with a rear main leak.
Ignition & Fuel
NB1 (’99–’00): Replace plugs and wires; inspect/replace the coil packs, aging packs cause misfires and CELs. Replace the inline fuel filter under the driver side.
NB2 (’01–’05): Replace plugs and check COP units and boots. They can fail, but not as notoriously as NB1 packs. Fuel filter service still applies per your maintenance plan.
Upstream O₂ sensor: By ~100k, many get “lazy,” hurting MPG and cat life. Proactive replacement around 70–100k is smart, do upstream first.

Replace all Fluids!
Reset everything: engine oil/filter (shorter intervals for MSM), manual transmission oil (5- or 6-speed spec/volume), diff oil, coolant, brake fluid, and clutch fluid. Follow the factory capacities and viscosities. If you track or autocross, consider more frequent brake and oil service.
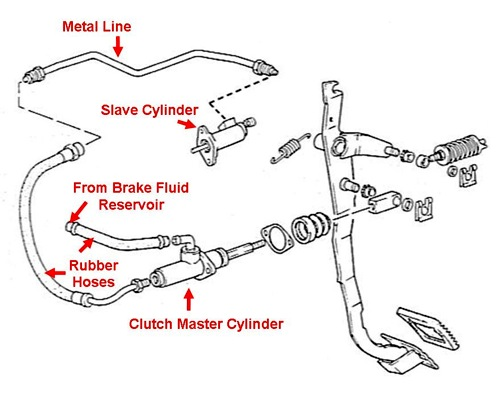
Clutch Hydraulics (Known Weak Link)
Replace the clutch slave cylinder and strongly consider the master at the same time; flush with fresh DOT 3/4. Internal corrosion and worn seals are common and show up as a sinking or spongy pedal.
Brakes Hoses, Calipers, Pads, Rotors
At 100k/20+ years, rubber hoses harden and crack. Stainless braided lines sharpen pedal feel and are legal in many clubs. Rebuild any sticky calipers, refresh slider pins and boots, and bleed thoroughly. Pick a pad for how you actually drive (street, spirited, or track).
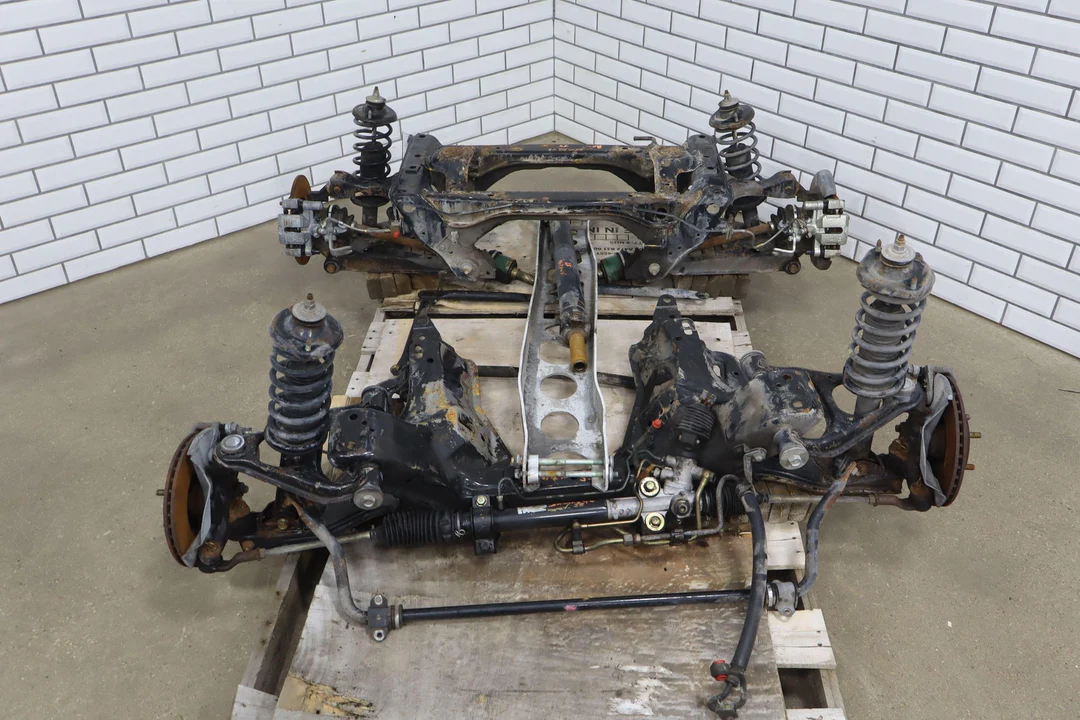
Suspension Rubber, Joints, and Shocks
Control-arm bushings: Expect real degradation by this age. OE-style rubber brings back civility; firmer rubber or poly sharpens response at the cost of NVH.
Shock mounts & bushings: Top mounts and shaft bushings crack/ovalize, replace during any damper refresh.
Ball joints & tie rods: Inspect boots and play; front lowers work hard on lowered cars. Replace anything torn or loose.
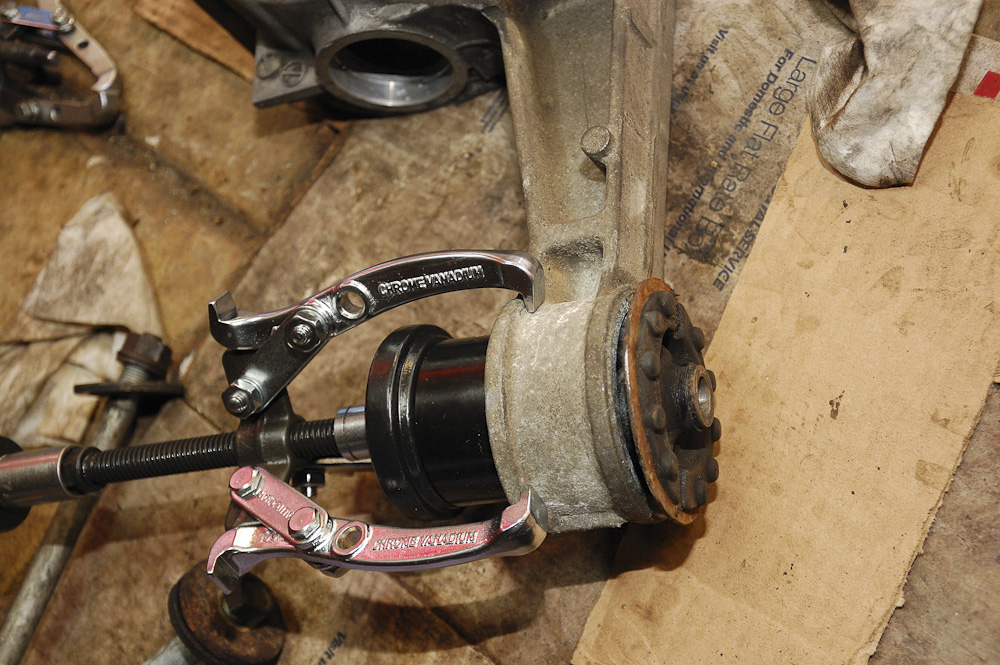
Hubs & Bearings
Wheel bearings usually announce themselves with a drone that changes with load or turning. Track use accelerates wear. Rear hub service needs a press. Replace any unit that’s noisy or rough.
Driveline Mounts, PPF, and Diff Bushings
The Power Plant Frame (PPF) keeps engine, trans, and diff in line. Check torque on PPF bolts, inspect the diff nose mount, and evaluate bushings if you get thunks/clunks on load changes. Avoid “PPF delete” ideas on street cars unless your build truly requires it.
Steering System
Inspect inner/outer tie rods, rack boots, and the lower steering U-joint for play or binding. Replace cracked boots ASAP to keep grit out. Address any free play before alignment.
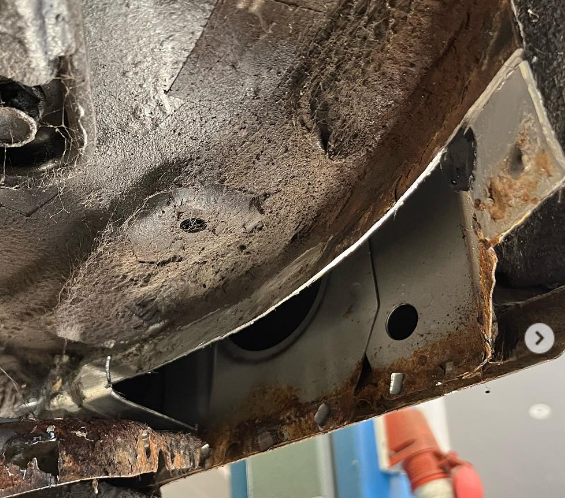
Body, Drains, and Rust Prevention
Common rust zones: rear sills/rockers (often due to clogged soft-top drains), lower rear quarters, and, on salted cars, front chassis rails. Keep the rain-rail drains clear (trombone brush is the community favorite). After any repairs, treat internal cavities to slow future corrosion.
Parts & Torque References
Use the factory owner’s/workshop manuals for torque specs, fluid types/capacities, and procedures. Keep a PDF handy as your build bible.
Quick Shopping/Task Checklist
- Timing belt kit (belt + idler/tensioner), water pump, thermostat + gasket, front cam & crank seals, accessory belts
- Radiator (all-aluminum is a nice upgrade), cap, upper/lower/heater hoses, fresh coolant
- Valve cover gasket; reseal rear cam cap/blanking plug area if seeping
- NB1: plugs, wires, inspect/replace coil packs; NB2: plugs and COP boots
- Upstream O₂ sensor
- Fluids: engine oil/filter (MSM: stricter), transmission, diff, brake, clutch, coolant
- Clutch slave (and master optional), full bleed
- Brake hoses (stainless optional), pads/rotors as needed; full fluid flush
- Control-arm bushing set; shock mounts/bushings
- Inspect/replace noisy hubs/bearings
- Clear soft-top/rain-rail drains; inspect rocker/chassis rails for rust
- Finish with a 4-wheel alignment (use a sensible street-sport baseline)
Don’t over-torque the aluminum thermostat housing; scratched faces or crushed gaskets are why many “new” thermostats leak.
- A valve-cover leak at the rear often mimics a rear-main, verify before pulling the trans.
- NB1 coil failure can cook your cat if you keep driving on a dead cylinder, fix misfires promptly.
- If pedal feel stays inconsistent after bleeding, replace clutch master and slave as a pair.
That’s the 100k NB reset in one sitting: handle the belt and cooling stack, erase leaks, refresh fluids and hydraulics, rebuild the brake/suspension touch points, and protect the body. Do it once, do it right, and the car goes back to being boringly reliable, exactly how a Miata should be between canyon runs.


