
Miata Chassis Bracing Guide - Subframe and Frame-Rail Stiffness
Sticky tires and stiffer suspension expose how much Miata tubs flex. NA/NB cars gain huge stability from rail and floor bracing; NC/ND bodies are stiffer from the factory but still benefit from targeted subframe ties and, for track use, a proper roll bar to keep geometry consistent.


Most Miatas feel tight and lively, right up until you bolt on sticky tires, add roll stiffness with bars or springs, and rack up real track miles. Then you discover the tub is flexing before the suspension finishes its job. Convertibles pay a “no roof” tax, so torsion loads try to run through the sills, thin floor “rails,” tunnel, and the front and rear subframe mounts. You feel it as cowl shake, windshield/tombstone flutter, and those vague mid-corner “did my camber change?” moments. As generations progressed, Mazda stepped up body rigidity a lot: the NC took a big leap over the NB, and the ND’s Skyactiv structure chased stiffness per kilogram rather than just adding weight. Translation: NA/NB cars respond massively to floor and rail work; NC/ND cars benefit more from targeted subframe ties and, for track use, a proper roll bar.
What Added Stiffness Feels Like
Brace the right places and the car instantly cleans up: turn-in snaps to attention, you make fewer mid-corner corrections, the dash and windshield calm down, and camber feels believable on entry and exit. The “why” is simple. Reinforcing the frame rails increases the floor’s section modulus so the “ladder” under you stops twisting. Crossing the rails to the tunnel turns that ladder into more of a closed box. Tying the subframe pickup ears together cuts the local toe and camber migration that shows up when you load the suspension hard. The tradeoffs are mild, some added weight (ideally low and central), a hint more NVH on rough roads, and the need to choose parts that don’t hang below splash shields or block transmission and exhaust service.
The Fix, in the Right Order
Baseline health first. If your NA/NB “rails” are wavy from bad jacking or speed bumps, get them straightened before anything else. Re-torque the subframe bolts and make sure soggy bushings aren’t impersonating a floppy chassis.
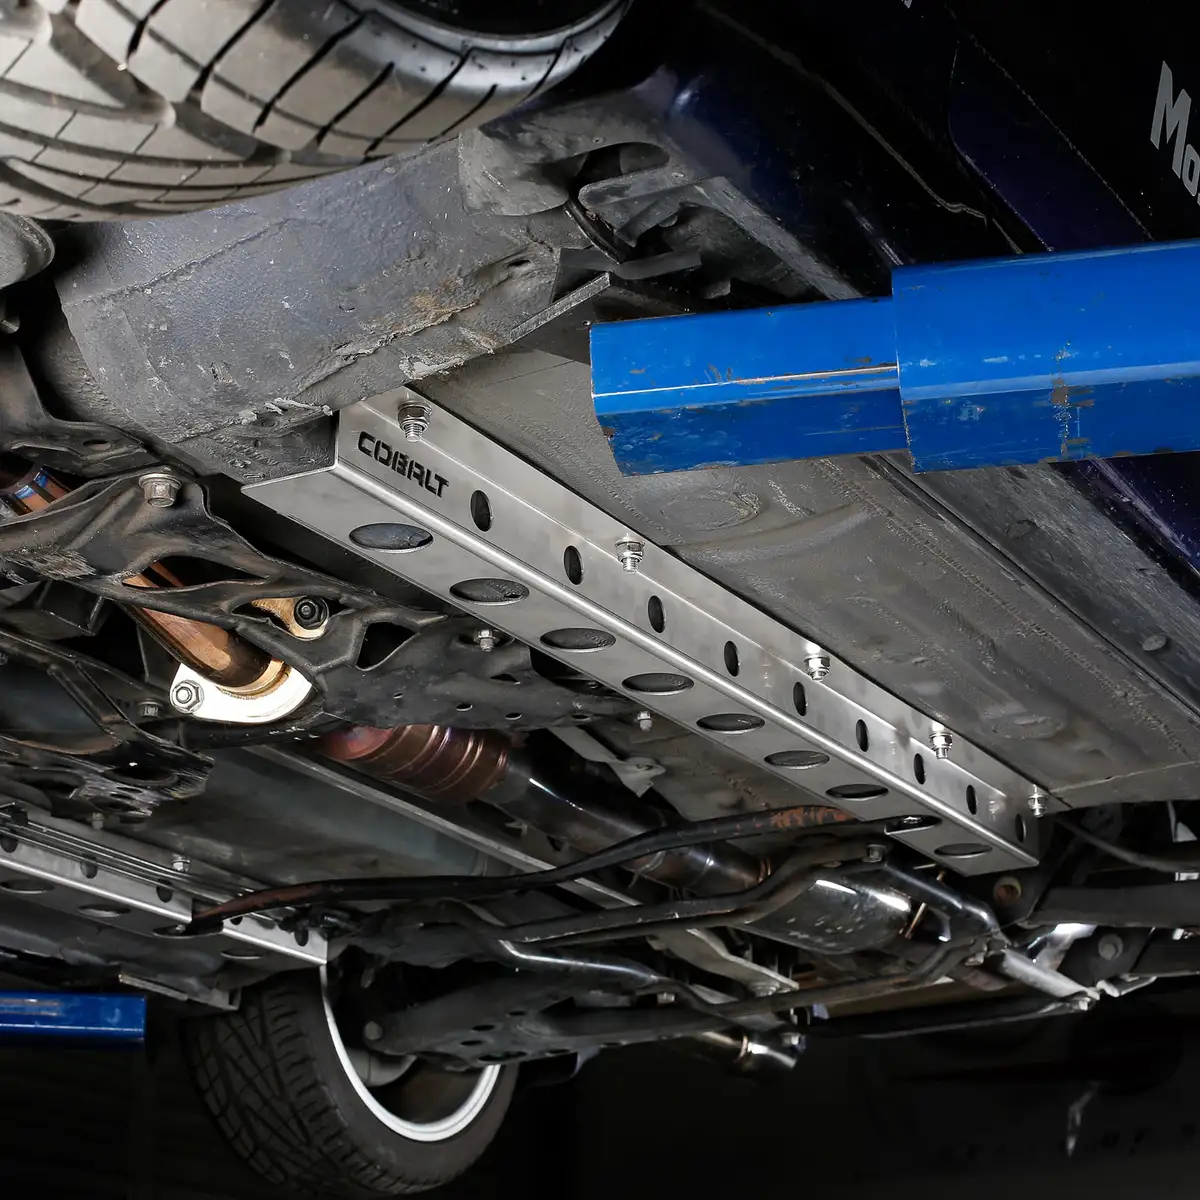
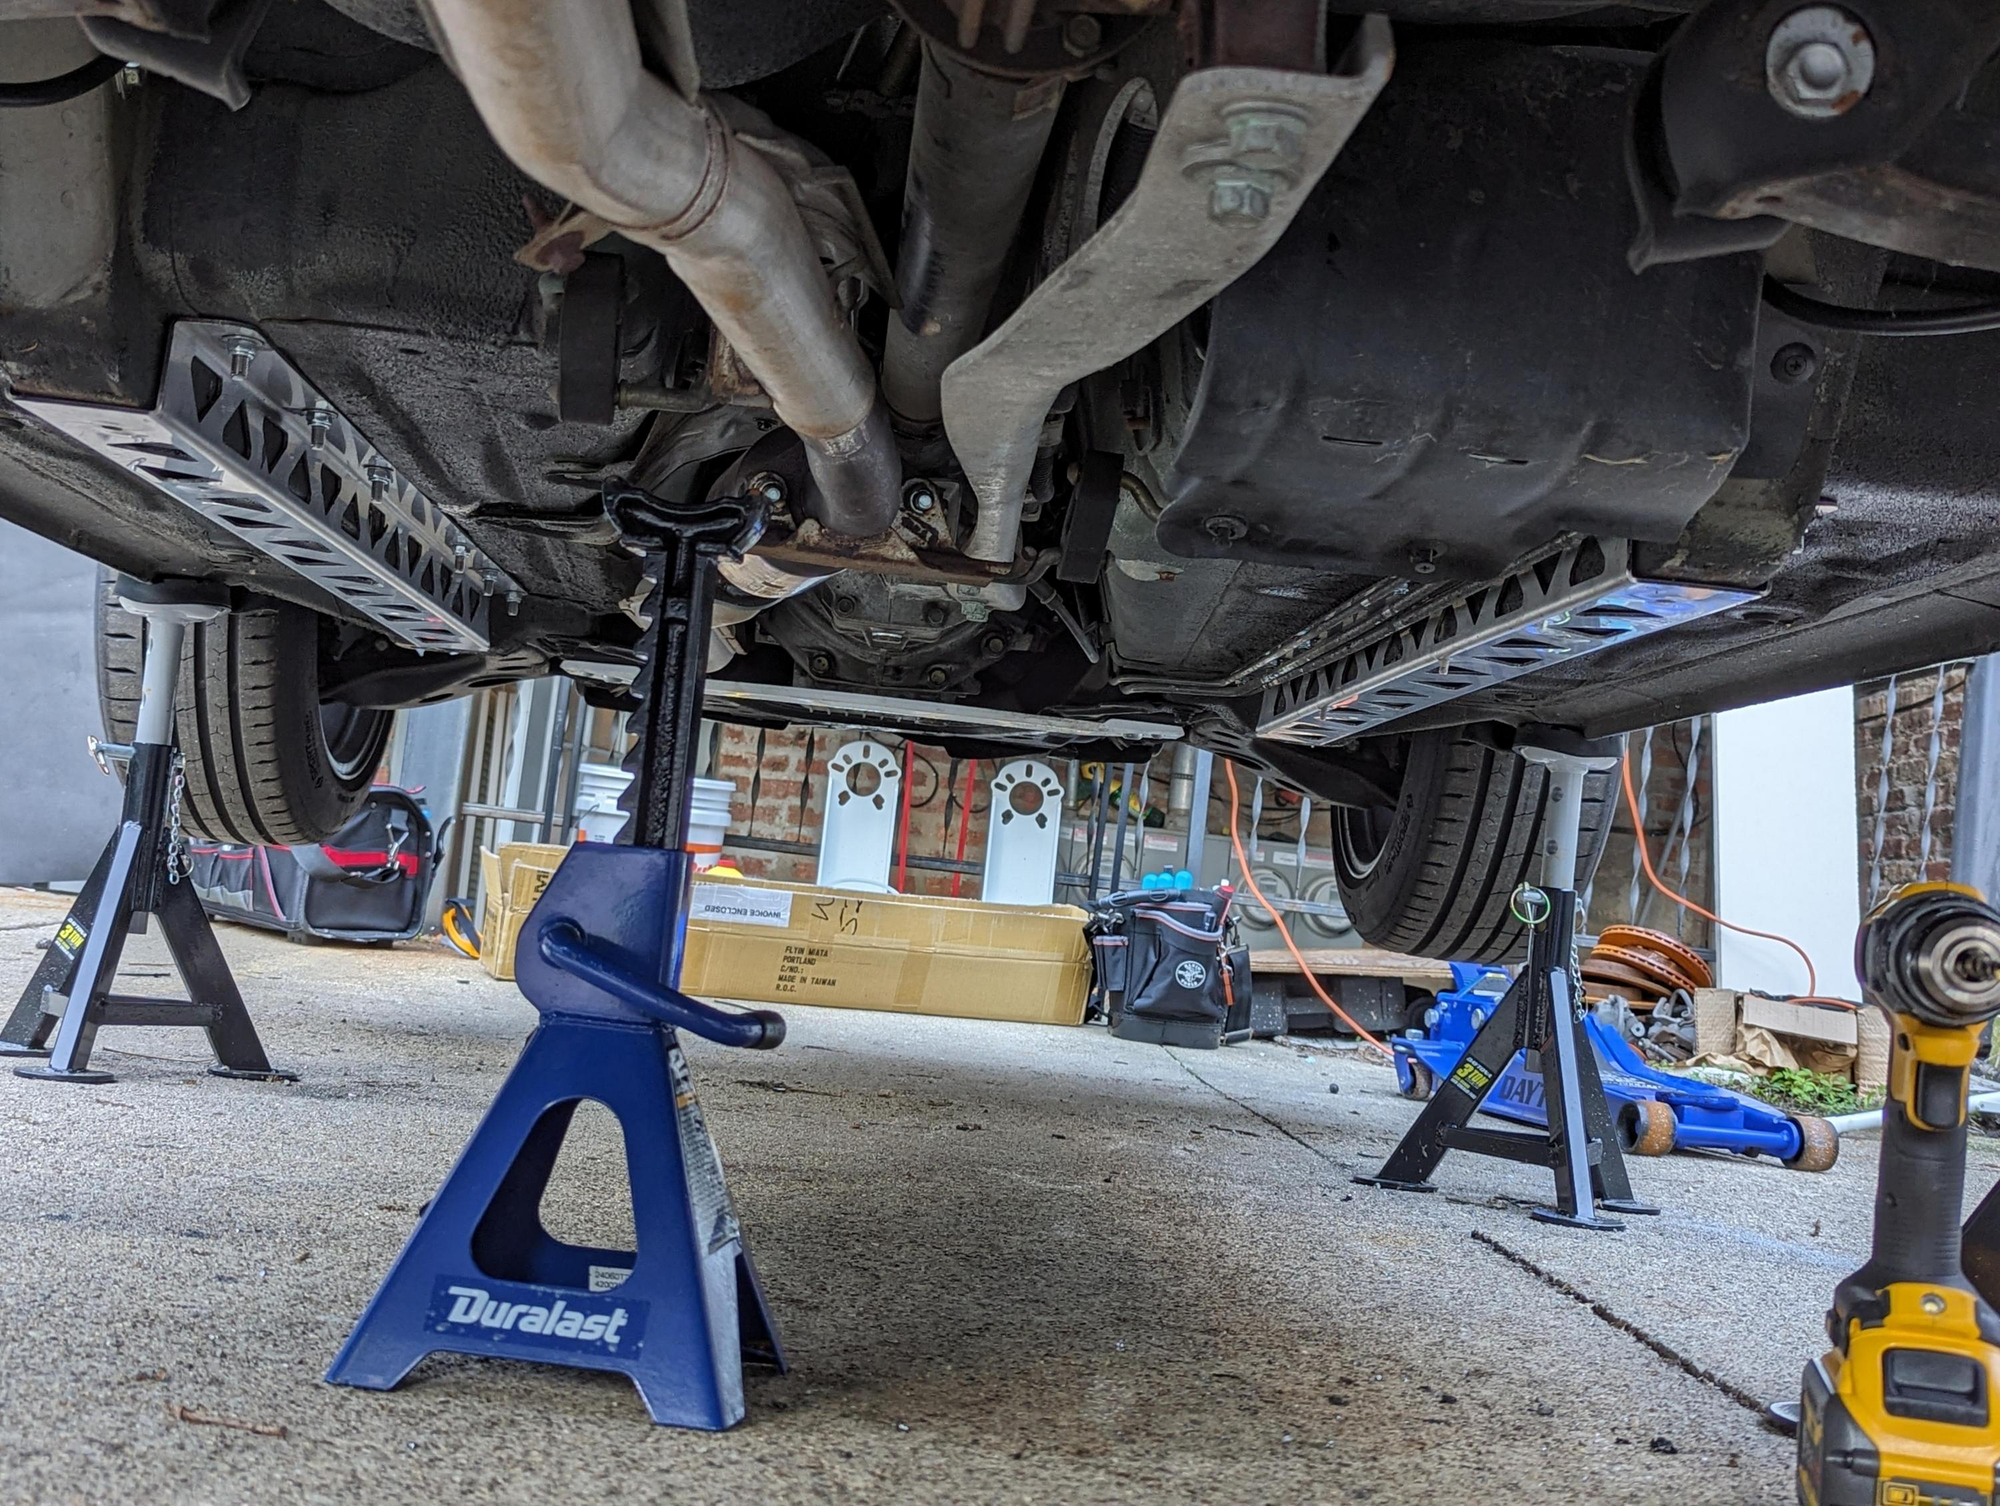
Frame-rail sleeves for NA/NB. Slip-over rail reinforcements are the highest-ROI first step on early cars. They restore crushed sections, add real torsional stiffness, and create forgiving jack points without giving up ground clearance. It’s the foundation for everything that follows.
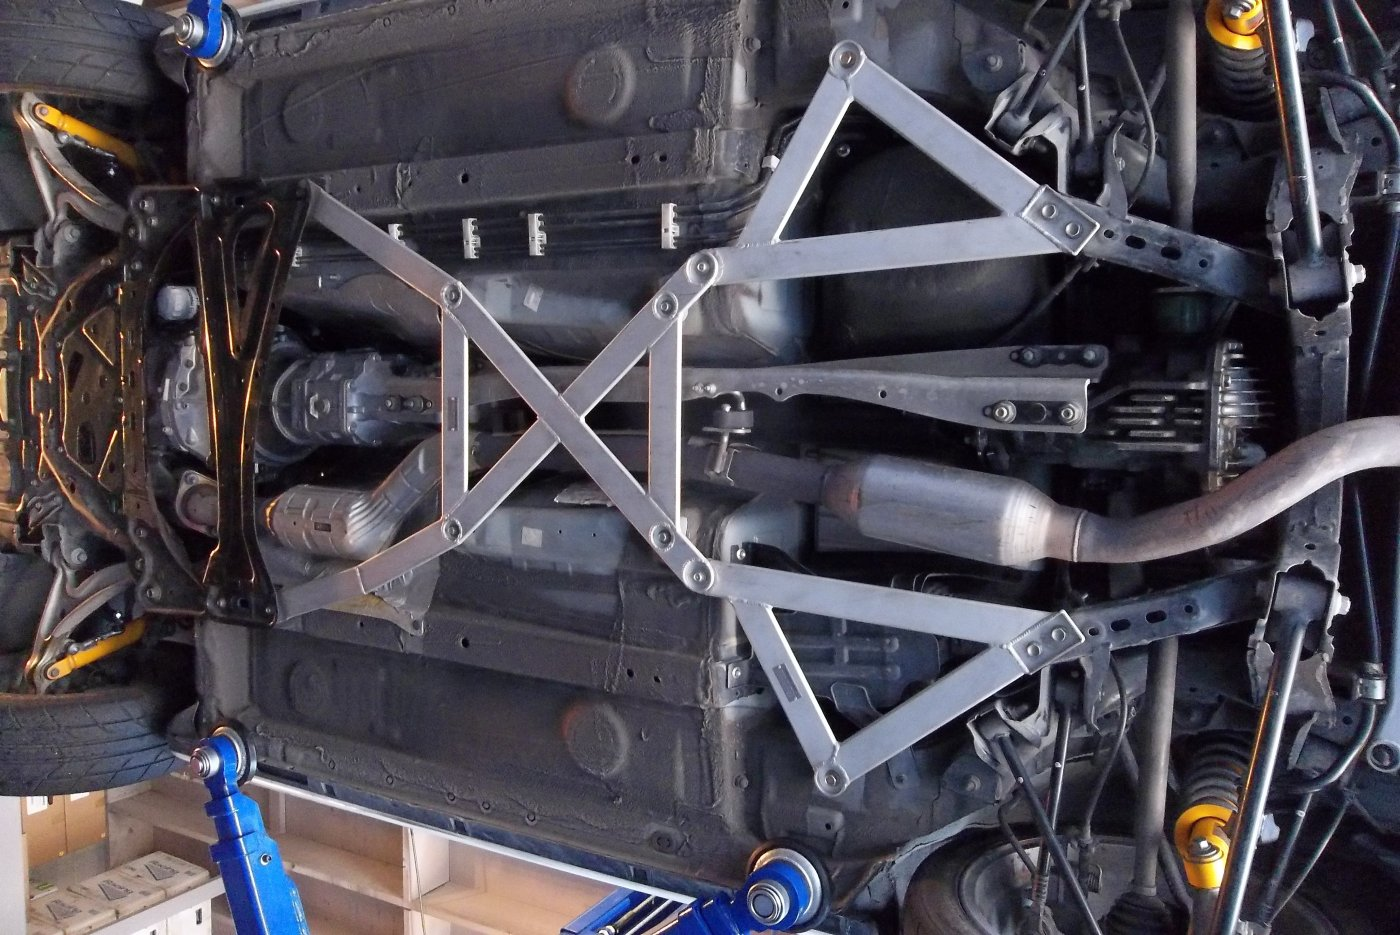
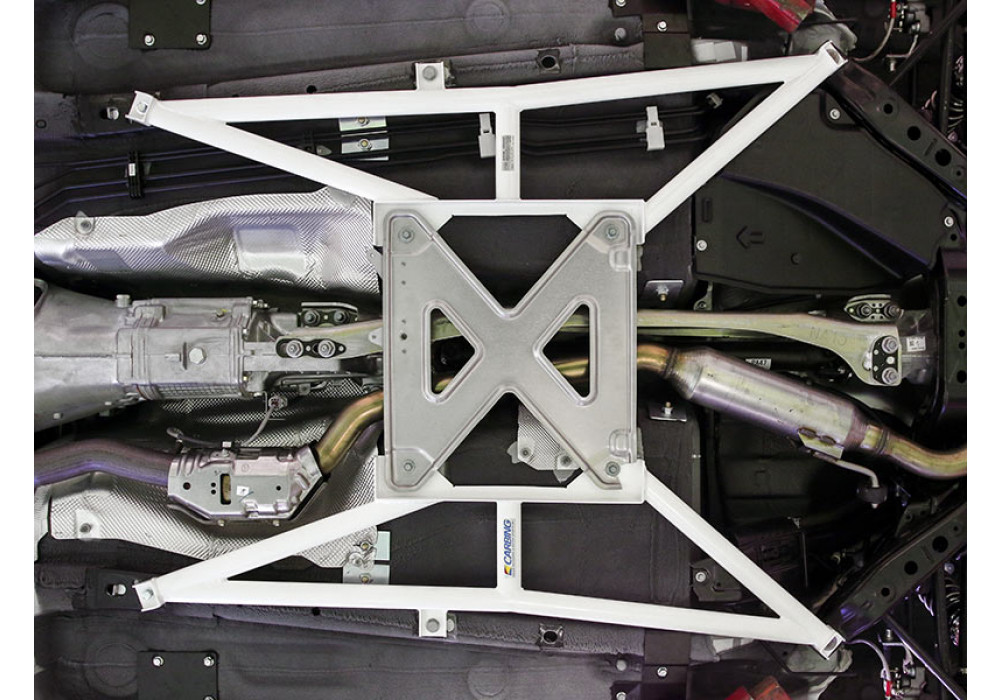
Under-floor X (“butterfly”). Once the rails are solid, cross-tie them to the tunnel so the floor acts like a box. Good systems sit no lower than stock bracing, keep weight low and central, clear common exhaust routes, and are designed to allow transmission and differential service without a full teardown. This is the “whole-car” feel upgrade most owners notice immediately.
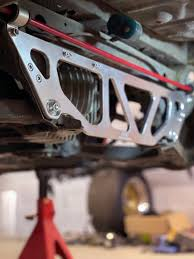
Front and rear subframe ties. A front lower-arm brace helps early NA/NB cars by reducing flex around the pickup ears; later cars feel a smaller but still tidy improvement. In the rear, a triangulated or four-point brace “boxes” the lower arm mounts, calming toe change under load so exits feel planted on bumpy surfaces.
Heavy-duty rails and rail-to-subframe links. If you’re on slicks or running aero, you can push torsional gains further with stouter rails and links that couple the rails to subframe structure. The payoff is real, but you must check exhaust clearance and plan for serviceability.
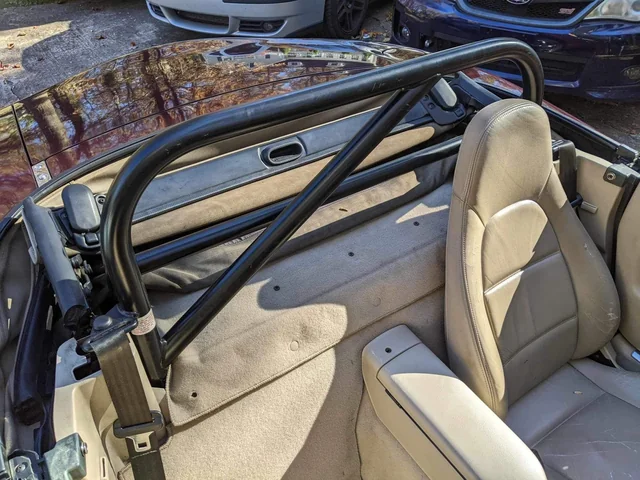
Roll bar or cage for track duty. The single most effective “brace” remains a well-designed roll bar or cage. It ties the rear bulkhead, adds triangulation, and meaningfully raises the ceiling for spring rate and tire. It also adds weight and noise and brings safety and class rules into play, worth it for HPDE and racing, but think it through for a street car.
Rules and Classing Without Surprises
If you autocross in Street or Street Touring, the safe path is simple bolt-in two-point braces that attach at or very near the suspension pickup points. Multi-point under-car structures, weld-ins, and anything that functions like extra frame rails can bump you into more modified categories. Street Prepared and beyond give more latitude, but always read the current book before drilling or welding. For other organizations, expect point hits or class bumps when you add structural bracing, print the relevant page and keep it in the glovebox for tech.
Fitment and Serviceability Checks
Prioritize designs that explicitly keep factory ground clearance so you don’t trade ride height for stiffness. Look for under-floor systems that are modular and can be dropped for clutch or differential service. If you’re mixing headers and mid-pipes, verify routing room before you buy. On NA/NB, rail sleeves are a quality-of-life upgrade because they add robust jack points exactly where you want them.
How to Measure Your Gains at Home
Run a simple seam-hit test over the same expansion joint at a fixed speed and use a phone IMU app to log steering column vibration, after bracing, lateral-G variance typically tightens up. In a repeatable slalom, log steering angle versus yaw rate and look for less phase lag once the underbody is boxed. On a skidpad, photograph tire shoulder position versus measured G at a fixed pressure; after rails and butterfly, shoulder wear evens out and transient corrections shrink. Treat vendor lab numbers and forum FEA as data points, not gospel, pair them with your own before/after logs.
Buyer’s Guide by Use-Case
Daily driver on rough roads (NA/NB). Do rail sleeves first, then a front lower-arm tie and a rear four-point. Add a butterfly if you want the “one-piece” feel without losing clearance. Keep the weight low and central and you’ll barely notice it in fuel economy.
Autocrosser in Street/Street Touring. Stay inside the two-point, near-pickup rule if you want to keep your class. Many rail sleeves and butterfly systems will move you up, great for feel, not great for trophies if you care about category legality.
HPDE and track. On NA/NB, the full trio, rails, butterfly, subframe ties, plus a proper roll bar is the proven recipe. On NC/ND, focus on targeted lower braces and a roll bar. In all cases, pick parts that won’t punish you during clutch or diff service.
Pitfalls, Myths, and Internet Lore
“Any shiny bar helps” isn’t true. If a brace doesn’t either close a box or tie real load paths at pickup points, the stiffness-per-pound can be minimal. Cheap X-bars that hang below splash shields are a ground-strike waiting to happen; the good systems sit no lower than stock. And while NA/NB floor rails are thin and easily crushed, their shape still matters to the floorpan ladder, straightening and reinforcing them helps both stiffness and safety when jacking. Treat vendor claims as method-specific results and balance them with independent testing and your own logs.
Parts Worth Naming
Frame-rail sleeves for NA/NB. Slip-over design that restores shape, adds measurable torsional stiffness, keeps ground clearance, and doubles as durable jack zones.
Butterfly under-floor systems for NA/NB. Rails plus an X that close the box, typically around a few dozen pounds total, placed low and central, with factory-clearance height and smart service access.
Front and rear subframe ties for all generations. Choose pieces that mount at or very near the OEM pickup points and that document compatibility with factory “sport” braces and popular exhausts.
Safety and Street Reality
A roll bar is the most effective chassis brace you can add, but it changes the cabin. Think through helmet clearance, seat travel, rear visibility, and padding. On the street, keep factory belts unless the rest of the restraint system is upgraded correctly. For competition, read your rulebook carefully and bring the relevant pages to tech. The goal is simple: make the floor and rails act like a box, tie the pickup points together, and avoid ground-clearance and classing traps. Do that, and your Miata will feel like you tightened every fastener in the car, because, in a way, you did.


