
Miata CAN + GPS Data Overlay Logging
Data beats vibes. A budget CAN + GPS setup gives Miata drivers real gains: lap times, speed traces, braking points, throttle use, and corner consistency. Pair phone video with a Bluetooth OBD reader and external GPS for NA–ND cars, and you get pro-level insight without spending more than a tire set.


Numbers beat plain guesswork when you’re trying to get faster. A basic CAN + GPS stack gives you hard info: lap times, speed traces, braking points, throttle use, gear choice, minimum corner speed, and, maybe the most underrated metric, lap-to-lap consistency. Video is great for memories, but pairing it with data turns “felt fast” into “I braked 12 meters later and carried 3 km/h more through Turn 3.” We’re keeping it budget, too. A phone plus a Bluetooth OBD reader and an external GPS can punch way above its weight for a fraction of dedicated loggers. Miata folks love “cheap, effective, and DIY,” and this guide leans into exactly that: modular pieces that work on NA–ND, off-the-shelf hardware, and overlays without spending more than a good set of tires.
CAN, OBD-II, and GPS: what’s actually going on?
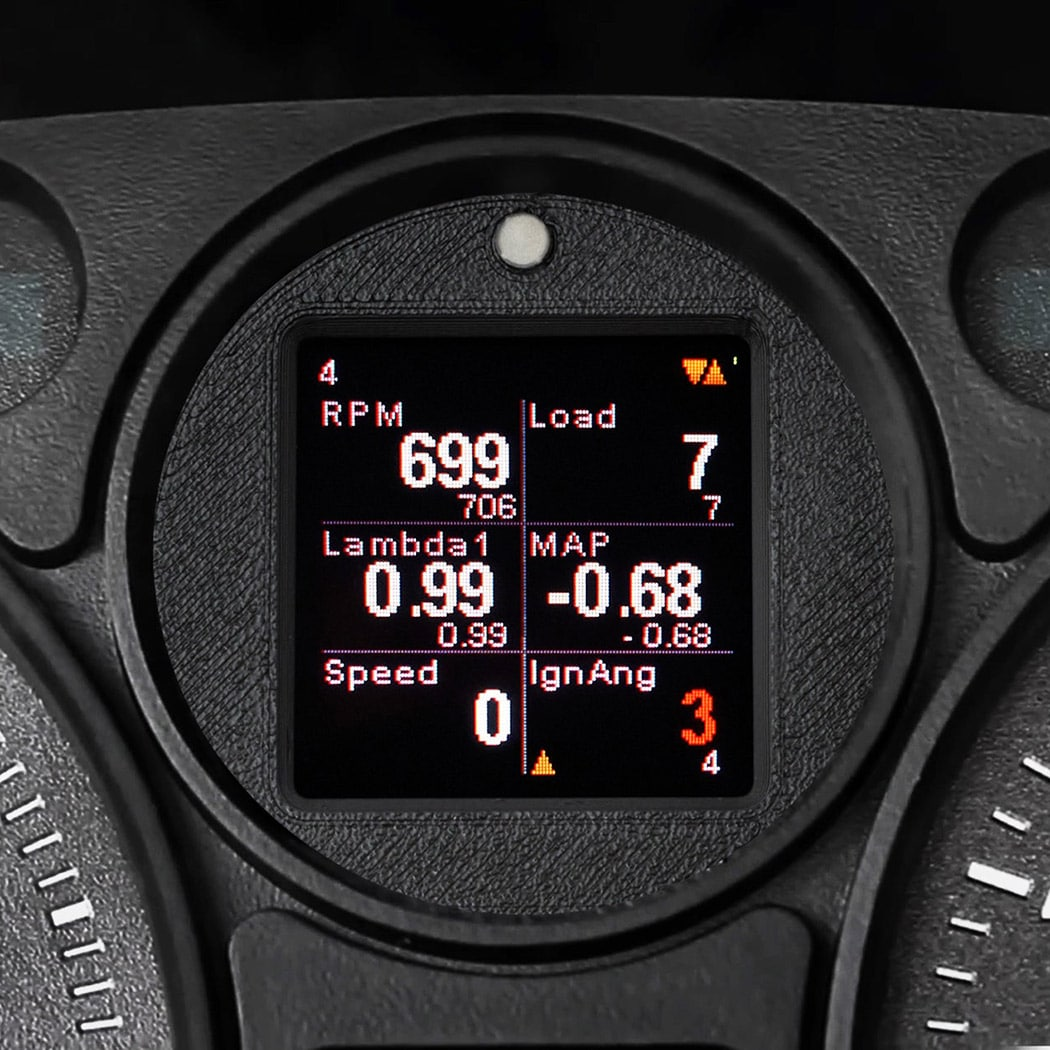
OBD-II is a request/response system for diagnostics: your app asks for a parameter like RPM or throttle, the ECU replies. It works, but the rate is limited because you’re polling. CAN is the car’s broadcast network: modules constantly shout messages with data such as wheel speeds or steering angle, usually at higher and steadier rates than OBD polling. GPS delivers position and speed; your phone’s internal GPS is typically about 1 Hz, while external receivers update at 10–25 Hz. That higher rate sharpens braking points, reveals true minimum corner speeds, and makes your on-screen car stop “teleporting.”
Software that simply works
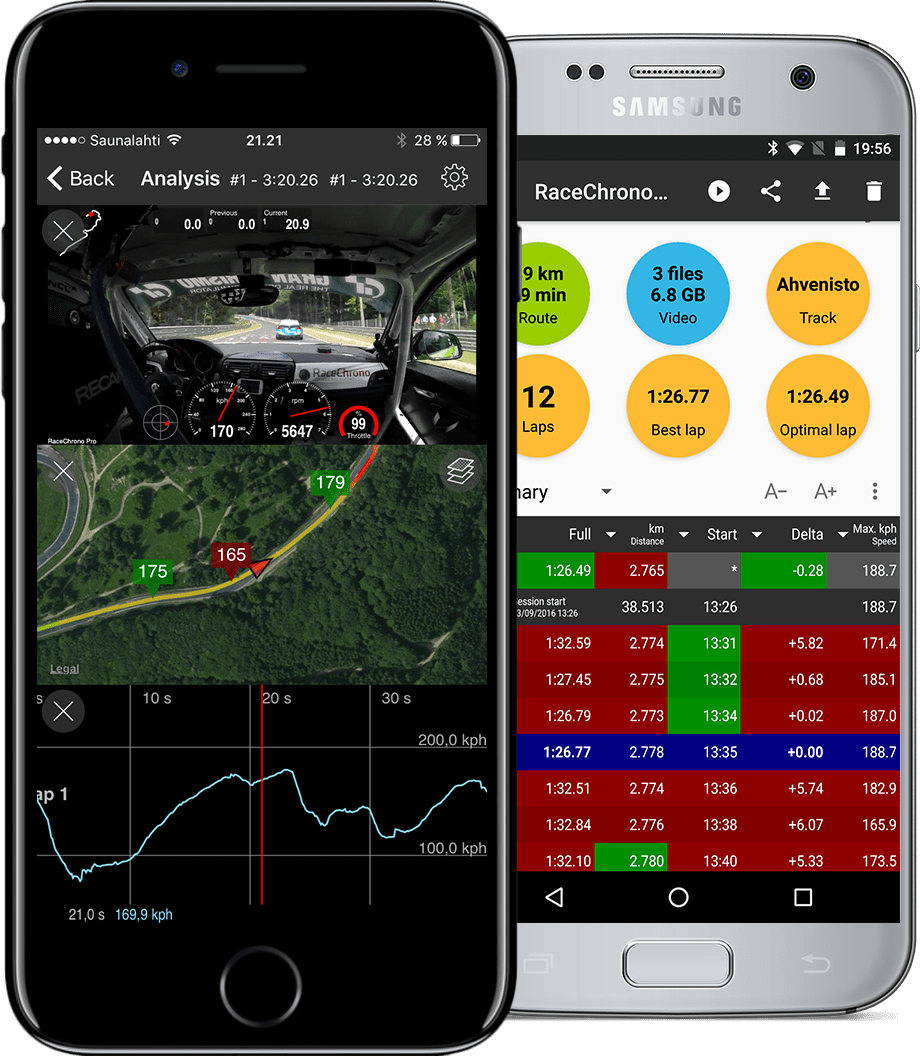
On phones, RaceChrono, TrackAddict, and Harry’s LapTimer handle lap timing, GPS, IMU, and OBD/CAN, and can either record phone video or sync to external cameras. If you want to render overlays on the phone, you can keep everything one-device and simple. If you prefer GoPro or action-cam quality, export your data as CSV or VBO and build the overlay on a computer with RaceRender or DashWare. When choosing an app, make sure it supports external GPS and OBD/CAN at the same time, has clean export options, and can integrate with cameras or at least make manual sync painless.
Hardware on a budget
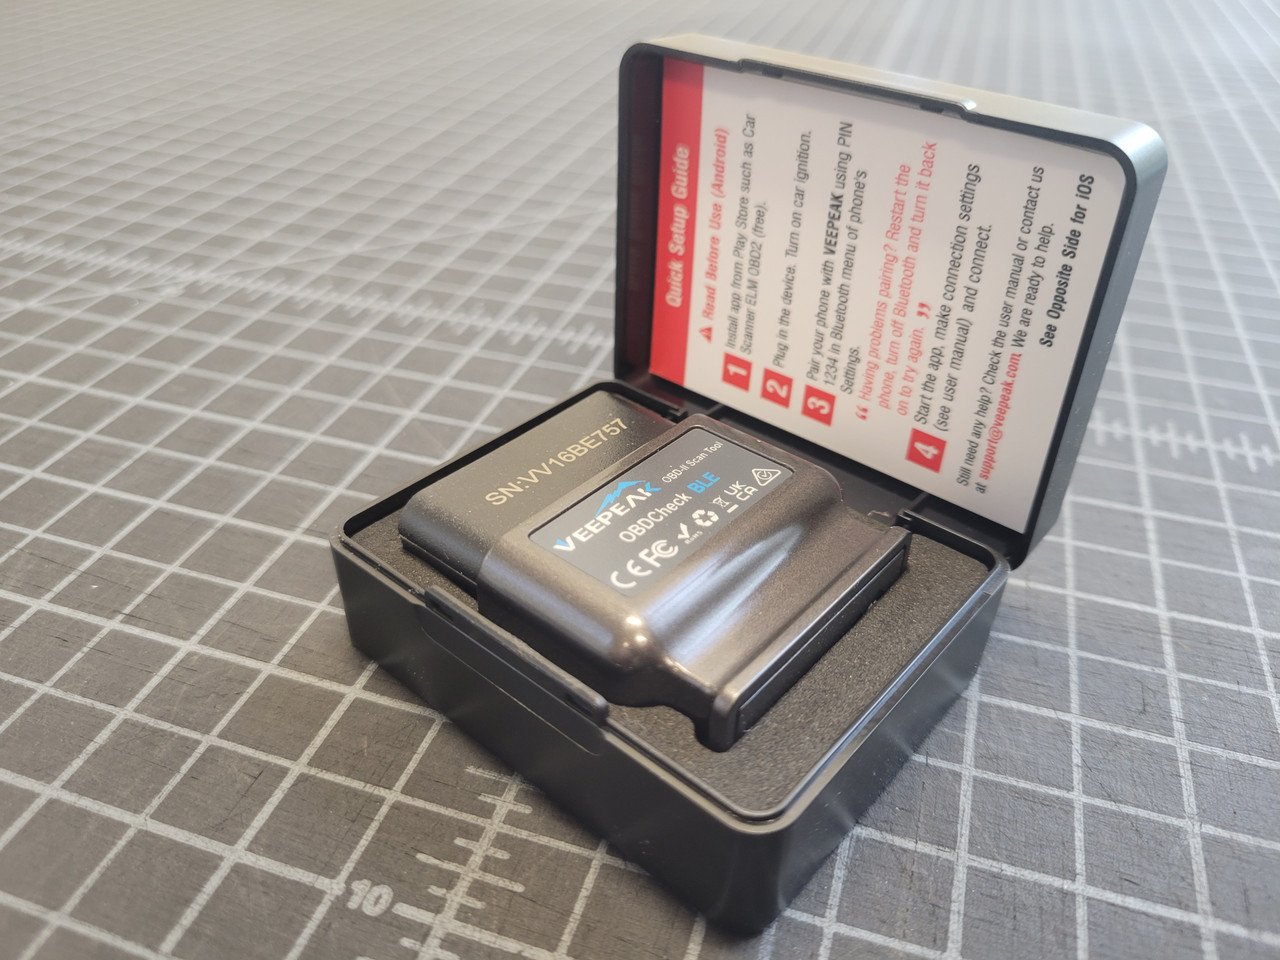
Your phone or tablet is the hub, so mount it rigidly and keep it powered; vibration is the enemy of readable overlays. For GPS, the good-better-best ladder is clear: internal phone GPS around 1 Hz is fine for a taste, 10 Hz receivers like Qstarz or configured u-blox modules are the sweet spot, and 25 Hz units like RaceBox Mini feel pro on braking point precision and trace smoothness. For OBD/CAN, skip random ELM327 clones and go straight to OBDLink LX/MX/MX+; they’re fast, stable, and supported for high-rate CAN logging in compatible apps. Round things out with a solid suction, vent, or roll-bar mount, a stout 12V USB adapter, short cables, and a safety lanyard for the phone.
Setups you can do
For NA, start with phone + app + 10–25 Hz GPS and enjoy lap timing, speed, line, and G estimates. If you’re running a standalone ECU, enable its CAN output and feed that into your app through a supported reader or a DIY BLE bridge for RPM, throttle, and temps. For NB, pair a Bluetooth OBD (preferably OBDLink) with a fast GPS to capture RPM, speed, coolant, and throttle; if you want richer channels, step up to a standalone ECU or add-on CAN. For NC, you can begin with OBD PIDs and then “level up” by decoding CAN through an OBDLink and an app that supports experimental CAN mode. For ND, the budget dream is phone app + OBDLink MX/MX+ in CAN mode + 10–25 Hz GPS; target RPM, vehicle speed, per-wheel speeds, steering angle, gear, brake switch or pressure, accelerator pedal, and clutch switch where available.
Before the event, mount everything, pair the GPS and OBDLink, create a vehicle profile in the app, add devices, and select your channels. If you’re using CAN, load the right IDs and equations for your car. At the track or autocross, pick the venue inside the app, confirm GPS lock, and start recording before rolling. If you’re using a GoPro, clap or tap the horn as you leave to create an easy sync spike. After each session, review laps and sector deltas, sanity-check temps and throttle/brake behavior, and export data if you’re doing desktop overlays.
Common problems
Choppy traces or laggy overlays almost always come from slow GPS, bloated OBD channel lists, or flaky adapters. Fix it by moving to a 10–25 Hz GPS, trimming your logged PIDs, and using an OBDLink. Bluetooth dropouts often trace back to battery optimization killing the app or ignition cycles powering down the reader; disable app battery optimization and ensure steady power. Heat and mounts are real issues, too, avoid direct sun, consider vent or roll-bar positions, and add a safety lanyard so nothing turns into a projectile.
Shoestring means phone + free app + internal GPS, with an optional cheap OBD for NB–ND. It works, but the GPS rate and adapter quality are the ceiling. The sweet spot under two-fifty is a paid app, an OBDLink LX/MX/MX+ (MX+ if you want CAN on NC/ND), and a 10–25 Hz GPS, this is the best value for most drivers. Serious nerds add a standalone ECU or a CAN bridge on NA/NB, or build a DIY CAN-BLE device and analyze on desktop for near pro-level insight if they’re willing to invest setup time.
Safety, rules, and the “is this legal?” question
Keep mounts solid, cables away from pedals, and re-check everything before sessions. Most clubs allow phones and cameras as long as they’re secure; some competition classes limit active displays visible to the driver, but logging is usually fine, always check your local rule set. Above all, treat data as a tool to build consistency and clean technique. The lap time follows when your braking points, minimum speeds, and throttle traces start looking identical, not when you stare at a delta chasing a hero lap.


