
Low-Buck Miata Paint Protection: DIY PPF + Ceramic on Small Panels
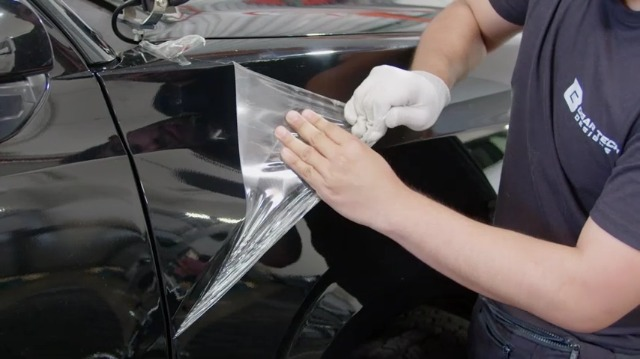
You don’t need a full wrap to protect a Miata. Focus on high-impact spots: rear quarter edges, rocker sills, A-pillars, door cups, trunk lip, headlights, and mirrors. Hand-cut 8–10 mil TPU PPF for these, ceramic-coat the rest.


You don’t need a full front-end wrap to keep a Miata looking sharp. Most of the damage happens on small, high-impact zones, the leading edge of the rear quarter where the front tires sling debris, the rocker pinch and lower sills, the A-pillars and windshield surround, the door cups and handle edges, the trunk loading lip, plus the headlamps and mirror caps. If you hand-cut simple rectangles and strips of 8–10 mil TPU paint protection film (PPF) for those areas and then apply a consumer ceramic coating to the rest, you’ll knock down chips and wash-marring in a single weekend. Expect to spend roughly $150–$250 in supplies, follow the same cure logic pros use, and pocket the four-figure labor savings.
What You’re Installing
PPF is a clear, self-healing thermoplastic polyurethane film with an elastomeric top layer. Light swirls and micro-marring soften and visually “disappear” when the surface gets warm from sun, hot water, or gentle heat, though deeper cuts won’t heal. Thickness in the 8–10 mil range is the street-car sweet spot: flexible enough to hand-install, tough enough to resist sand-blasting and pitting. Your ceramic coating, on the other hand, is a cross-linking silicon-based resin that adds chemical resistance, gloss, and hydrophobics. The bottle size is usually 30–50 ml, which is plenty for the unfilmed paint on a Miata. Application success comes down to reading the product’s flash cues, observing its re-coat window, and controlling temperature and humidity.
The Small-Panel Map (NA–ND)
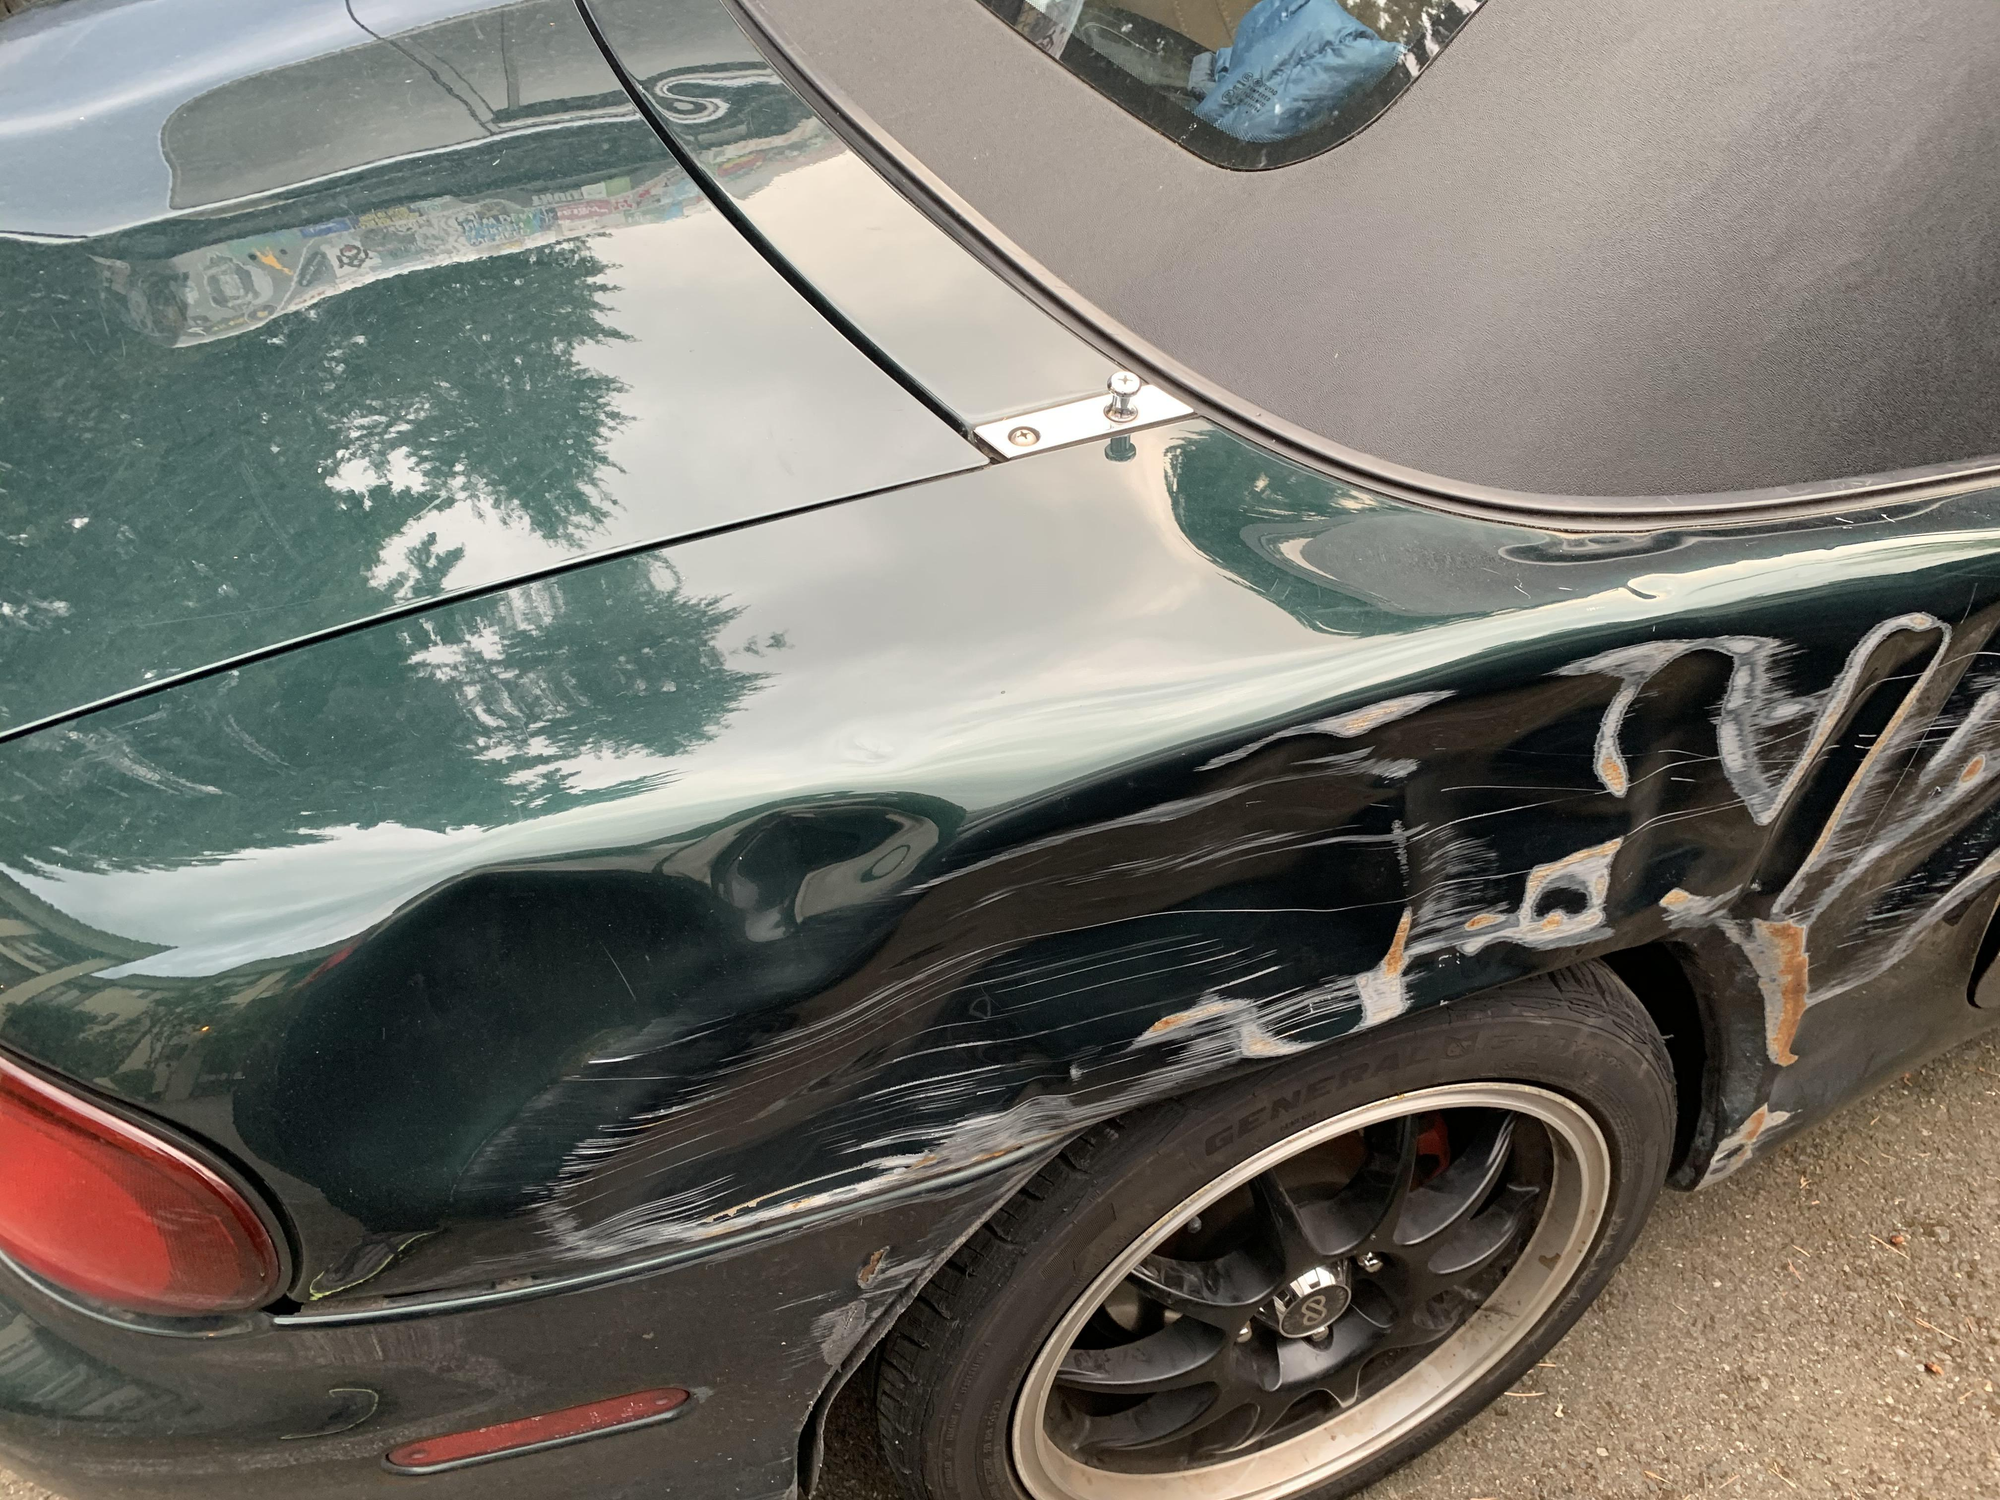
Focus first on the rear quarter panel’s leading edge because that “sling zone” takes a beating on every generation. Next, protect the rocker pinch and lower sills since they catch road grit and shoes. The A-pillars and windshield surround chip from wind-borne sand and rain-carried debris, so narrow strips there pay off. Door cups and handle edges collect fingernail marks; a tiny patch prevents that. The trunk lip takes hits from luggage and bags; a slim rectangle saves the clear. Finally, headlamps and mirror caps pit over time; simple ovals or rectangles cut from offcuts will help.
Gear and Budget
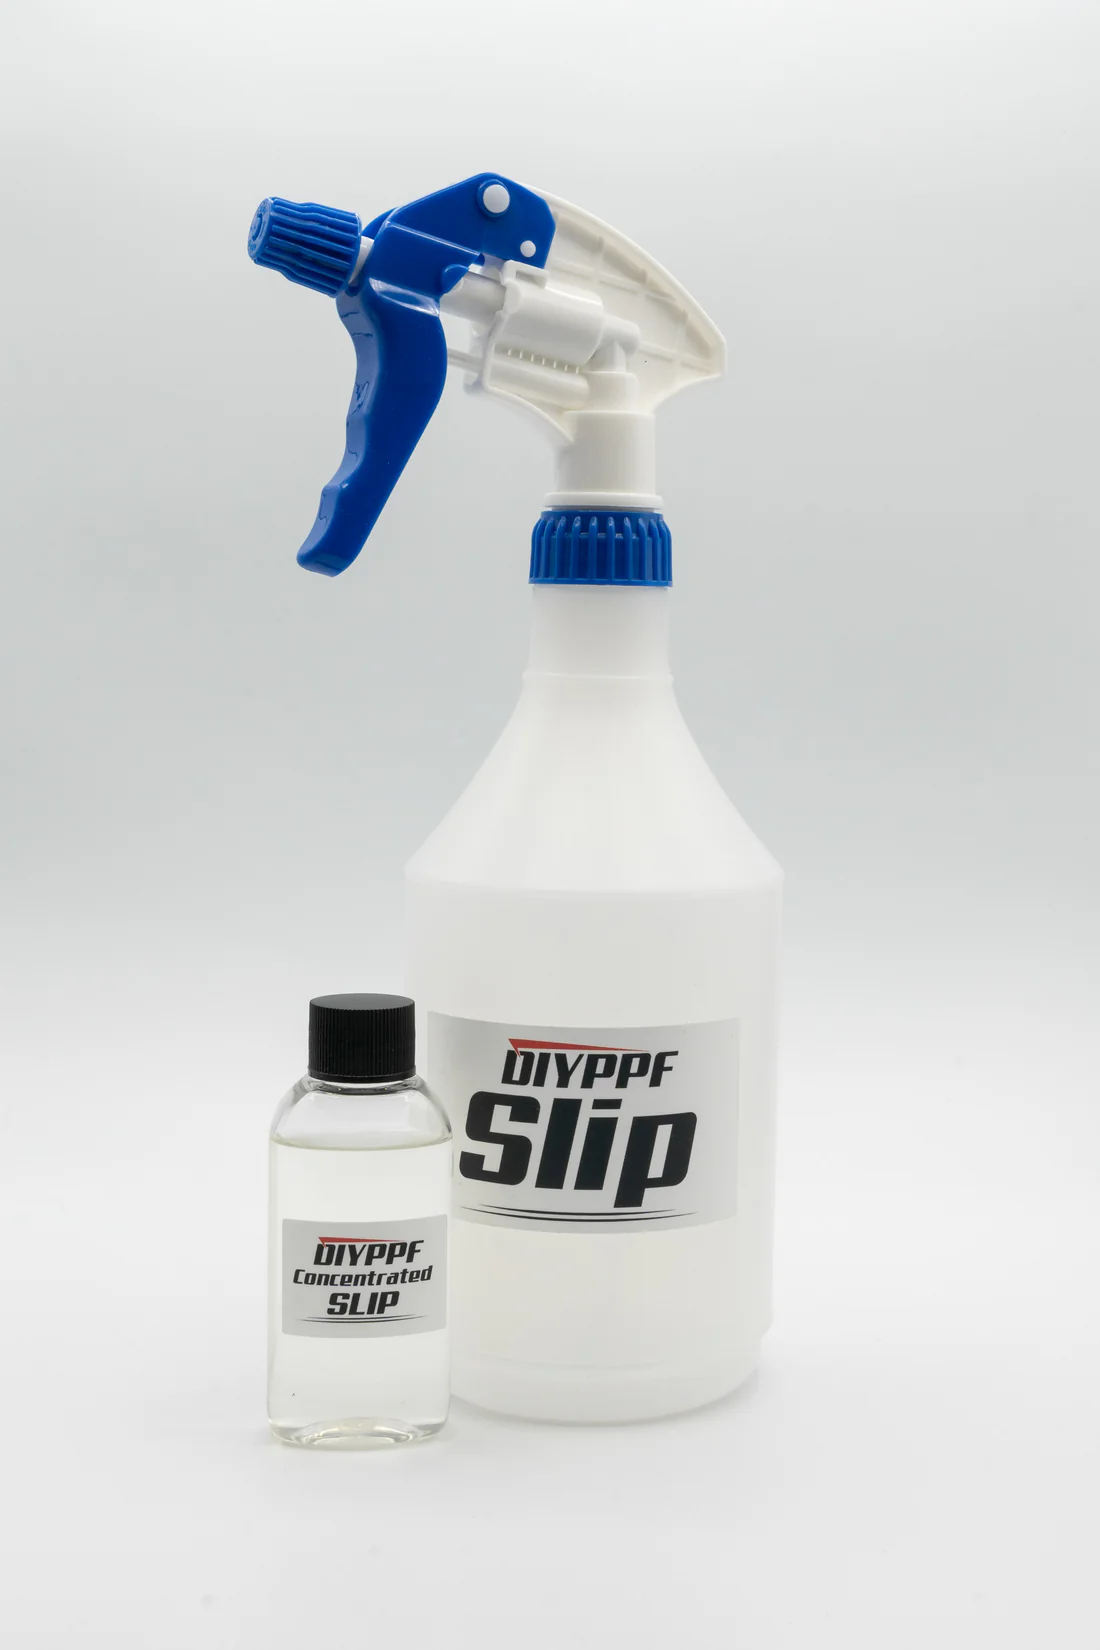
You can do this with lean but pro-grade tools: two labeled trigger sprayers for slip and tack solutions, a mild clay bar, a 10–20% IPA wipe for degreasing, a hard and a soft-edge squeegee, a low-setting heat gun or steamer, a plastic trim tool, painter’s tape, sharp 30-degree snap-off blades, nitrile gloves, and strong lighting. For chemistry, you need distilled water, a few milliliters of Johnson’s baby shampoo for slip, and isopropyl alcohol for tack. Add a 30–50 ml consumer ceramic kit with applicator suedes and plush microfibers. Two sheets of 12"×60" clear TPU film are typically enough for both rear-arch leads, both A-pillars, door cups, a trunk lip, and offcuts for mirrors, with some margin for mistakes. Bought smart, the whole cart lands in the $150–$250 range and leaves you with extra mixables for future touch-ups.

Prep Matters Most
Wash the car thoroughly and decontaminate the target zones with a mild clay bar so the film doesn’t trap bonded grit. Degrease each landing zone with a 10–20% IPA solution and a clean towel, and tape off rubber and textured trims to prevent solution creep and blade contact. Control the environment as best you can: shade, still air, and a panel temperature in the 60–85 °F (16–30 °C) range, with the 70–79 °F (21–26 °C) “sweet spot” making everything easier. If the paint already has a ceramic coating where film will go, remove it first, PPF adhesion suffers over coatings.
Slip solution is simply distilled water with a tiny dose of baby shampoo. Think in milliliters, not glugs. A good starting point is one liter of water with roughly two milliliters of shampoo; on hotter days, a touch more soap gives you extra glide. Tack solution is water plus isopropyl alcohol so the adhesive bites when you need it to. Mixing 150 ml of 99% IPA with 850 ml of water (or 250 ml of 70% IPA with 750 ml of water) works reliably. Some installers also keep a hybrid bottle, water, IPA, and a trace of shampoo, to fine-tune between the two.
Ceramic on the Unfilmed Paint (and Over Cured Film)
The sequence is non-negotiable: correct the paint if needed, install PPF on your target zones, allow it to settle, and then apply ceramic to the rest of the panels. Many consumer ceramics can also go on top of cured PPF to boost hydrophobics and make bug cleanup easier; just confirm your product’s guidance. Work in small sections, apply thinly, and watch for the coating’s visual flash, rainbowing, a soft haze, or that moment when the towel “grabs.” Level promptly, follow the re-coat window if you’re doing two layers, and keep the car dry through the initial cure.
Maintenance
Hand washes with pH-balanced shampoo and plush drying towels keep both film and coating happy. Clean bugs and bird bombs promptly so they don’t etch. Expect light wash-induced swirls on the film to fade when the car warms in the sun or when you pour hot water across the panel. Avoid blasting PPF edges with high pressure or harsh angles. For the coating, avoid heavy detergents, and top up occasionally with a compatible silica spray to maintain slickness and beading.
If an edge won’t lay, re-wet with slip, lift slightly, inject a mist of tack, hold for about ten seconds, warm gently, and re-squeegee. If you trap lint, don’t panic; lift just enough to flush it out with slip and reset. If you see fingers or stretch marks on curves, stop stretching, add a tiny relief cut, introduce low heat to relax the film, and try again. If pressure-washing ever lifts a corner, dry the area, clean it, and re-set the edge with tack and light warmth. For ceramic high-spots that you catch within open time, re-level immediately; if they’ve cured, spot-polish and re-coat that area, then blend.
This is the rare budget mod that punches way above its weight. A few smartly placed rectangles of film and a careful ceramic application will keep your Miata from sand-blasting itself and looking tired before its time. The cuts are simple, the chemistry is precise but approachable, and the payoff is seeing clean arches and crisp sills every time you step back from the hose.


