
Leakproof Miata: Drain, Rain-Rail, and Seal Fixes That Last
On NA/NB Miatas, rain should flow from the soft top into the rain rail, down the rear drain tubes, and out the duckbill flaps. When those clog, water backs up into the carpet. NC/ND cars add cowl-gasket seepage as they age. A quick 10-minute triage checks drains, duckbills, and cowl seals.


On soft-top NA/NB cars, rainwater is meant to shed off the fabric, drop into the plastic “rain rail” at the back edge of the top, collect in the rear tub, then run down the vertical drain tubes hidden behind the seat-belt towers. At the very bottom, rubber one-way “duckbill” flaps spit the water onto the ground. When the funnels get packed with leaves or those duckbills glue themselves shut with grime, water backs up and soaks your rear carpet.
NC and ND models route water through molded gutters and hidden rear drains too, but they add another failure mode: seepage at the cowl/windscreen panel when foam gaskets age or get disturbed.
Fast Leak T (10-Minute Driveway Checks)
Do a quick, targeted feel test. Pull the floor mats and press the carpet at the front footwells and behind each seat. If your rear carpet is wet, think soft-top drains or a cracked/misaligned rain rail. If your front footwells go damp after a wash on an NC, suspect the cowl panel seals. Pop the trunk and scan for dried water trails behind the tail lights and third brake light, and make sure the power-antenna grommet (NA/NB) isn’t split. If your door cards are damp after rain, the culprit is almost always a failed door vapor barrier, not the outer weatherstrip.
Generation-by-Generation Leak Map
NA/NB (1990–2005): The big hits are clogged rear drains and duckbills, cracked rain rails (or rails installed outside the tubs), squashed tail-light and third-brake-light gaskets, a tired antenna grommet, and door vapor barriers that lost their butyl seal.
NC (2006–2015, soft top & PRHT): Rear deck drains still clog, but a famous hidden one is the cowl: oval plastic caps under the windscreen panel use foam that shrinks and lets water track along the studs into the cabin. Third brake light gaskets can seep into the trunk as they age.
ND (2016+): The rear drains still need routine cleaning. Even cars with “filters” can flood if those screens plug up. Work from the top; internal grates and check valves don’t like being stabbed from underneath.
Tools and Consumables
Grab a trombone-style flexible brush or a length of speedometer cable for the drains, plus a squeeze bottle for gentle flushes. For door repairs, you’ll want butyl tape/strip-caulk and 3–6 mil plastic sheeting. Keep replacement gaskets on hand for the tail lights and third brake light, and plan for a new rain rail during top jobs. Non-marring trim tools, plastic rivets, and stainless pop rivets make the rain-rail job cleaner.
Soft-Top Drain Cleaning (NA/NB): Step-by-Step
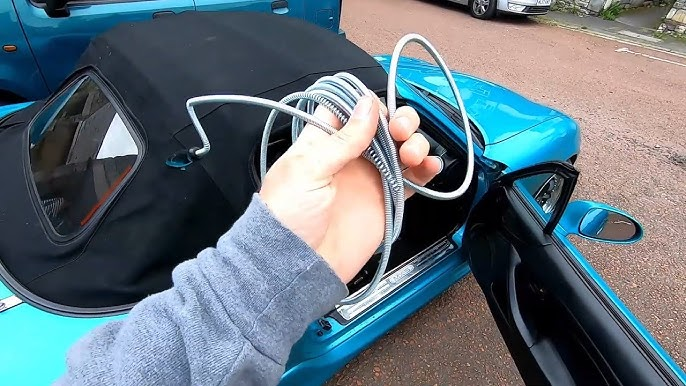
Put the top up, open both doors, slide the seats forward, and shine a light behind each seat-belt tower to find the drain funnels. Feed the brush or flex cable down from the top, never up from below or you’ll compact debris into the funnel. Ease it through until it pops out under the rocker, pull out the gunk, and follow with a small water flush. Pour a cup of water into each funnel and confirm a steady stream on the ground.
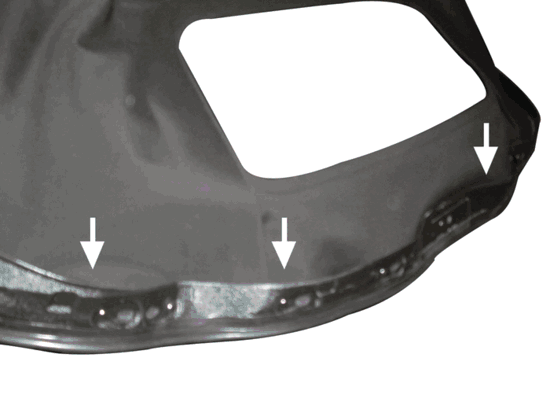
Rain-Rail Refresher: What It Is and When to Replace
The rain rail is a U-shaped plastic gutter riveted to the back edge of the soft top. It directs water into the rear tubs and drains. Age makes it brittle and wavy; incorrect installation can leave its ends outside the tubs, which guarantees a soaked carpet. If you’re installing a new top, or you see cracks, warping, or missing end caps, fit a fresh rail.
Pull the soft-top assembly (protect the plastic window while you work). Drill out the old rivets and transfer any hardware, then set the new rail with the correct rivet length and spacing. Seal the joints where the rail segments meet and make sure both ends drop inside the body tubs. Refit the assembly and torque the 13 rain-rail bolts evenly. Before the interior goes back, water-test the rear tub and verify both drains flow cleanly.
Door Leaks: Fix the Vapor Barrier, Not the Weatherstrips
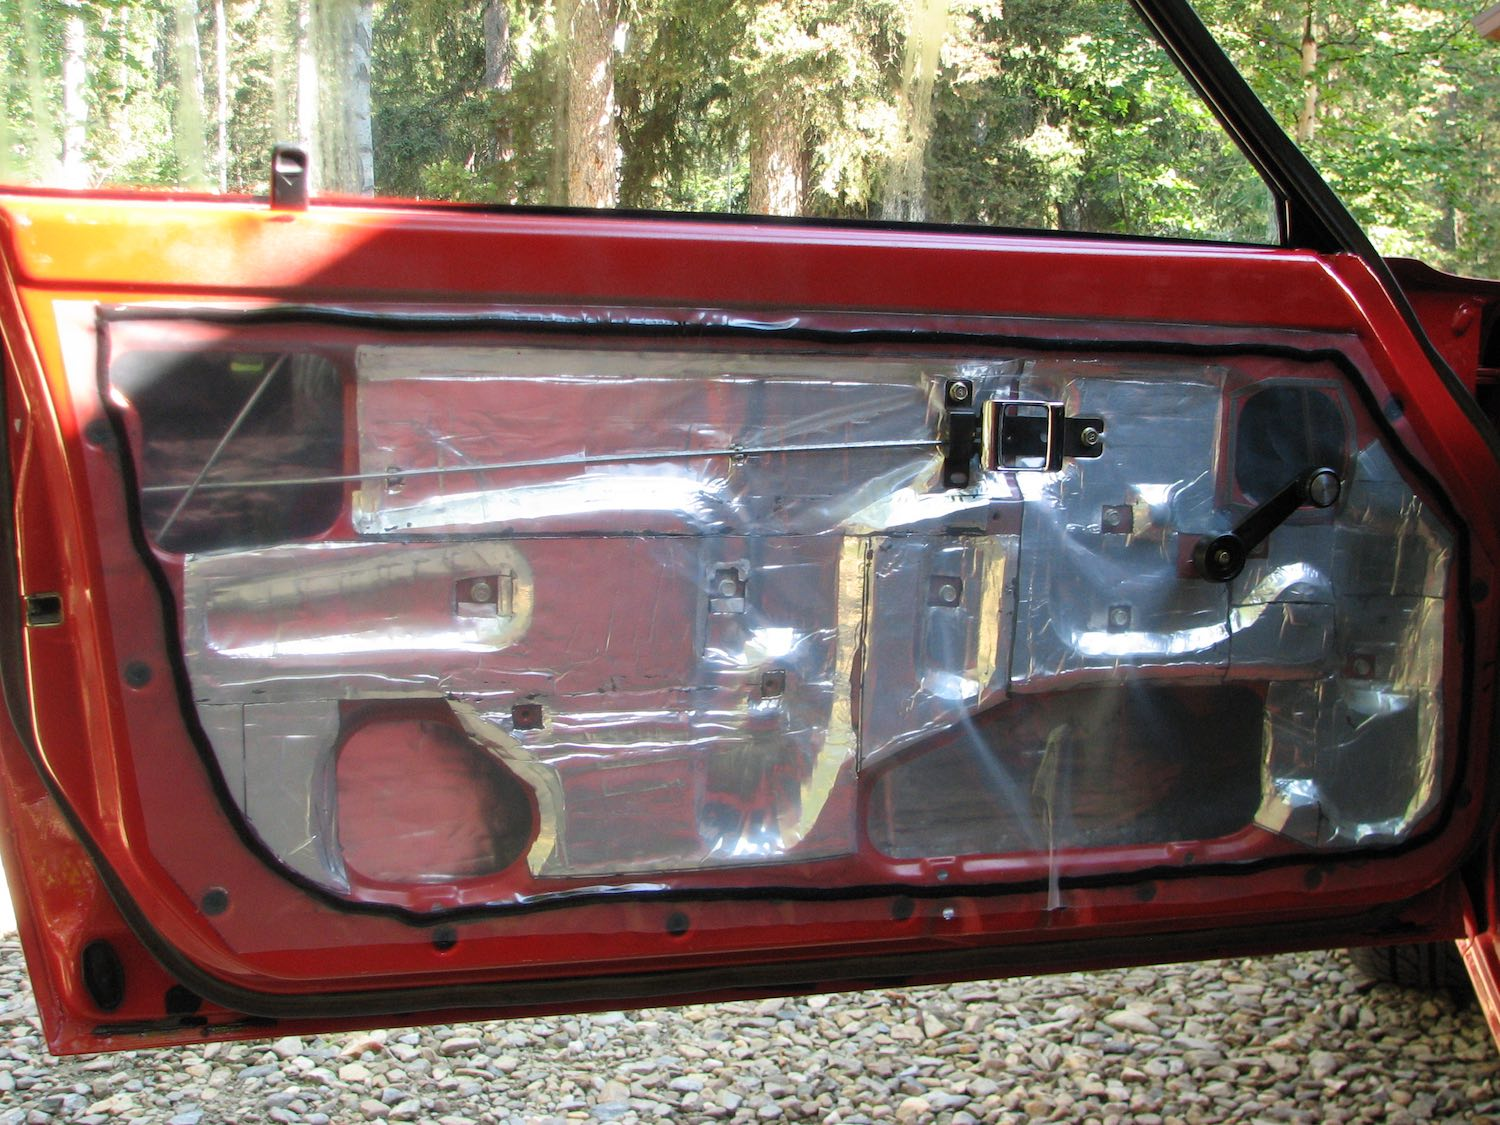
Water is supposed to pass the outer window sweep and drip inside the door shell. The only thing keeping it off your door card and carpet is the plastic vapor barrier stuck to the inner skin with butyl. If a corner lifted, water will ride the cable runs right into the cabin. Peel back the old plastic, roll fresh butyl all the way around every edge and opening, patch around speakers, and confirm the small drain holes along the bottom of the door are open.
Trunk Leak Killers (NA/NB/NC)
Replace flattened tail-light gaskets and snug the nuts evenly, overtightening warps housings and makes things worse. Renew the third brake light gasket on NB/NC and reseal the light housing if needed. On NA/NB, replace the antenna grommet or properly seal a delete plug. The best diagnostic is a staged hose test: climb into the trunk with a light (or point a recording phone inside), and have a helper wet one area at a time so you can see exactly where it trails in.
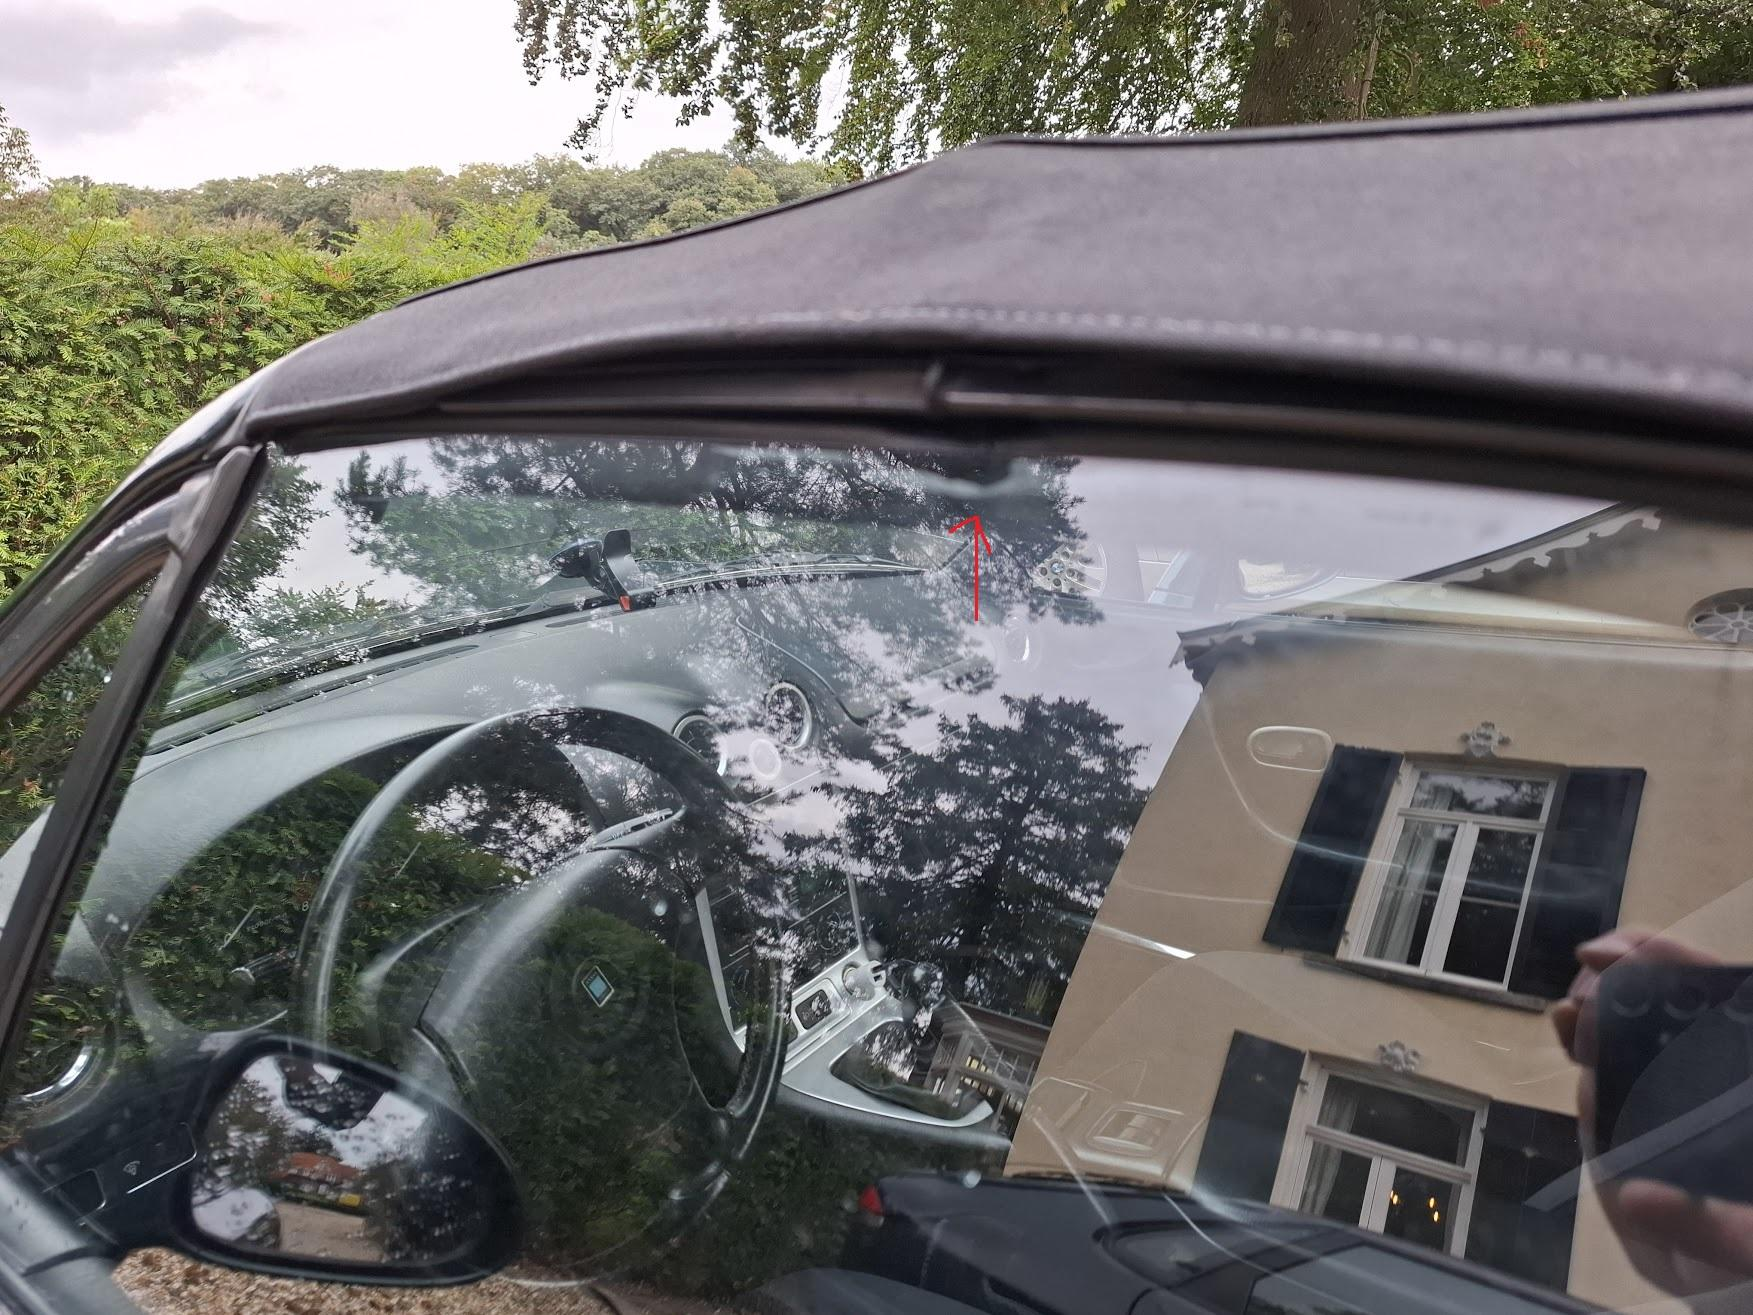
NC Cowl/Windscreen Panel: The Hidden Footwell Soaker
If your NC front carpets are mysteriously wet, pull the wiper arms, pop the two cowl halves, and you’ll find oval studs plugged by plastic caps with foam seals. When that foam shrinks, water tracks down the studs and into the cabin. Replace the caps or upgrade to improved gaskets, reseal carefully, and water-test across the windshield base before reassembly.
ND/NC Rear Drains: Special Notes
Later cars can have internal grates or check valves you can damage from below. Always start from the top funnel with the correct brush, use gentle water and air if things are stubborn, and only service or replace drain elements if you confirm they’re physically damaged or missing.
After the Fix: Proper Dry-Out Protocol
Don’t trap moisture. Pop the sill trims, lift the carpets, and aim fans or a dehumidifier at the padding until it’s totally dry. This is about mold prevention and protecting the harnesses that run along the floor. A light sprinkle of baking soda helps with odor; vacuum once dry.
Preventive Maintenance That’s Realistic
Every three to six months, sweep the soft-top well and clear the rear drains; do a quick targeted hose test if you’ve parked under trees or noticed dampness. Once a year, press around your door vapor barriers and re-roll butyl if an edge lifted, peek at trunk gaskets, and on NCs, give the cowl caps a look. Any time the top is off the car, inspect or replace the rain rail and verify both drain exits are unobstructed and the duckbills aren’t glued shut with grime.
Water-Test Checklist (Targeted Spray Method)
Work in stages so you can isolate failures. First, spray only along the windshield base and cowl (NCs in particular). Then move to the soft-top header and side rails. Next, hit the quarter-window area and behind the seat-belt towers while watching the rear tub. Finish with the trunk: tail-light seams first, then the third brake light, then the antenna. Take notes after each pass so you know exactly which zone failed.
FAQs
“My drains are clear but the floor’s still wet.” Re-inspect the rain rail for cracks or misalignment, check the door vapor barriers, and on NCs, verify the cowl caps aren’t weeping.
“Can I poke from the bottom?” Don’t. On NC/ND you can shred internal grates or valves. Work from the top with the right brush.
“Do I need a new top to fix leaks?” Usually not. Clean drains, reseal door vapor barriers, refresh light gaskets, and replace a cracked rain rail. Those solve most leaks without buying a whole new top.


