
NA Miata Oil Change Made Easy: Step-by-Step DIY Tutorial
The Mazda NA Miata may be the most driven sports car and easily one of the go to favorites among car enthusiasts. The NA offers simplicity, reliability, and an engaging driving experience. Our own little Miata’s serves us alright, but you also gotta take care of your car! Performing your own oil cha

The Mazda NA Miata may be the most driven sports car and easily one of the go to favorites among car enthusiasts. The NA offers simplicity, reliability, and an engaging driving experience. Our own little Miata’s serves us alright, but you also gotta take care of your car! Performing your own oil changes is one of the most effective ways to keep your Miata in peak condition and is the perfect gate way to start wrenching around your beloved. However, the wealth of information (and misinformation) online can make this seemingly simple task confusing. This guide cuts through the clutter and provides a clear, step-by-step breakdown of how to change your oil—covering everything from the tools you’ll need to how to safely dispose of the used oil afterward. Let’s dive in!
Why Changing Your Oil Is Important
Regular oil changes are the lifeblood of a healthy engine. Over time, engine oil breaks down and collects dirt, metal particles, and debris, which can lead to excessive wear on your engine’s components. This not only lowers the performance of your Miata but can also cause long-term damage that results in expensive repairs. Fresh oil keeps the engine lubricated, reduces friction, and helps regulate temperature, ensuring that your car runs smoothly.
Traditionally, it was recommended to change the oil every 3,000 miles, but modern synthetic oils have extended this interval. Depending on the type of oil you use and how you drive, you can stretch oil changes to every 5,000 to 7,500 miles. In this guide, we’ll walk you through the entire process, plus discuss which type of oil might be best for your Miata based on climate and driving conditions.
Tools & Materials Needed
Before starting the oil change, gather the following tools and materials. Having everything on hand will save you a lot of time and hassle.
Consumables
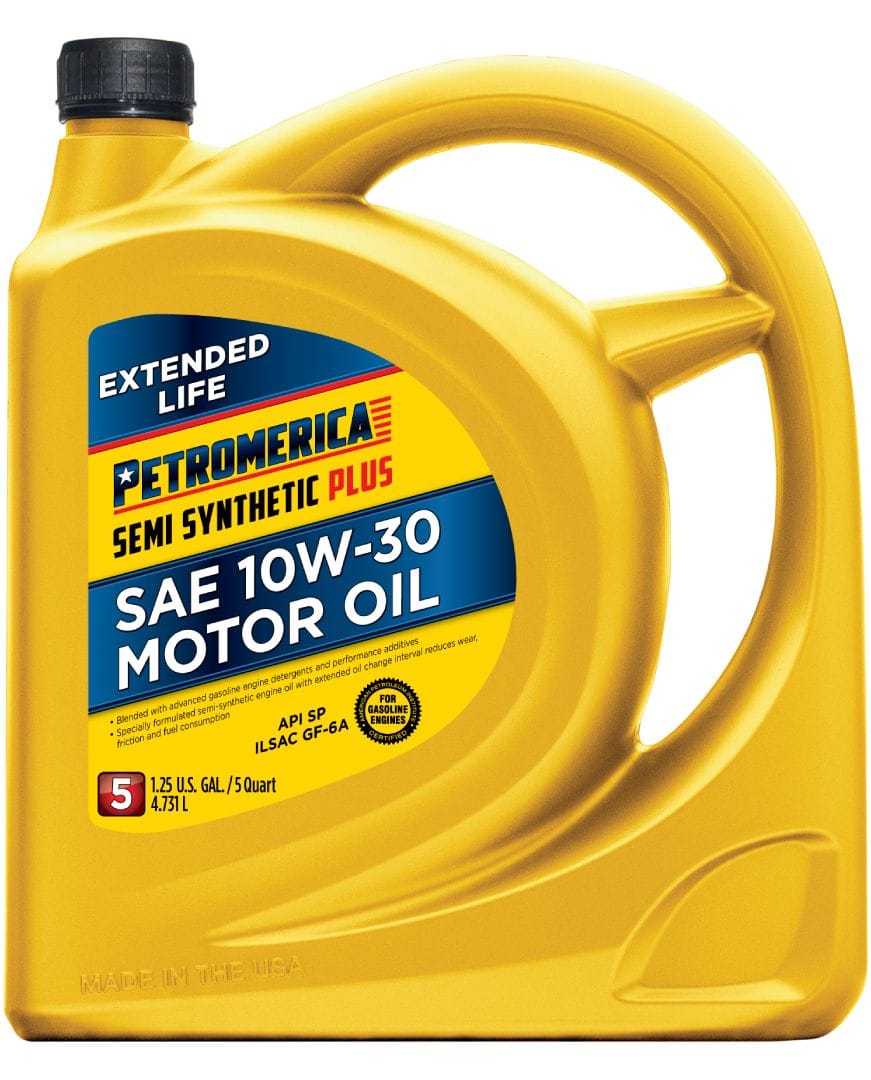
- Oil: 3.6 quarts for the 1.6L engine or 4 quarts for the 1.8L engine. The recommended viscosity is 10W-30, but you can adjust based on your local climate.
- Oil Filter: Stick with OEM filters for the best results, but reputable aftermarket filters work too.
- Crush Washer (Optional): It’s a good idea to replace the washer on the drain plug, but you can reuse it a couple of times if necessary.
Tools
- 19mm Wrench or Socket Wrench: To remove the oil drain plug.
- Hydraulic Floor Jack and Jack Stands: To safely raise and support your Miata.
- Oil Drain Pan: Ensure it’s large enough to hold at least 4 quarts of oil.
- Funnel: For a mess-free way to pour oil into the engine.
- Oil Filter Wrench (Optional): Handy if the oil filter is too tight to remove by hand. Having the proper tools is a step towards being a pro!
Step 1: Preparing Your Miata for the Oil Change
The first step in any oil change is to prepare the car. Start by running your engine for 2-3 minutes to slightly warm up the oil. Warm oil flows better, making it easier to drain from the engine. However, don’t let the engine run too long, as overheating the oil can make it dangerously hot to handle.
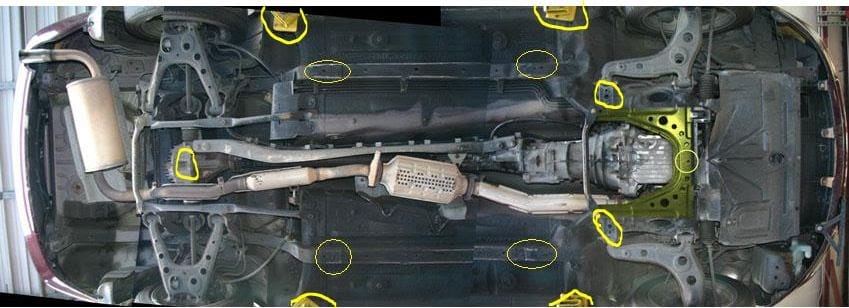
Next, locate the jack points on the front frame rails of the Miata. These notches are where it’s safe to place your jack. Lift the driver’s side first—this will help the oil drain more thoroughly because of the car’s angle. Once the car is raised, place a jack stand under the frame rail for safety. Never work under a car that’s only supported by a jack. Jack stands are essential to prevent accidents.
Step 2: Draining the Old Oil
Once the car is securely lifted and you have your tools ready, remove the oil filler cap on top of the engine. This allows air to flow in, which will help the oil drain faster and more completely.
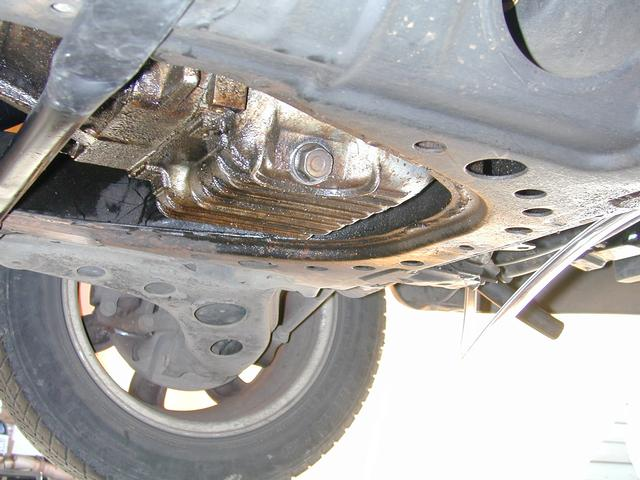
Locate the oil drain plug, which is a 19mm bolt on the oil pan, near the passenger side. Position your oil drain pan directly underneath the plug. Using your 19mm wrench, loosen the plug until you can unscrew it by hand. Be prepared for the oil to start flowing immediately as soon as the plug is removed. About 3-4 quarts of oil will drain, so ensure your pan can hold it all.
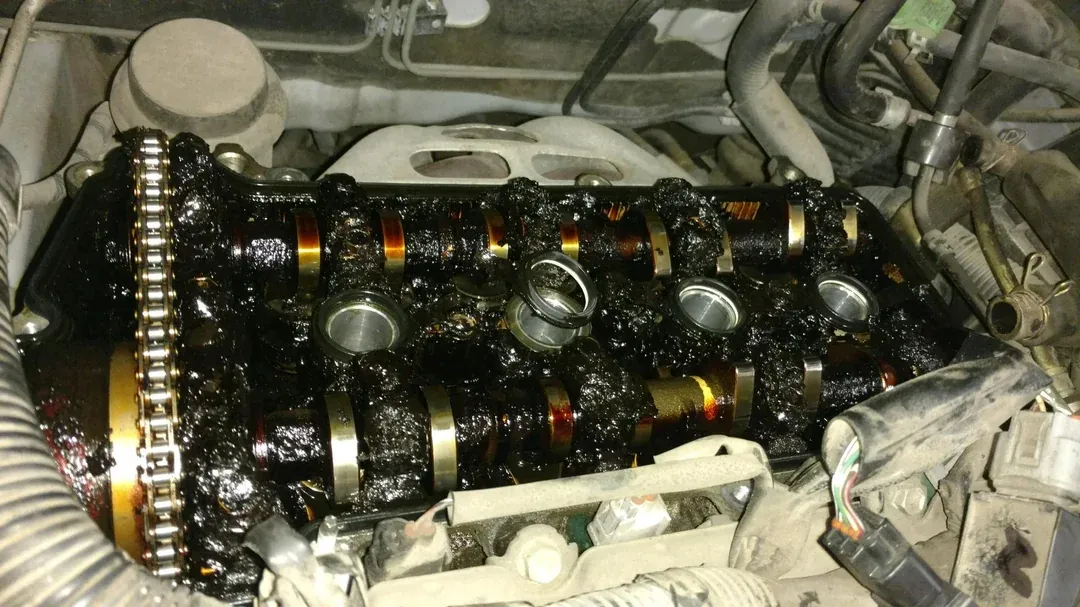
As the oil drains, take a moment to inspect it. Look for any metal shavings or debris, which could indicate engine wear. A little metallic shimmer is normal, but large particles could be a cause for concern. If the oil has a milky appearance, that could suggest a head gasket issue where coolant is mixing with the oil—something you’ll want to address quickly.
Step 3: Inspect and Replace the Drain Plug
With the oil drained, it’s time to inspect the drain plug. Some Miatas have magnetic drain plugs that collect metal particles floating in the oil. A little bit of metal dust is normal, but if you find larger chunks, it could be a sign of more serious engine issues.
Now, check the condition of the crush washer. While it’s recommended to replace it during every oil change, you can reuse it if it’s in good shape and undamaged. Once everything looks good, reinstall the drain plug. Tighten it by hand first, then use your wrench to snug it up. If you have a torque wrench, tighten it to 25 ft-lbs. Be careful not to over-tighten, as this could strip the threads or damage the oil pan.
Step 4: Removing the Old Oil Filter
Now that the old oil is drained, it’s time to remove the oil filter. On the NA Miata, the oil filter is located on the passenger side of the engine, below the intake manifold and close to the starter motor. It’s in a bit of a tight spot, so you might need an oil filter wrench if it’s difficult to reach.
Place a rag or some paper towels beneath the filter to catch any residual oil that might spill when you remove it. Twist the filter counterclockwise by hand. If it’s too tight, use the oil filter wrench to get it loose. Once the filter is off, inspect it to ensure that the old rubber O-ring has come off with it. Leaving the O-ring stuck to the engine can cause a poor seal with the new filter and lead to leaks.
Step 5: Installing the New Oil Filter
With the old filter removed, take your new oil filter and rub a small amount of fresh oil around the rubber O-ring. This helps create a good seal and makes it easier to remove the filter during your next oil change. Some people choose to pre-fill the oil filter with oil before installing it, but this is optional for the Miata due to the filter’s sideways orientation.
To install the new filter, screw it on by hand, tightening it until it’s snug. Don’t use a wrench to tighten the oil filter—hand-tight is enough. Over-tightening could damage the filter or cause it to leak.
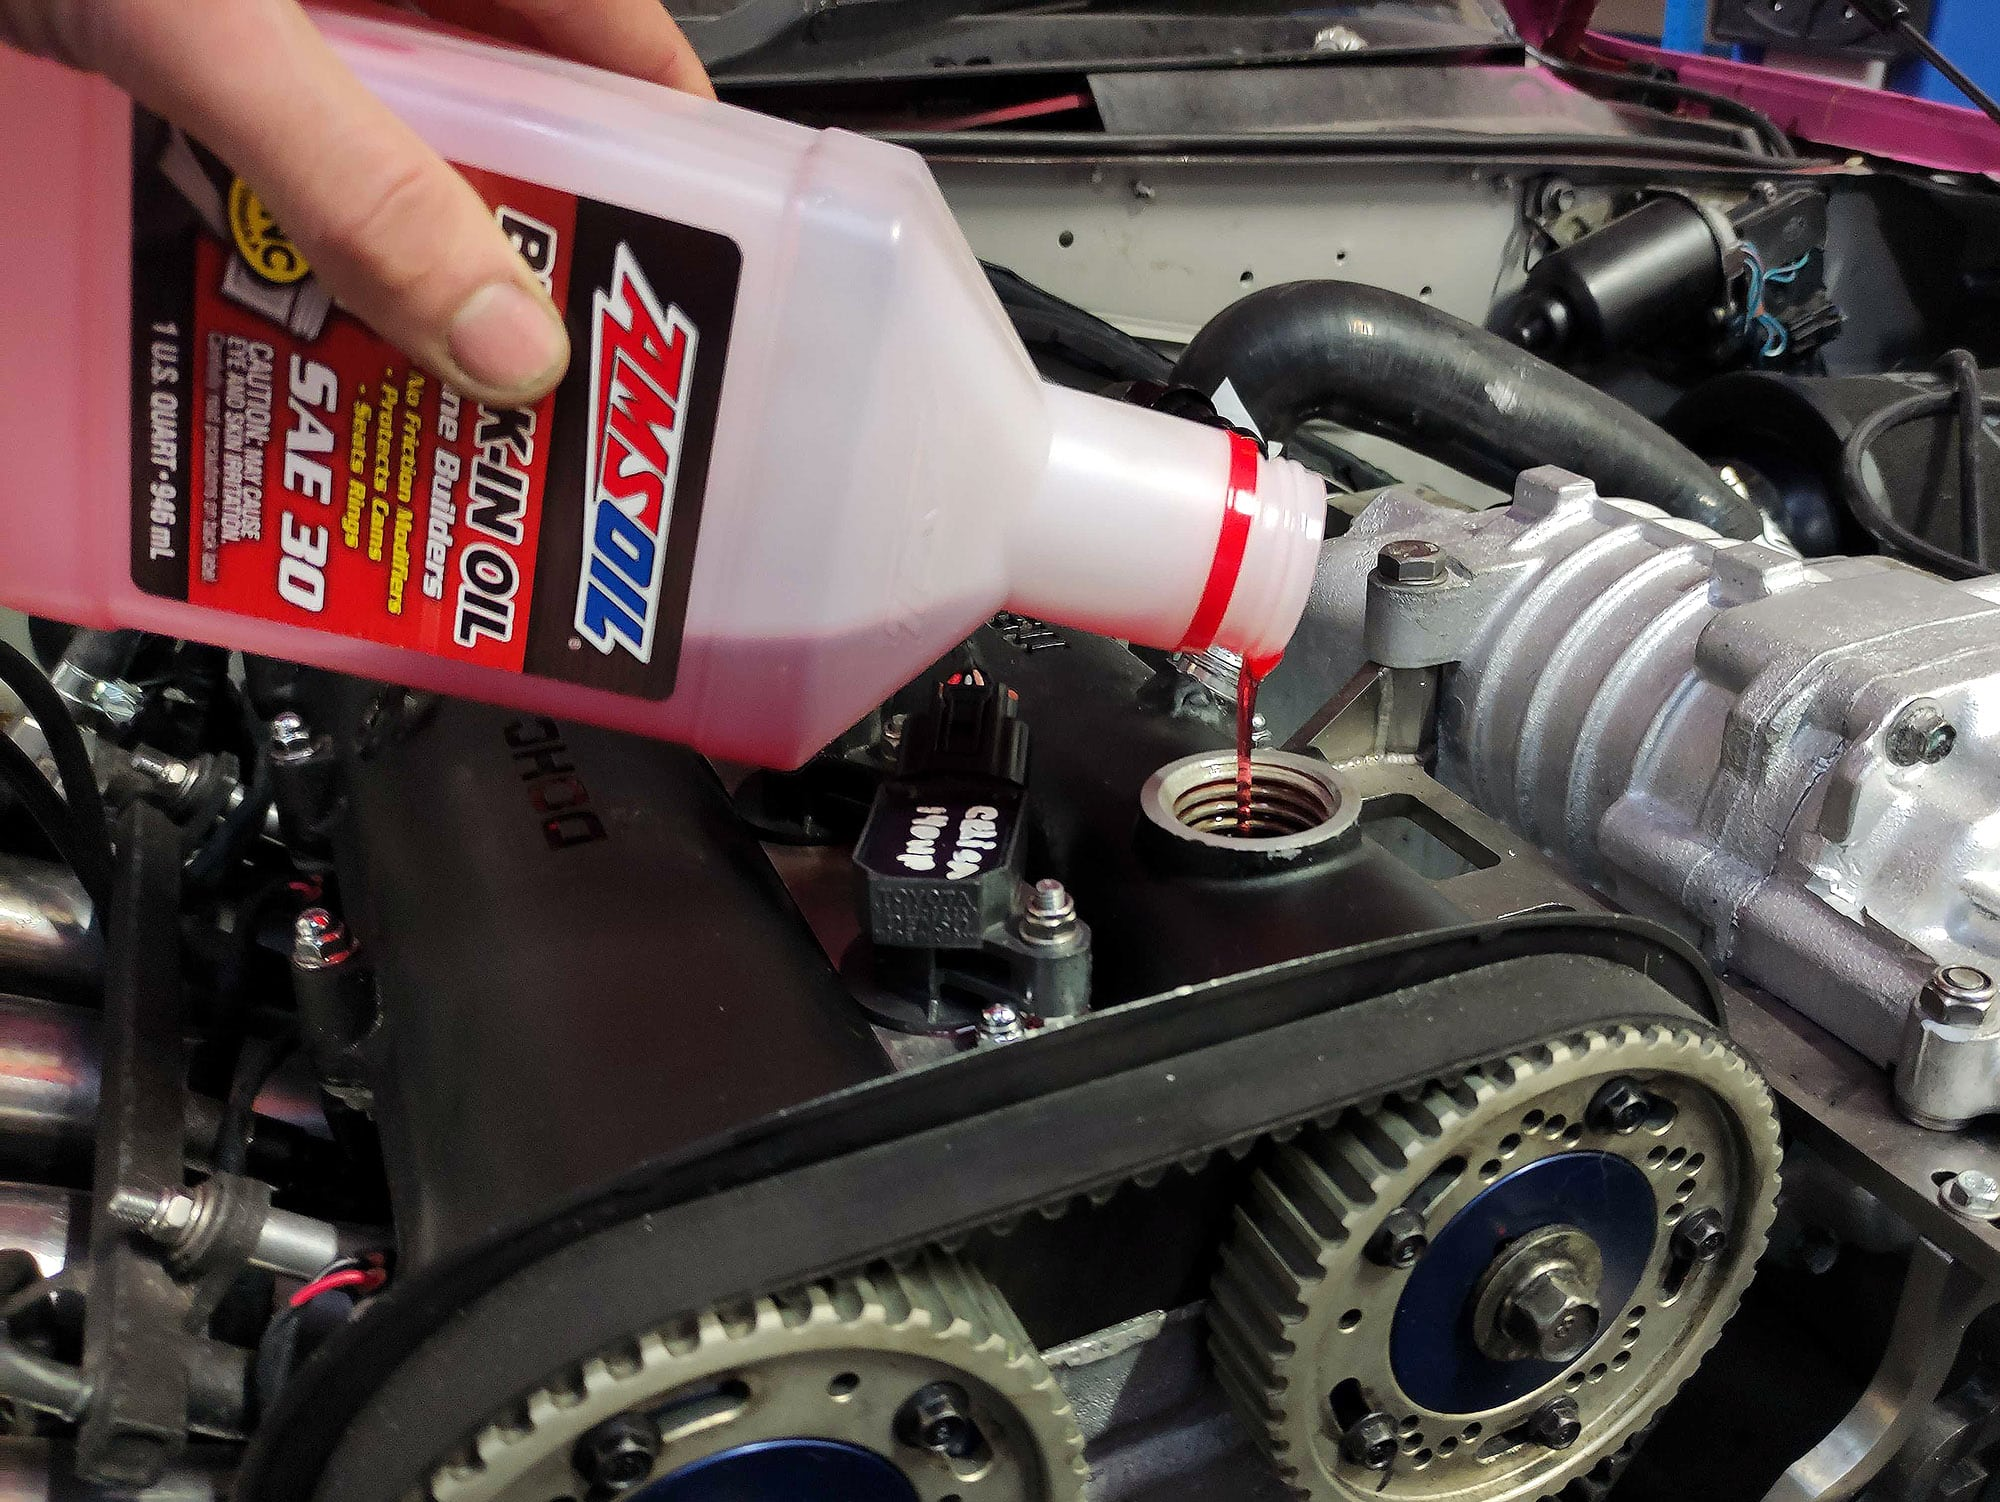
Step 6: Adding the New Oil
Now that the old oil has been drained and the new filter installed, it’s time to add fresh oil. Place your funnel into the oil filler hole and carefully pour in the correct amount of oil. For the 1.6L engine, you’ll need 3.6 quarts, while the 1.8L engine requires 4 quarts. Be sure to check the oil jug’s markings as you pour to avoid overfilling, which can lead to engine issues.
Once you’ve added the oil, replace the oil filler cap and make sure it’s securely tightened.
Step 7: Lower the Car and Check for Leaks
With the fresh oil added, you can now lower the car. Jack it up slightly to remove the jack stands, then slowly lower the Miata back to the ground.
Start the engine and let it run for a few minutes. While the engine is running, check underneath the car for any signs of leaks, particularly around the drain plug and oil filter. If everything looks good, turn the engine off and use the dipstick to check the oil level. If necessary, add a little more oil to bring it up to the full mark on the dipstick.
Step 8: Properly Dispose of Old Oil and Filter
Properly disposing of used oil and filters is essential for environmental protection. Most auto parts stores or recycling centers will accept your used oil and filter at no charge. Never pour old oil down the drain or throw it in the trash. Make sure to recycle both the oil and the filter according to your local regulations.
Changing the oil in your NA Miata is a simple but vital task that will keep your engine running smoothly and extend the life of your car. Not only is this a great DIY project for beginners, but it also saves you money and gives you the satisfaction of maintaining your car yourself. Regular oil changes, along with other routine maintenance, will keep your Miata performing at its best for years to come. So grab your tools, follow this guide, and enjoy the rewarding experience of taking care of your car!


