Welcome to our comprehensive guide on Miata body kits! If you’re a proud owner of a Mazda Miata and looking to enhance its aesthetics and performance, a body kit can be the perfect solution. In this blog post, we will take you through the process of selecting, installing, and maintaining a body kit, ensuring that you have all the knowledge and tools necessary to transform and enhance your beloved car.
Body kits are aftermarket accessories designed to modify the exterior appearance and improve the aerodynamics of your car. They consist of a collection of parts such as front and rear bumpers, side skirts, fenders, spoilers, and more, which can completely transform the look of your car. But why would you want one? Well, a body kit not only adds a touch of personal style and uniqueness to your Miata but can also enhance its performance by improving its handling and stability.
Choosing the right body kit for your Miata is crucial to achieving the desired look and performance. In the first section of this guide, we will discuss the factors you should consider when selecting a body kit, such as compatibility, material quality, and design. We will also explore the different types of Miata body kits available in the market, including OEM-style kits, wide-body kits, and lip kits.
Once you have chosen the perfect body kit, the next step is installation. In the installation section, we will provide you with a step-by-step guide on how to properly install your body kit. We will also highlight common mistakes to avoid during the installation process, ensuring that you achieve the best results while avoiding any potential damage.
Keeping your Miata’s body kit in top condition is essential for its longevity and overall appearance. In the maintenance section, we will share tips and techniques on how to clean and polish your body kit, as well as how to inspect for damage and wear. We will also discuss when it might be necessary to replace certain parts of your body kit to keep it looking fresh and performing optimally.
To inspire and give you a glimpse of the transformation that a body kit can bring, we will showcase real-life examples of before and after installations. Additionally, we will explore some of the most stunning and creative designs and customizations that Miata enthusiasts have created with their body kits. Lastly, we will delve into how a body kit can improve the performance of your Miata, from increased aerodynamic efficiency to enhanced stability and grip.
Whether you’re a car enthusiast looking to take your Miata to the next level or a beginner who wants to learn more about body kits, this guide has got you covered. So, let’s dive in and unlock the world of Miata body kits together!
Understanding Miata Body Kits: What They Are and Why You Need One
A body kit is a collection of aftermarket accessories specifically designed to modify the appearance and improve the performance of your car. These kits typically include various components such as front and rear bumpers, side skirts, fenders, spoilers, and other add-ons that can be customized to suit individual preferences.
The primary purpose of a body kit is to transform the visual appeal of your car. By adding stylish and aerodynamic components, you can give your Miata a more aggressive, sporty, and unique look. Body kits come in a wide range of designs and styles, allowing you to personalize your vehicle to reflect your own taste and personality.
In addition to enhancing aesthetics, a body kit can also improve the performance of your Miata. The components of a body kit are often designed to optimize aerodynamics, reducing drag and improving airflow around the vehicle, and wide body kits allow you to run wider tires than OEM. This can result in improved handling, grip, stability, and even fuel efficiency. By reducing air resistance and increasing downforce, a body kit can enhance the overall driving experience of your Miata.
Another advantage of a body kit is the ability to customize and differentiate your Miata from others on the road. Whether you’re participating in car shows or simply want to stand out from the crowd, a body kit can help you achieve a unique and eye-catching appearance. With numerous options available, you can select a body kit that suits your personal style and preferences, making your Miata truly one-of-a-kind.
While body kits offer numerous benefits, it’s important to note that they require proper installation and maintenance to ensure optimal performance and longevity. It’s crucial to choose high-quality body kits from reputable manufacturers to ensure a proper fit and durability. Additionally, regular maintenance, including cleaning and inspection, will help preserve the appearance and functionality of your body kit.
In the next sections of this guide, we will dive deeper into the process of selecting the right Miata body kit, providing installation instructions, maintenance tips, and showcasing real-life examples of the transformations that can be achieved with these kits. So, if you’re ready to take your Miata to the next level, let’s move on to the next section and explore the factors to consider when choosing a body kit.
How to Choose the Right Miata Body Kit
Choosing the right Miata body kit is a crucial step in achieving the desired look and performance for your vehicle. With so many options available in the market, it’s important to consider several factors before making your decision. In this section, we will explore the key considerations to keep in mind when choosing a Miata body kit.
Factors to Consider When Choosing a Body Kit
Compatibility: It’s essential to ensure that the body kit you choose is compatible with your specific Miata model and year. Different body kits may have variations in fitment, so double-check the compatibility information provided by the manufacturer or supplier to ensure a proper fit.
Material Quality: The quality of the materials used in the body kit will determine its durability and longevity. Look for body kits made from high-quality materials such as fiberglass, carbon fiber, or polyurethane. These materials are known for their strength, resistance to damage, and lightweight properties, but they are not all equal!
Design and Style: Consider the overall design and style of the body kit. Do you prefer a sleek and subtle look, or a more aggressive and aerodynamic appearance? Take into account your personal taste and the desired aesthetic for your Miata. Look for body kits that complement the lines and contours of your vehicle, enhancing its overall appearance.
Functionality: While aesthetics are important, it’s also crucial to consider the functionality of the body kit. Some body kits are specifically designed to improve aerodynamics, providing better airflow and reducing drag. Others may focus on enhancing downforce or improving cooling for performance purposes. Assess your goals and choose a body kit that aligns with your desired functionality.
Budget: Set a budget for your body kit and stick to it. Body kits can vary significantly in price, depending on the brand, material, and complexity of the design. Determine how much you’re willing to invest in your Miata’s body kit and explore options that fit within your budget range. Remember to consider any additional costs such as installation and painting. ( Remember: You WILL get what you pay for! )
Types of Miata Body Kits Available
Now that we’ve discussed the factors to consider, let’s explore the different types of Miata body kits available:
OEM-style Kits: These body kits are designed to mimic the appearance of the original equipment manufacturer (OEM) body kit that comes with certain Miata models. They offer a subtle and seamless integration, maintaining the factory look while enhancing it with minor modifications.
Wide-body Kits: Wide-body kits feature wider fenders and body panels, giving your Miata a more aggressive and muscular appearance. These kits are popular among enthusiasts who want a bold and standout look, as well as the ability to accommodate wider wheels and tires.
Full Body Kits: Full body kits include a complete set of components, such as front and rear bumpers, side skirts, fenders, and sometimes a rear wing or spoiler. These kits offer a comprehensive transformation, completely changing the look of your Miata.
Where to Buy Quality Miata Body Kits
When it comes to purchasing a Miata body kit, it’s important to source it from reputable suppliers or manufacturers. Here are a few places where you can find quality body kits:
Special Online Retailers: For many, this is where we will end up buying our body kits, brand new from an online retailer like MossMiata, CarbonMiata, KBD Body Kits, Vivid Racing, and Nenguin. Just be sure to read reviews, check ratings, and verify the risk before making a purchase, because many kits are produced to order so it can take weeks, if not months before you receive your product!
Facebook Marketplace: Every car enthusiast has been on here at some point, and it might be the best place to try and find a body kit as well. With most body kits being produced to order and shipped from Japan, buying it from someone who already has it might just be the best way to do it. Plus you can inspect the pieces in person and potentially negotiate a better deal!
Car Enthusiast Forums: Joining online forums or communities dedicated to Miata enthusiasts can provide valuable insights and recommendations. Fellow enthusiasts often share their experiences, recommend trusted sellers, and provide feedback on different body kits.
Local Body Shops: Depending on where you are, local body shops that specialize in automotive customization could carry body kits! They may have connections with suppliers or even offer their own line of body kits. Consulting with professionals can ensure you receive expert advice and guidance throughout the process.
In the next section, we will guide you through the process of installing your Miata body kit, providing you with the necessary tools and step-by-step instructions to achieve a successful installation. So, let’s move on and bring your chosen body kit to life!
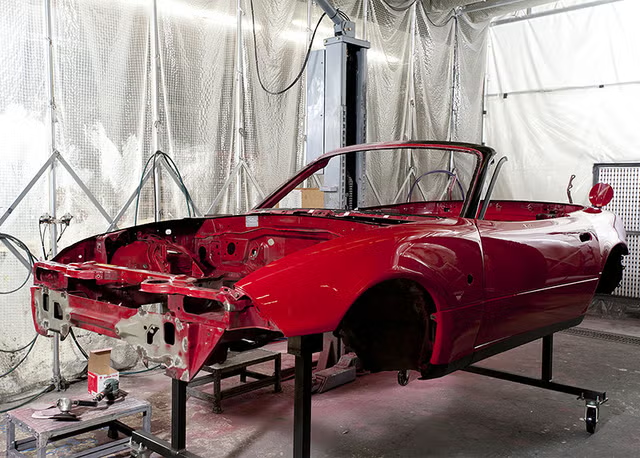
Installing Your Miata Body Kit
Installing a body kit can be an exciting and rewarding process that allows you to see your desired transformation come to life. However, it’s important to approach the installation with patience, precision, and attention to detail. In this section, we will provide you with a step-by-step guide on how to properly install your body kit, ensuring a seamless fit and professional-looking result.
Tools You Will Need for Installation
Before getting started, gather the following tools to ensure a smooth installation process:
Socket set and wrenches
Screwdrivers (both flathead and Phillips)
Trim removal tools
Torque wrench
Heat gun or hairdryer (for certain installations)
Adhesive promoter (if required by the body kit manufacturer)
Masking tape
Cleaning supplies (such as rubbing alcohol or mild soap and water)
Measuring tape
Level
It’s important to note that the specific tools required may vary depending on the body kit you have chosen and any additional components or modifications involved. Refer to the installation instructions provided by the manufacturer for any specific tools or equipment needed.
Step-by-Step Installation Guide
Preparation: Before starting the installation, thoroughly read and understand the manufacturer’s instructions that accompany your body kit. Ensure that you have all the necessary components, and hardware. (Pro tip: Wash your car beforehand! A dirty vehicle is a lot harder to work on than a clean one)
Remove the stock components: Carefully remove any stock or existing body components that need to be replaced by the body kit. This may include the front and rear bumpers, side skirts, fenders, or other parts. Follow proper procedures for removing these components, as outlined in your Miata’s service manual or the manufacturer’s instructions.
Test-fit the body kit components: Before proceeding with the actual installation, dry-fit the body kit components to ensure they align properly and have a proper fitment. This will allow you to make any necessary adjustments or modifications before permanently securing the parts. (Most aftermarket kits aren’t going to fit perfectly, this is the time to modify your parts to get the best fitment!)
Prepare the surfaces: Thoroughly clean the areas where the body kit components will be installed. Use rubbing alcohol or mild soap and water to remove any dirt, grease, or wax. Ensure that the surfaces are dry before proceeding.
Apply adhesive and cut panels (if required): Some body kits require the use of an adhesive promoter to ensure a strong bond between the body kit components and the vehicle’s surface, while others require you to cut off parts of the OEM body for the aftermarket pieces to be bolted on. Follow the manufacturer’s instructions on how you need to proceed and make necessary adjustments if need be.
Install the body kit components: Begin with the larger components, such as the front and rear bumpers, followed by the side skirts, fenders, and other parts. Carefully align each component with the corresponding mounting points on the vehicle. Use the provided hardware, such as screws, clips, or bolts, to secure the components in place. Follow the manufacturer’s instructions for torque specifications and proper fastening techniques. (Not all kits are perfect, it’s okay if things don’t line up perfectly, make adjustments where need be!)
Check for fitment and alignment: After each component is installed, step back and visually inspect the fitment and alignment. Ensure that all panels are aligned properly and have a symmetrical appearance. Use a level or measuring tape to check for even gaps and consistent lines. Remember, these are aftermarket parts, nothing is going to fit like OEM but we can do our best.
Secure and adjust: Once all the components are installed, double-check that all fasteners are tightened securely. Make any necessary adjustments to ensure proper fitment and alignment.
Finishing touches: Clean the installed components using appropriate cleaning products recommended by the manufacturer. This will help remove any residue and leave a polished finish.
Common Mistakes to Avoid During Installation
To ensure a successful installation, keep the following common mistakes in mind and avoid them:
Rushing the installation process: Take your time and follow the instructions carefully to avoid errors or misalignments.
Over-tightening or under-tightening fasteners: Follow the manufacturer’s recommended torque specifications to prevent damage to the body kit or vehicle.
Neglecting to test-fit components: Dry-fit all components before installation to ensure proper fitment and alignment.
Failing to clean and prepare surfaces: Properly clean and prepare the surfaces for installation to ensure a secure bond.
Skipping or ignoring the manufacturer’s instructions: Always refer to the provided instructions specific to your body kit for guidance throughout the installation process.
By following these steps and avoiding common mistakes, you can achieve a professional and seamless installation of your Miata body kit. In the next section, we will delve into the essential maintenance practices to keep your body kit looking its best and performing optimally. So, let’s move on and learn how to maintain your Miata body kit!
Maintaining Your Miata Body Kit
Proper maintenance is essential to keep your Miata body kit looking its best and ensuring its longevity. Regular cleaning, inspection, and timely repairs are key to preserving the appearance and functionality of your body kit. In this section, we will guide you through the essential maintenance practices to keep your Miata body kit in top condition.
Cleaning and Polishing Your Body Kit
Routine Cleaning: Wash your Miata regularly, paying special attention to the body kit components. Use a mild soap or automotive shampoo and a soft sponge or microfiber cloth to gently clean the surfaces. Avoid abrasive cleaners or brushes that could damage the finish of the body kit.
Drying: After washing, thoroughly dry the body kit components with a clean microfiber cloth or chamois to prevent water spots or streaks. Pay attention to any crevices or hard-to-reach areas where water might accumulate.
Polishing: Apply a high-quality automotive wax or polish specifically designed for the material of your body kit. Follow the manufacturer’s instructions for application and buff the surface to achieve a smooth and shiny finish. Regular polishing will help protect the body kit from UV damage and maintain its appearance.
Protective Film: Consider applying a clear protective film to vulnerable areas of the body kit, such as the front bumper or side skirts. This film acts as a barrier against rock chips, scratches, and other road debris, helping to preserve the finish of your body kit.
Inspecting for Damage and Wear
Regular Inspection: Routinely inspect your body kit for any signs of damage, wear, or loose components. Pay attention to cracks, scratches, or chips that may compromise the integrity of the body kit. Inspect all mounting points, fasteners, and hardware to ensure they are secure and intact. (Fiberglass can crack and chip when exposed to the environment, so be careful!)
Repairing Minor Damage: If you notice minor damage, such as small scratches or chips, consider using touch-up paint or clear coat repair kits to address the issues promptly. Follow the manufacturer’s instructions for the specific repair product and take care to match the color and finish of your body kit.
Addressing Major Damage: In case of significant damage or extensive wear, consult a professional body shop or a specialist in automotive customization. They can assess the extent of the damage and provide options for repair or replacement of the affected body kit components.
When to Consider Replacing Parts of Your Body Kit
Cracks or Structural Damage: If you notice any significant cracks or structural damage on your body kit components, it is advisable to replace them. Cracks can compromise the integrity of the body kit and potentially lead to further damage if left unaddressed.
Irreparable Wear or Fading: Over time, body kits may experience wear, fading, or discoloration due to exposure to sunlight, harsh weather conditions, or normal wear and tear. If the wear is extensive and cannot be effectively repaired or restored, it may be time to consider replacing the affected parts.
Upgrade or Change of Style: If you wish to change the style or upgrade your Miata’s appearance, replacing certain body kit components or opting for a completely new body kit may be the solution. This allows you to customize your Miata according to your evolving preferences or to achieve a fresh and updated look.
By following these maintenance practices and promptly addressing any damage or wear, you can ensure that your Miata body kit remains in excellent condition for years to come. In the next section, we will showcase real-life examples of Miata transformations with body kits, providing you with inspiration and ideas for your own customization journey. So, let’s explore the possibilities and unleash the potential of your Miata!
Transforming Your Miata with a Body Kit: Real-Life Examples
Seeing real-life examples of Miata transformations with body kits can provide inspiration and ideas for your own customization journey. In this section, we will showcase before and after body kit installations, as well as highlight some exceptional designs and customizations that Miata enthusiasts have achieved.
Before and After Body Kit Installations
Subtle Elegance: A Miata with a subtle body kit upgrade can give it a refined and elegant appearance. By adding a lip kit, side skirts, and a rear diffuser, the car gains a sportier and more assertive look without being overly aggressive.
Aggressive Stance: For those who prefer a more aggressive and eye-catching look, a wide-body kit can completely transform the Miata’s appearance. Wider fenders, front and rear bumpers, and a rear wing create a bold and muscular stance that demands attention.
Track-Ready Performance: Some enthusiasts choose body kits that are specifically designed for track performance. These kits often feature enhanced aerodynamics, larger air intakes, and functional vents to optimize airflow and improve the car’s handling and stability on the track.
Inspirational Designs and Customizations
Unique Paint Schemes: Customizing the color and finish of a body kit can make your Miata truly stand out. From vibrant metallics to matte wraps or even custom graphics, the possibilities are endless for creating a unique and personalized appearance.
Custom Body Kit Combinations: Miata owners often get creative by combining elements from different body kits to achieve a one-of-a-kind look. Mixing and matching front bumpers, side skirts, and rear spoilers can result in a unique and personalized design that reflects your individual style.
How a Body Kit Improves the Performance of Your Miata
Beyond the visual transformation, a well-designed body kit can enhance the performance of your Miata in several ways:
Aerodynamic Efficiency: Body kits are engineered to optimize airflow around the vehicle, reducing drag and improving overall aerodynamic efficiency. This results in improved stability, reduced lift, and enhanced handling at high speeds.
Enhanced Downforce: Certain body kits, especially those designed for track performance, incorporate features like rear wings or spoilers that generate additional downforce. This increased downforce helps improve traction and grip, allowing for better cornering and stability.
Cooling and Airflow: Body kits often include functional vents or air intake systems that help improve cooling for the engine, brakes, or other components. Better airflow management can prevent overheating and ensure optimal performance during spirited driving or track sessions.
By combining aesthetics with performance enhancements, a Miata body kit transforms your car into a unique and personalized machine that stands out from the crowd.
Congratulations on completing this comprehensive guide to Miata body kits! We hope that the information provided has been helpful in your journey of selecting, installing, and maintaining a body kit for your Miata. Remember to consider compatibility, material quality, design, and functionality when choosing your body kit, and follow the proper installation and maintenance practices to ensure optimal results.
Now it’s time to unleash your creativity and transform your Miata into a head-turning, high-performance machine. Enjoy the process and embrace the joy of driving your customized Miata on the open road!


Leave a Reply
You must be logged in to post a comment.