
Essential Miata Cooling System Upgrades for Summer Driving
High temps can turn a spirited drive into a disaster, especially on track days. While the stock cooling system works for daily cruising, aggressive driving demands better cooling. Upgrades like aluminum radiators, high-flow fans, and better coolant help prevent overheating!


Nothing can ruin a fun summer drive or a track day faster than an overheating Miata. While the stock cooling system is usually okay for everyday cruising, pushing your Miata in high temperatures or during extended track sessions can put serious stress on the factory setup. Thankfully, there are plenty of upgrades, ranging from straightforward part swaps to more in-depth modifications, that will help keep engine temps in check. This, in turn, prevents costly damages like warped cylinder heads, blown hoses, or other unpleasant surprises.
Understanding your Miata Cooling
Mazda adapted this engine from a front-wheel-drive setup to fit the rear-wheel-drive Miata chassis by relocating the coolant exit to the front of the head. That shift means the rear cylinders don’t always cool as efficiently as the front ones. For casual driving, this design works fine. But when faced with high temperatures, stop-and-go traffic while running the AC, or demanding track use, especially if you’ve added a turbo or supercharger, your cooling system can struggle. Even a brief overheat can invite head gasket problems or other engine damage. Upgrading and maintaining the cooling system is the best way to ensure your Miata stays reliable, especially when the weather or your driving style push things to the limit.
Signs and Symptoms of Overheating
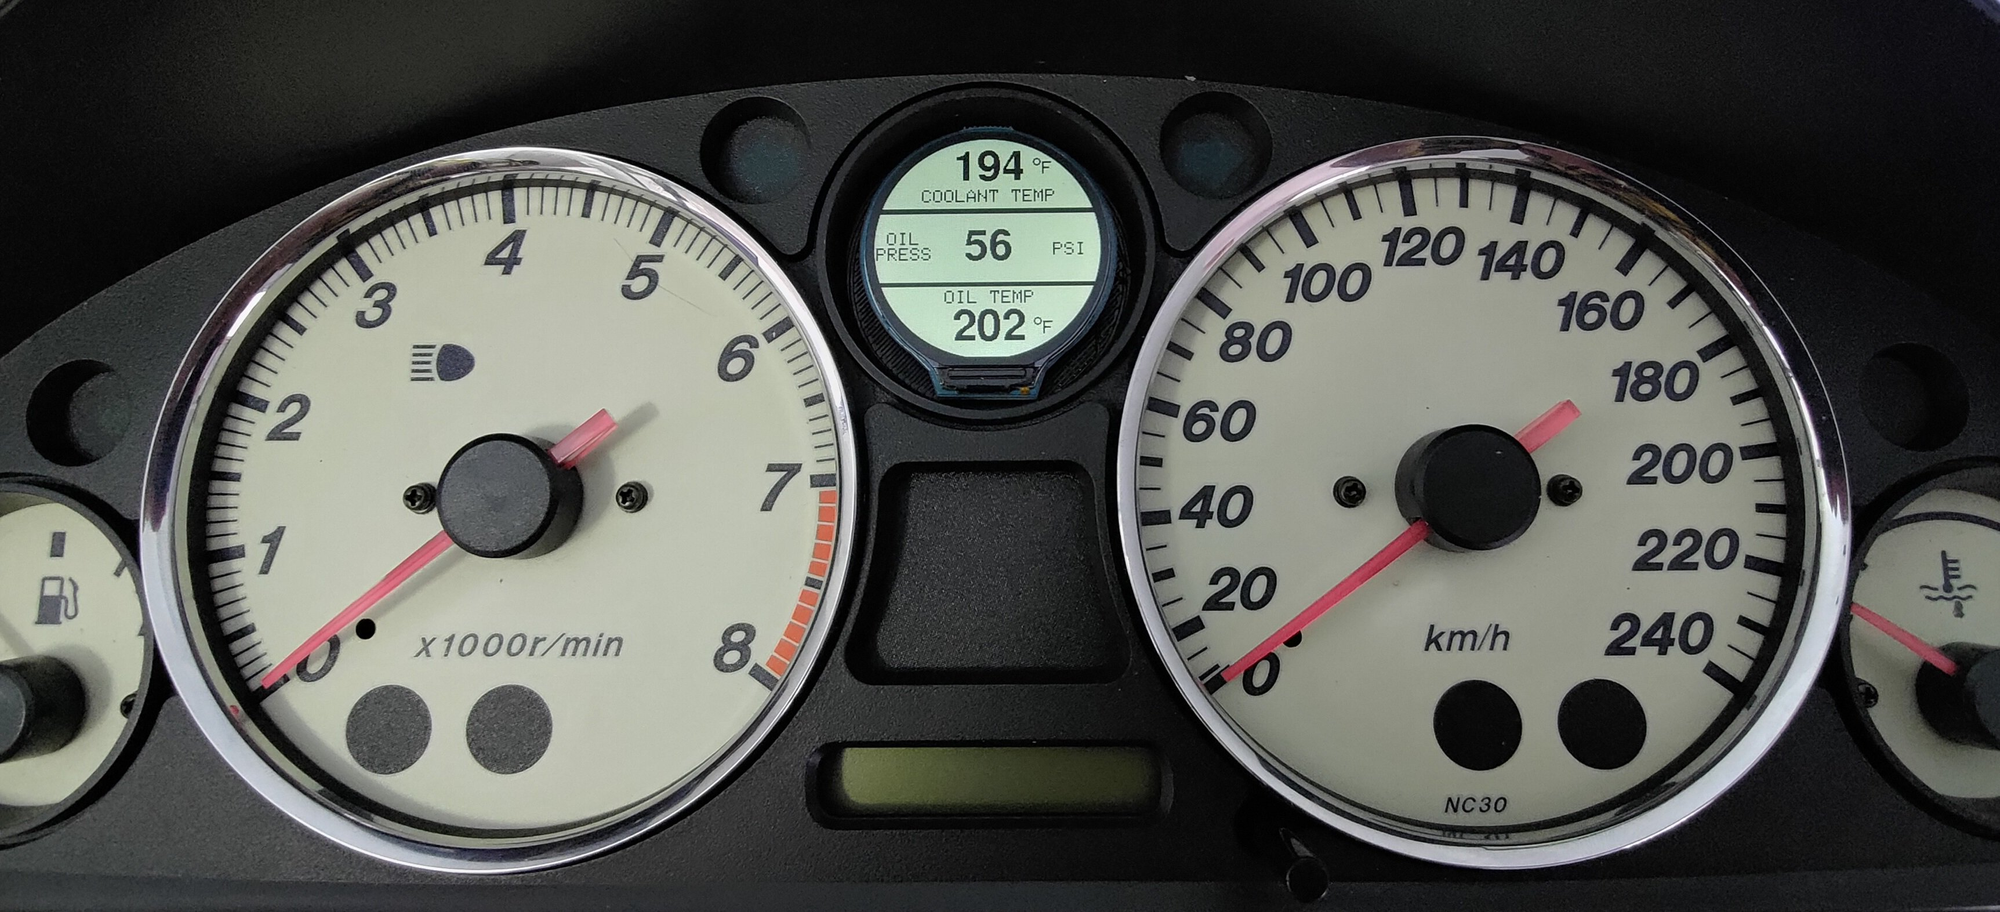
Miatas from the NA and NB generations use a temperature gauge that hangs at the 12 o’clock position across a wide temperature range, then shoots up quickly once the engine crosses a critical threshold. By the time you notice the gauge climbing, you could already be at the edge of trouble. Warning signs of overheating include the temperature needle creeping past center, a noticeable coolant smell or steam under the hood, coolant bubbling into the overflow tank or onto the ground, and reduced power or pinging (when the ECU retards timing to protect the engine). If you see any of these symptoms, pull over safely and let everything cool down before investigating further.
Essential Tools, Preparations, and Safety
Before diving into any cooling system upgrades, set up your workspace and gather essential tools. It helps to park on a level surface so you can drain and refill coolant accurately and so you can safely place your jack stands. Disconnect the battery to avoid electrical mishaps when you unplug fans or sensors. When lifting your Miata, remember to follow proper jack point guidelines to prevent damage to the chassis or underbody components. Finally, have all your parts on hand, new hoses, clamps, fresh coolant, distilled water, a good torque wrench, and a drain pan, to help your project go smoothly.
Upgrading and Replacing the Radiator
An all-aluminum, high-capacity radiator is one of the most noticeable Miata cooling upgrades you can make. Plastic end tanks in stock radiators can become brittle over time, risking cracks or failures. Swapping to an upgraded aluminum unit is a key step in avoiding random overheating issues.
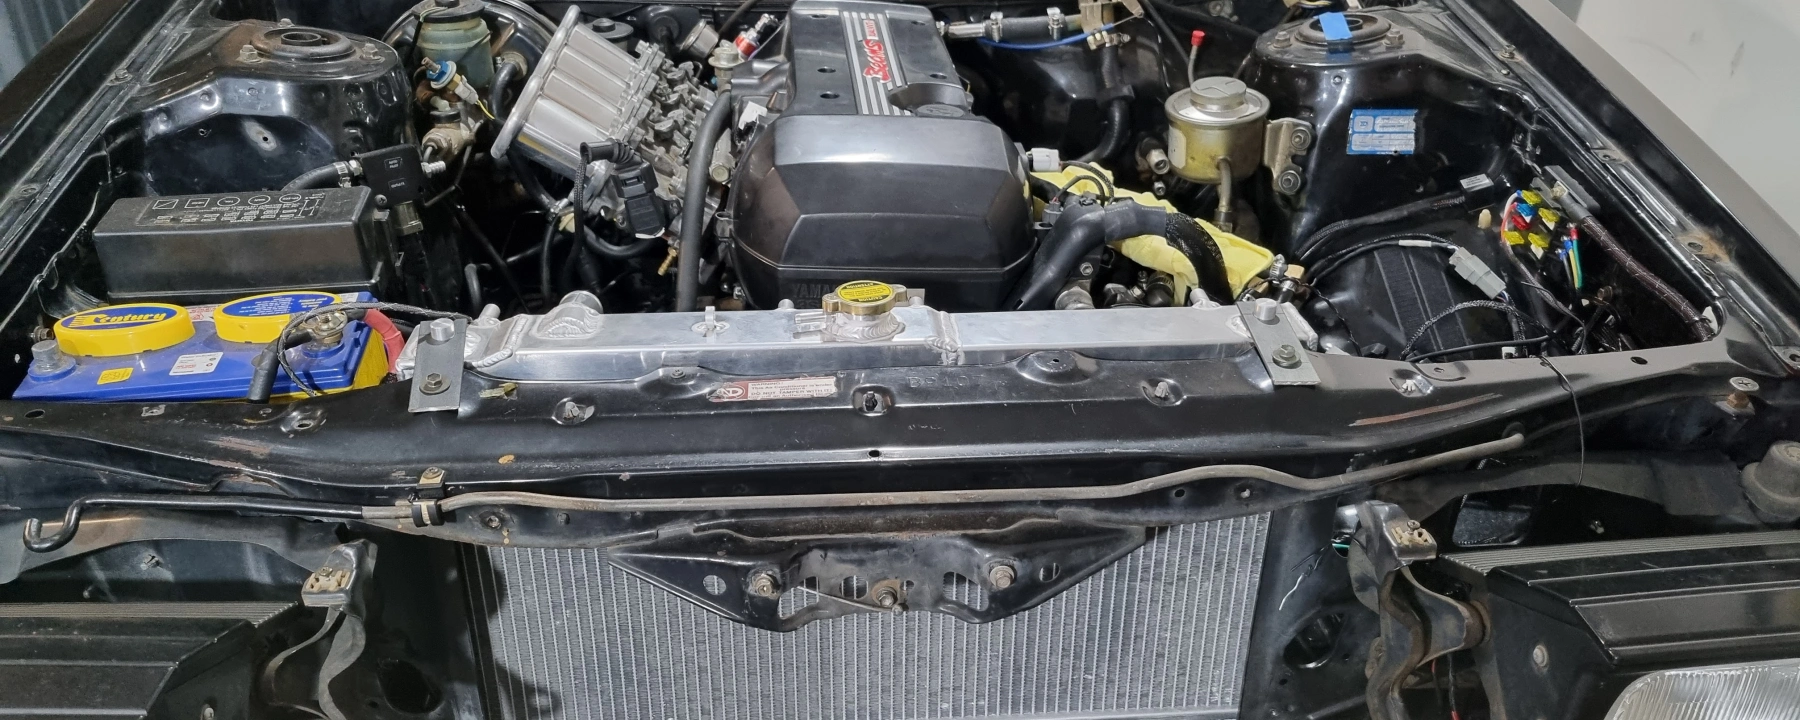
Removing the stock radiator involves draining the coolant into a suitable pan (be sure the engine is cool first), then unbolting the factory fan shrouds and unplugging the harnesses. Next, disconnect both upper and lower radiator hoses along with the overflow line. On NA/NB generations, a bracket typically secures the radiator at each side; NC/ND models often have a single top bracket. Once you have it unbolted, lift out the radiator, taking note of any leftover wires or hoses that might still be attached. Transfer rubber grommets or mounts to the new radiator if necessary, then check the thicker core for clearance around AC lines or intercooler piping. Secure it in place following the manufacturer’s torque specifications, and reconnect the radiator hoses with fresh clamps to avoid future leaks.
Upgrading Fans and Shrouds
Although stock Miata fans can keep a naturally aspirated car cool in typical driving, they may not cut it if you’re dealing with high-output situations, like turbocharging or aggressive track sessions. Modern aftermarket fans pull significantly more air through the radiator, providing a big boost in cooling performance.
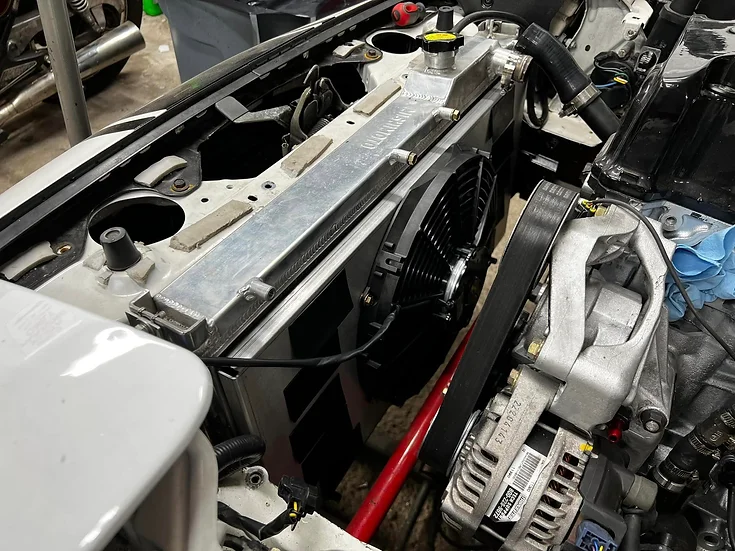
Installing upgraded fans typically involves attaching them to an aluminum fan shroud (if your kit includes one). Some setups use bolt-on hardware; others employ “zip-tie” style fasteners that run through the radiator fins. If you do the latter, remember to protect the radiator with foam pads. For wiring, you can tap into the factory harness or use a dedicated relay kit for high-current fans. The relay kit is especially handy if your fans draw more power than the stock wiring can comfortably handle. Always ensure there’s enough clearance around belts, piping, or AC lines once everything is installed.
Balancing Cylinder Head Temperatures
Because of the engine’s original front-wheel-drive design, the Miata’s coolant flow leaves the front of the head, leaving the rear cylinders at a slight disadvantage. A coolant reroute repositions the thermostat housing to the back of the head, closer to where it was in the original FWD design. Removing the OEM thermostat housing at the front is the first step. Once that’s replaced with a block-off plate, you can install the reroute housing at the back of the cylinder head. Some kits also include an inline thermostat that sits in the new path to the radiator. This change balances temperatures more evenly across all cylinders, which is especially helpful if you’re looking to prevent hot spots that can lead to engine wear or damage. While a reroute alone won’t solve all overheating issues, it’s an excellent addition to a suite of cooling upgrades.
Replacing Old Hoses and Checking for Leaks
Hoses are a common culprit in cooling system failures. Over time, rubber can degrade, becoming soft, swollen, or cracked, particularly around clamp connections. If your hoses show any sign of weakness, it’s better to swap them out than to risk a blowout on the road or track. Silicone hoses offer better longevity and can handle higher pressure and temperature, making them an ideal choice if you’re putting your Miata through its paces. They typically come in kits for the radiator, heater core lines, and bypass hoses, making it easy to refresh your entire cooling system at once.

Coolant Selection and Proper Filling
Coolant choice matters, especially depending on climate. A common mix is around 70% distilled water to 30% coolant for warmer regions, as water dissipates heat more effectively than antifreeze. In colder areas, of course, you’ll need to adjust that ratio to protect against freezing. Some track drivers use primarily distilled water with a corrosion inhibitor like Red Line Water Wetter, but you’ll want to avoid mixing that extensively with glycol-based coolants, as it can create sludge.
When refilling the coolant, elevate the front of your Miata if you can, and fill slowly through the radiator neck. Then start the engine with the heater turned on so the coolant circulates through the entire system. “Burp” the system by gently squeezing the upper radiator hose to release air bubbles. Watch your temperature gauge closely as the engine warms, and top off the radiator if the level drops.
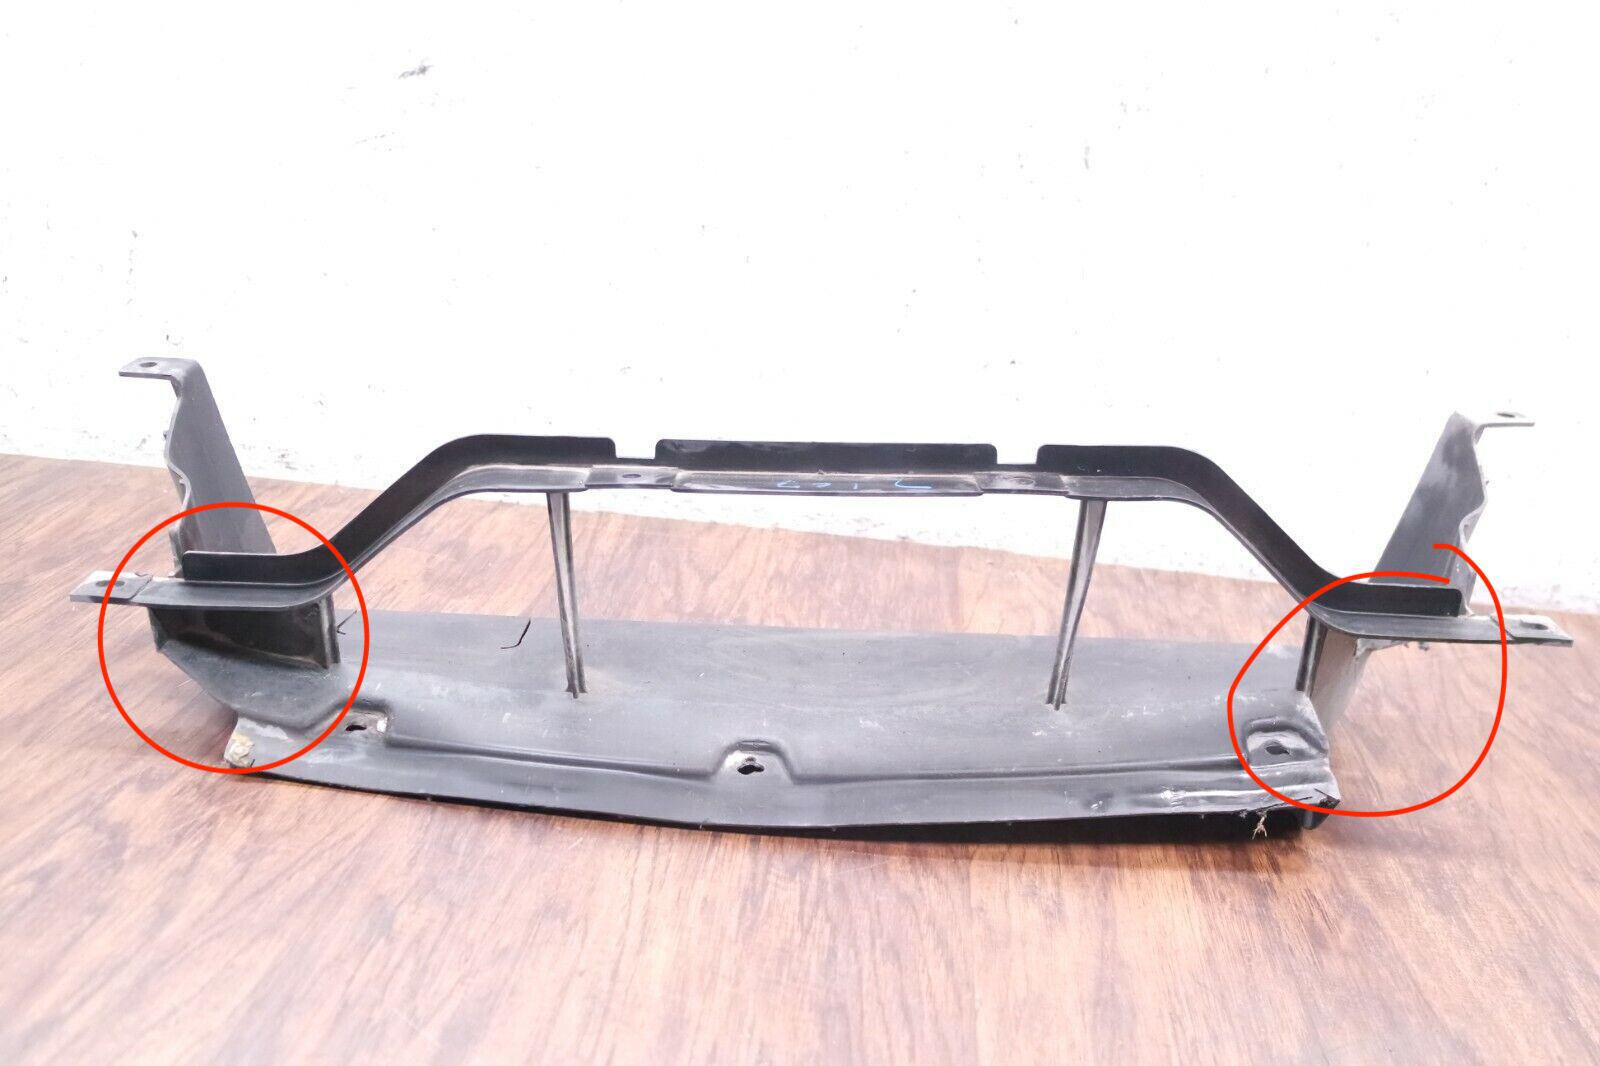
Radiator Splash Guard (Undertray) and Ducting
A surprising number of overheating woes stem from missing or damaged splash guards. These undertrays route oncoming air through the radiator instead of letting it flow underneath the car. If you no longer have your stock undertray, it’s wise to track down a replacement or consider making a DIY solution to ensure proper airflow. You can also seal any gaps around the radiator with foam weatherstripping or aluminum tape, especially between the AC condenser and radiator or along the sides of the core. Every step to direct airflow through the radiator instead of around it will help keep your Miata’s engine temps in check.
Testing Your Cooling Upgrades
Once your new radiator, fans, hoses, and reroute kit are in place, it’s time for a test drive. Keep an eye on the temp gauge as you take a moderate-speed drive around town. Periodically pull over to sniff for coolant or visually check for any leaks around hose clamps or at the base of your radiator. After letting the car cool, pop the radiator cap to ensure the coolant level is still where it needs to be. If everything checks out and the temperature remains stable, you’ll be ready for whatever summer traffic or track challenges you throw at it. For added peace of mind, consider installing an aftermarket temperature gauge or using an OBD-II scanner if your Miata supports it (NA/NB folks may need a fully aftermarket setup).
Maintenance
If your Miata is turbocharged or sees heavy track use, you should consider an oil cooler, particularly one with a built-in thermostat that bypasses the cooler on cold starts. This kind of kit helps manage engine oil temperatures and eases the overall thermal load.
It’s also smart to take care of routine fluid changes while you’re already under the hood. Stay on top of oil and filter swaps, and pay attention to the correct oil capacity, especially for older models like a ‘91 Miata. Finally, proper tire inflation doesn’t directly cool your engine, but it reduces rolling resistance and engine strain, which can help keep temps down during spirited driving.
Controlling your Miata’s engine temperature means looking at the entire cooling system, from the radiator and fans to the reroute kit and hoses, right down to the undertray and coolant mix. Any Miata, whether stock or boosted, needs a healthy, efficient cooling system to keep up with summer driving or repeated track sessions. By upgrading critical components and paying close attention to maintenance, you’ll transform your Miata from a fun little roadster with potential overheating quirks into a dependable performer ready to handle the hottest days. Regular checks will help you stay ahead of problems, letting you enjoy the open road or the racetrack with confidence and a big grin on your face.


