
DIY NA Miata Interior Overhaul
Tackle your Miata’s interior in one focused weekend. Strip it down, treat any rust, lay sound deadening, and reinstall fresh carpet for a tighter, quieter cabin.


This is a complete, DIY guide you can knock out over a weekend. You’ll strip the interior, deal with any crusty spots, lay proper sound deadening, refresh the carpet, mount better-fitting seats, and give the cluster a clean facelift, without turning the car into a never-ending project.
Scope, Safety, Tools, and Sequencing
Plan on two solid days. Day 1 is for stripping the interior, assessing and treating rust, laying your constrained-layer damper (CLD), and doing a dry mock-up of the new carpet. Day 2 is for final carpet install and trim, dialing in the seat position, and customizing the gauge faces and lighting. Late NA models can have driver and passenger airbags, so disconnect the battery (negative first) and let the system power down for at least ten minutes before touching any SRS connectors. If the airbag light is on, sort that out first by pulling and clearing codes according to the service procedures.
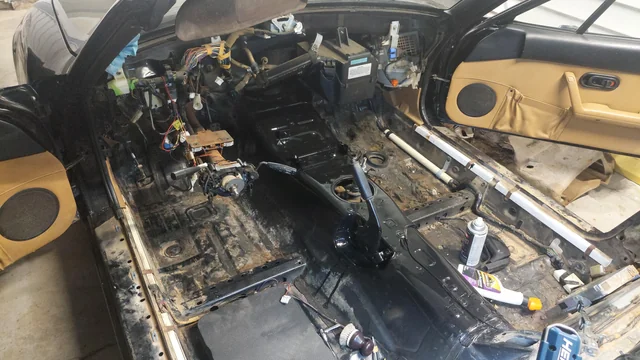
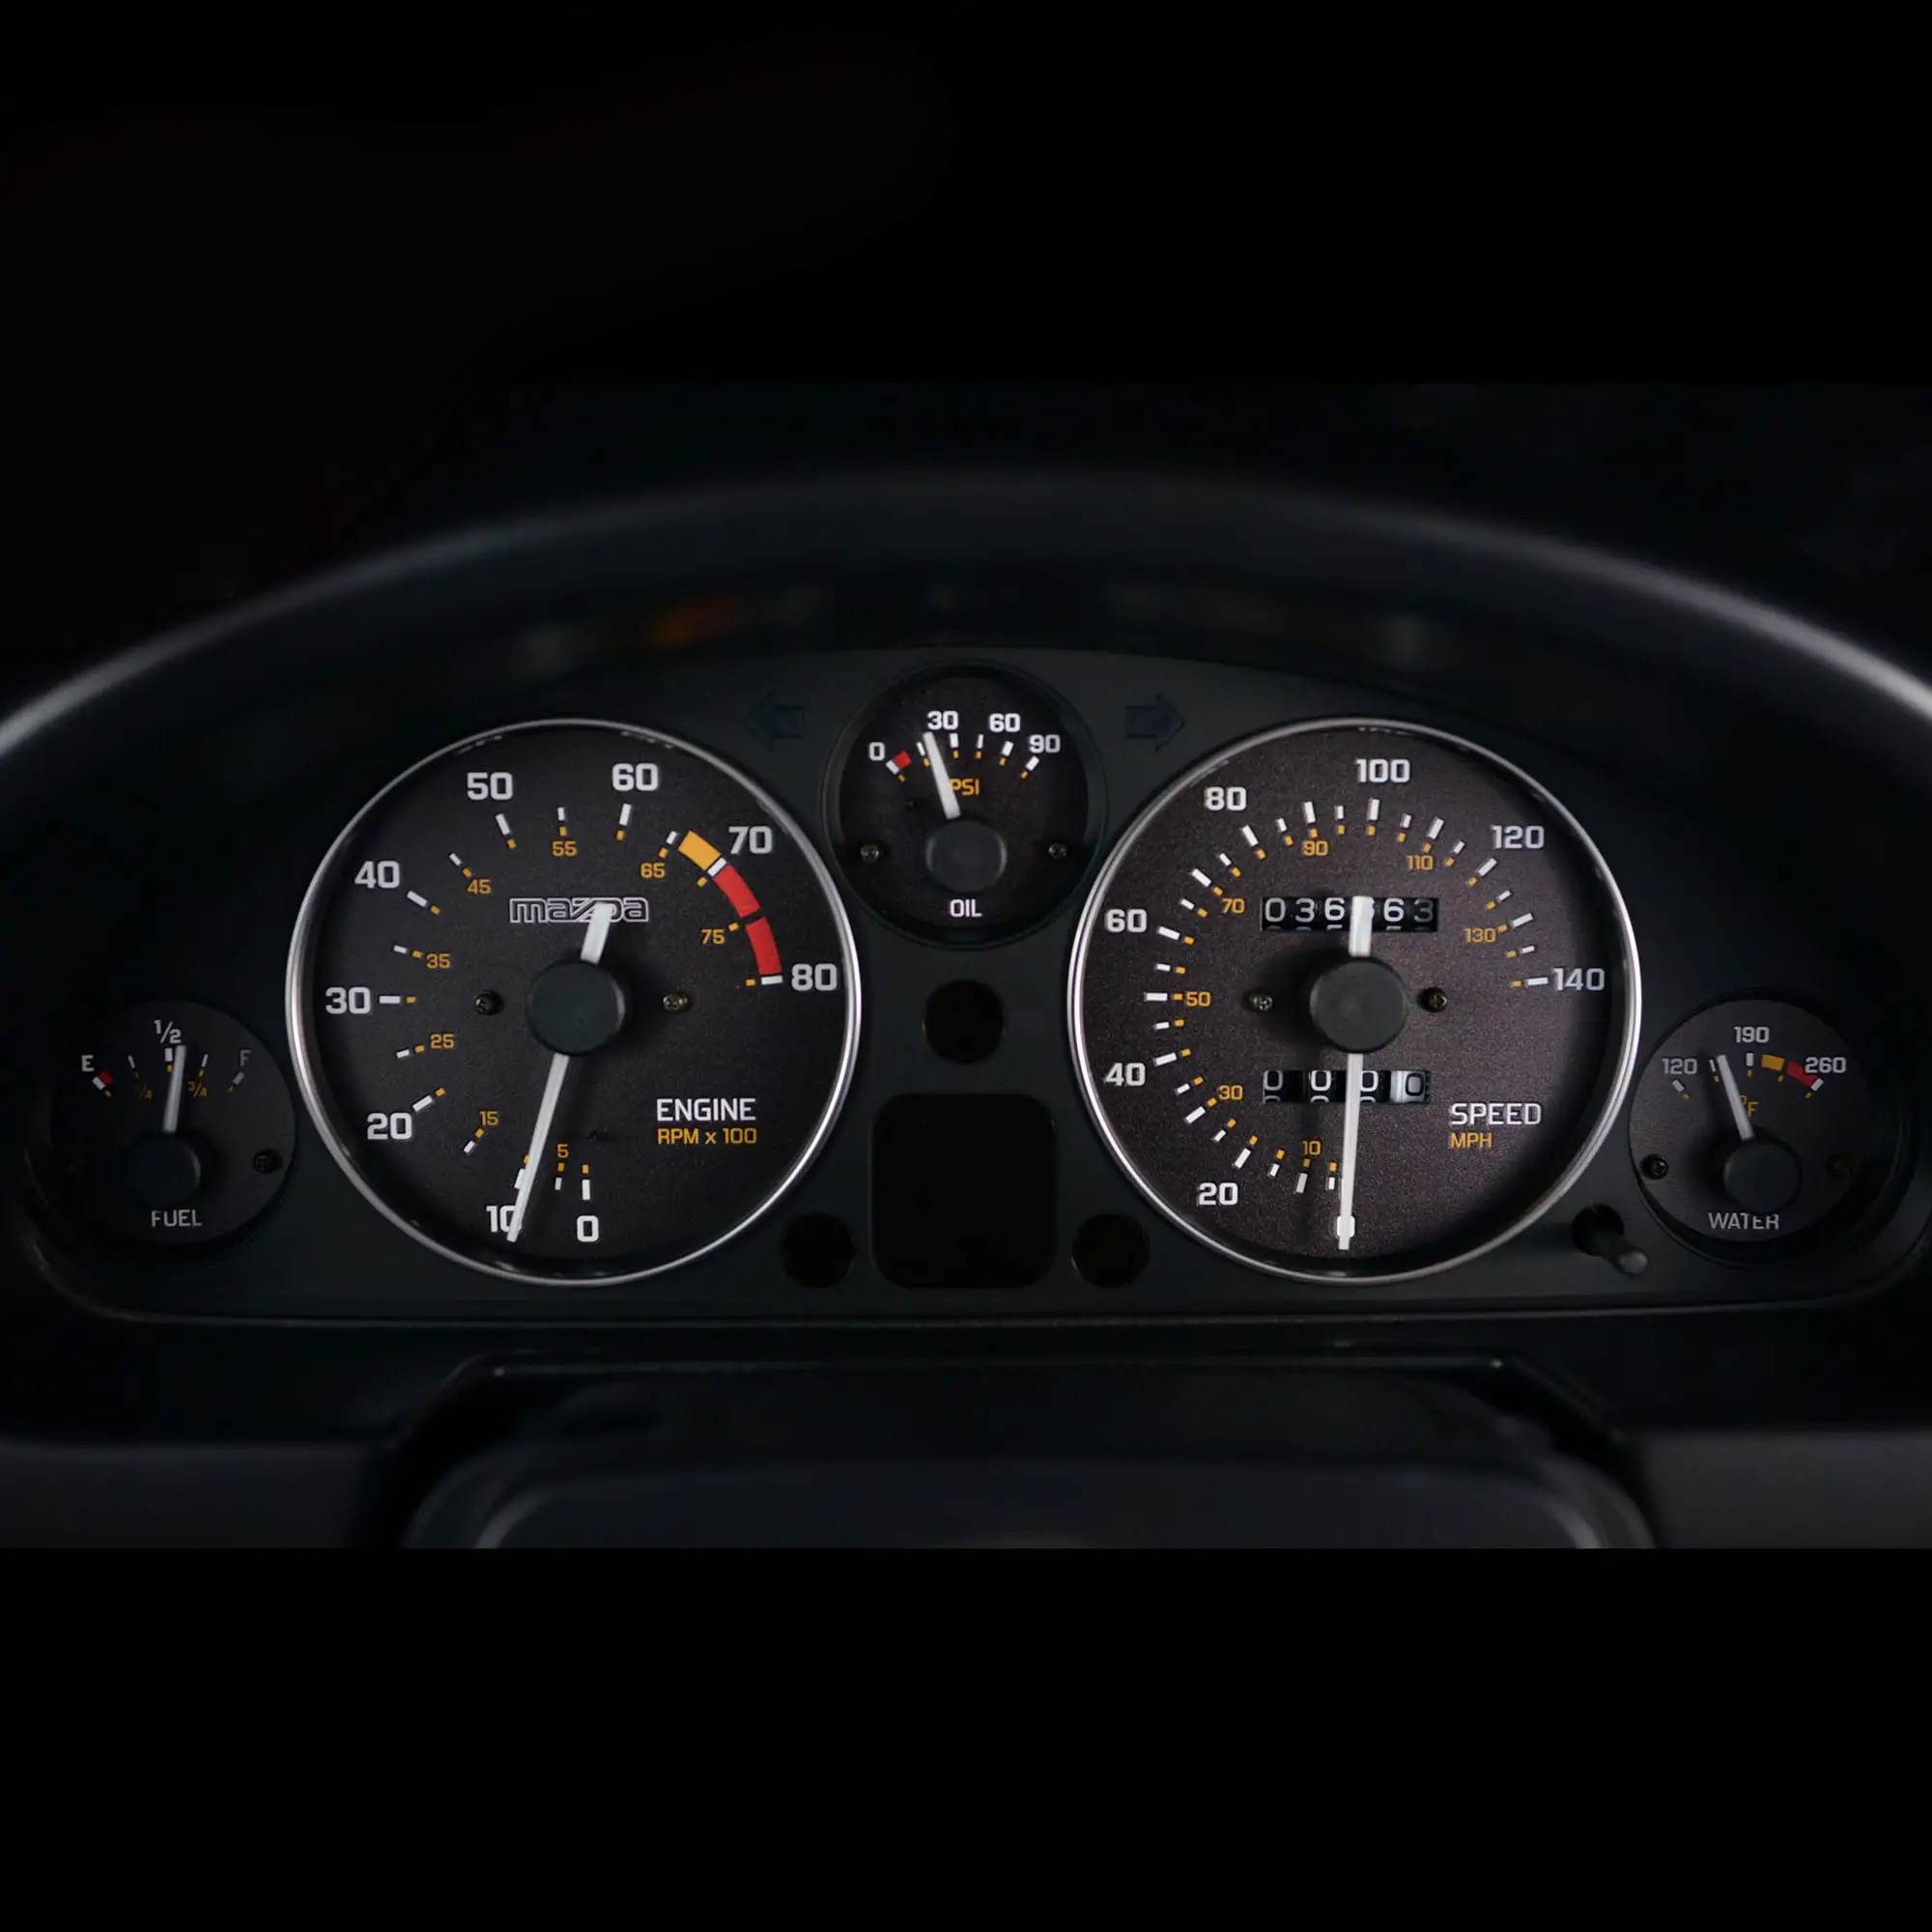
You don’t need exotic tools, just a socket set with 12/14/17 mm sockets and extensions, a torque wrench, plastic trim tools and clip pliers, Torx bits if needed, isopropyl alcohol and rags, a small panel roller for the CLD, painter’s tape, a sharp utility knife with spare blades, rust converter and primer, and plenty of plastic bags with labels for hardware. The initial strip-down is quick: pull the seats (four bolts each), belt receivers (watch for wires on later cars), sill plates, tombstone and HVAC/radio surround, center console, and the rear shelf carpet and panels. Before any gauge work, photograph cable routings and take a clear photo of the cluster with the key on so you can re-zero the needles accurately later.
Seats: Headroom, Support, and Real-World Fitment
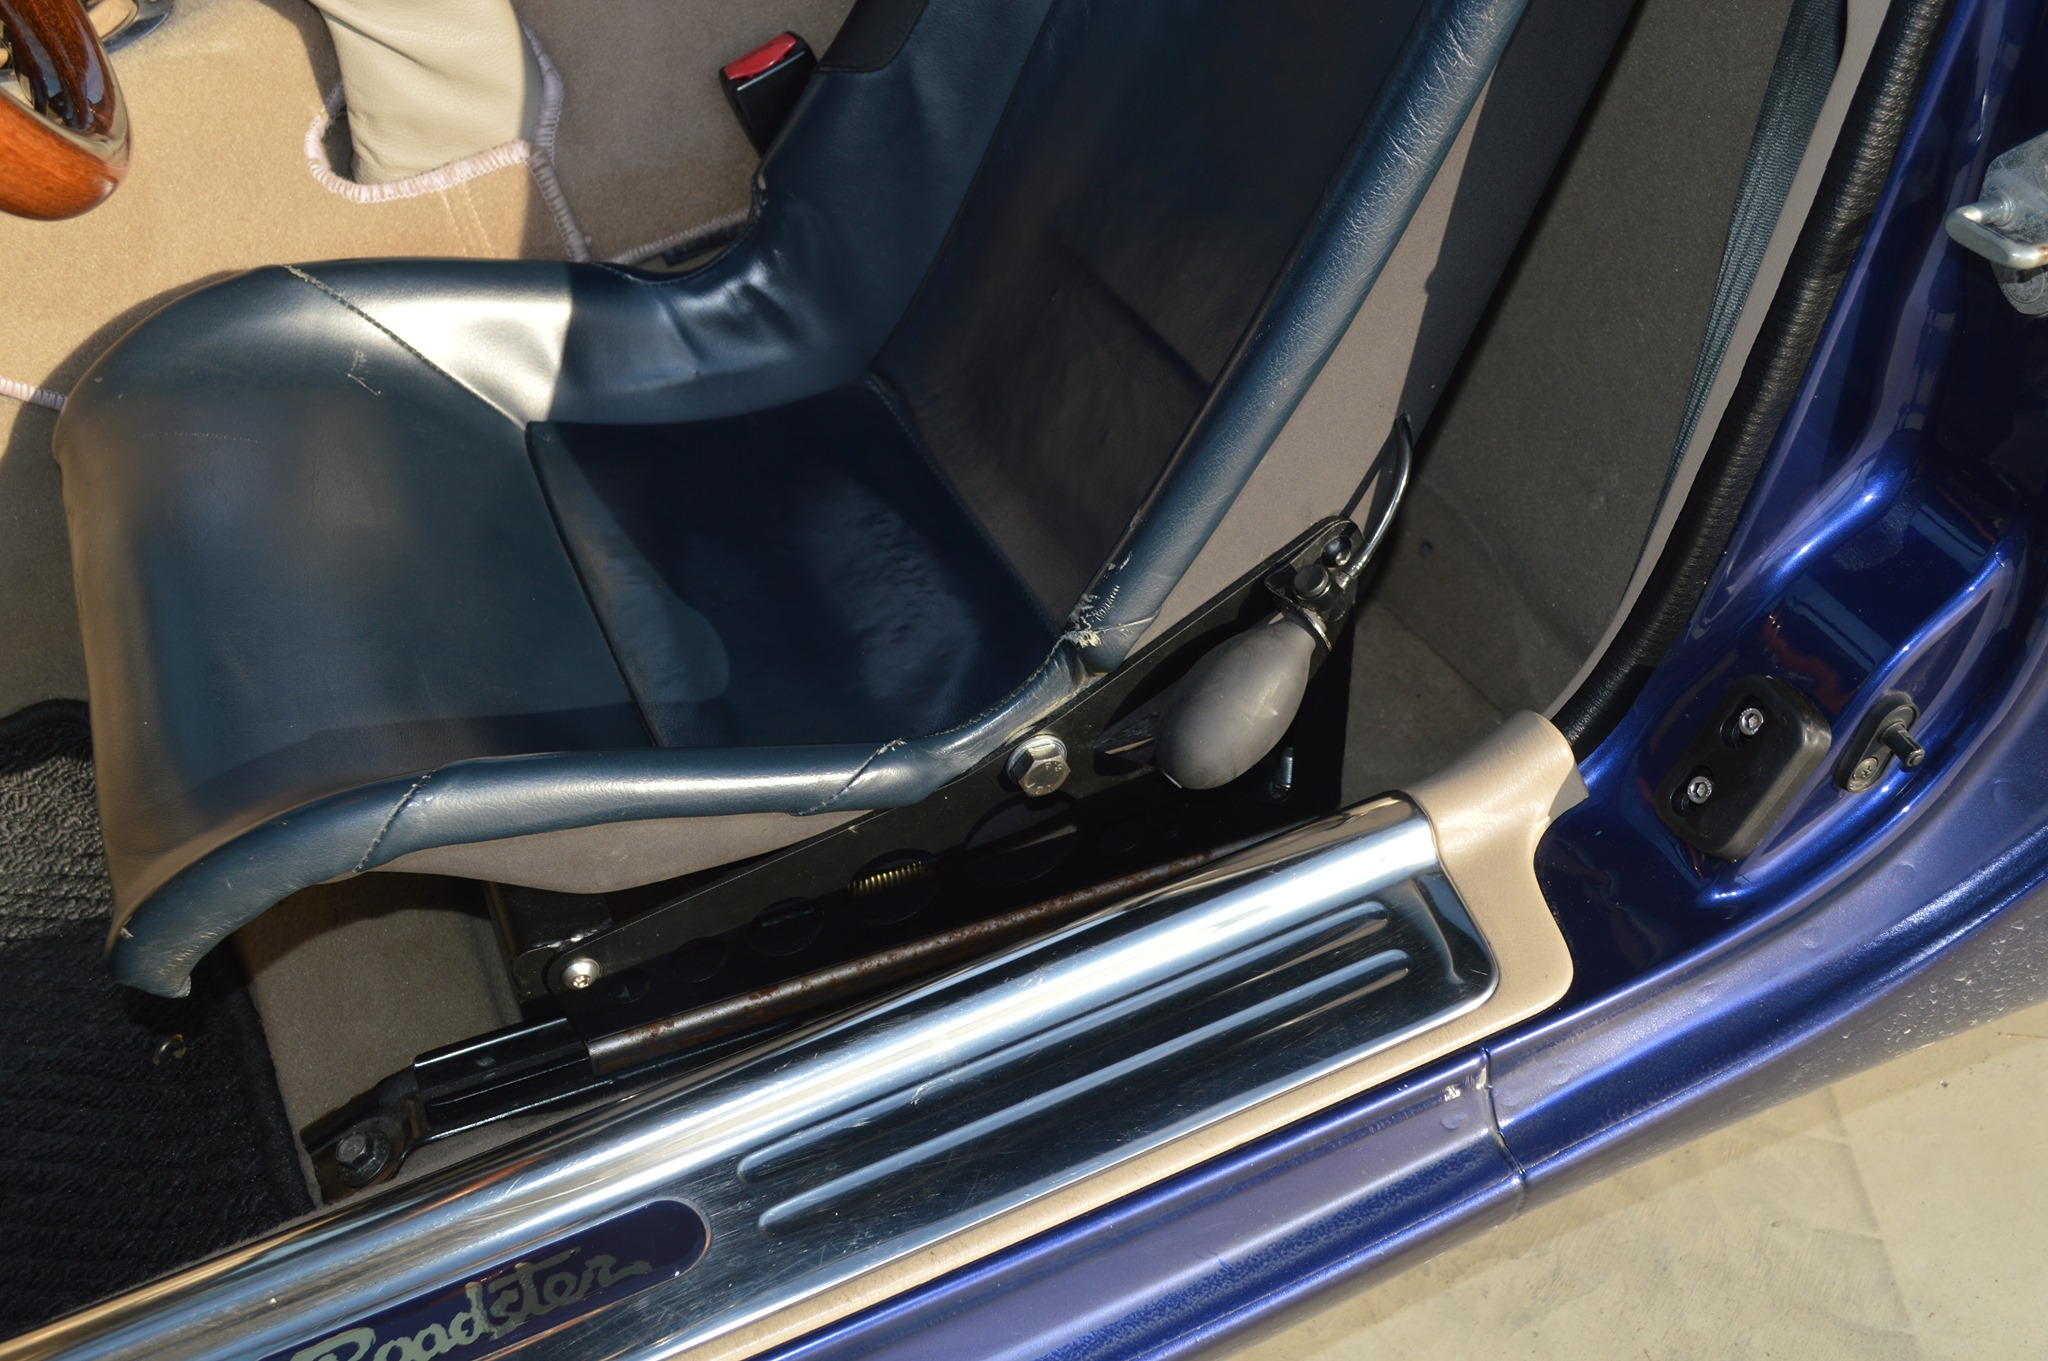
Start by deciding your path. The cheapest, fastest improvement is a foamectomy, removing a measured amount of foam from the stock seat cushion to lower your hip point and add a bit of contour. It’s reversible, costs nothing, and teaches you what you actually need. If you want OEM-plus, Elise/Exige seats on Miata-specific adapters give you a factory-ish look, real weight savings, and a much lower sit without going full race car. If you’re building for track time, a fixed-back bucket on a low mount delivers maximum helmet clearance and better belt geometry; just confirm shoulder and hip width against the tunnel and door card before you buy.
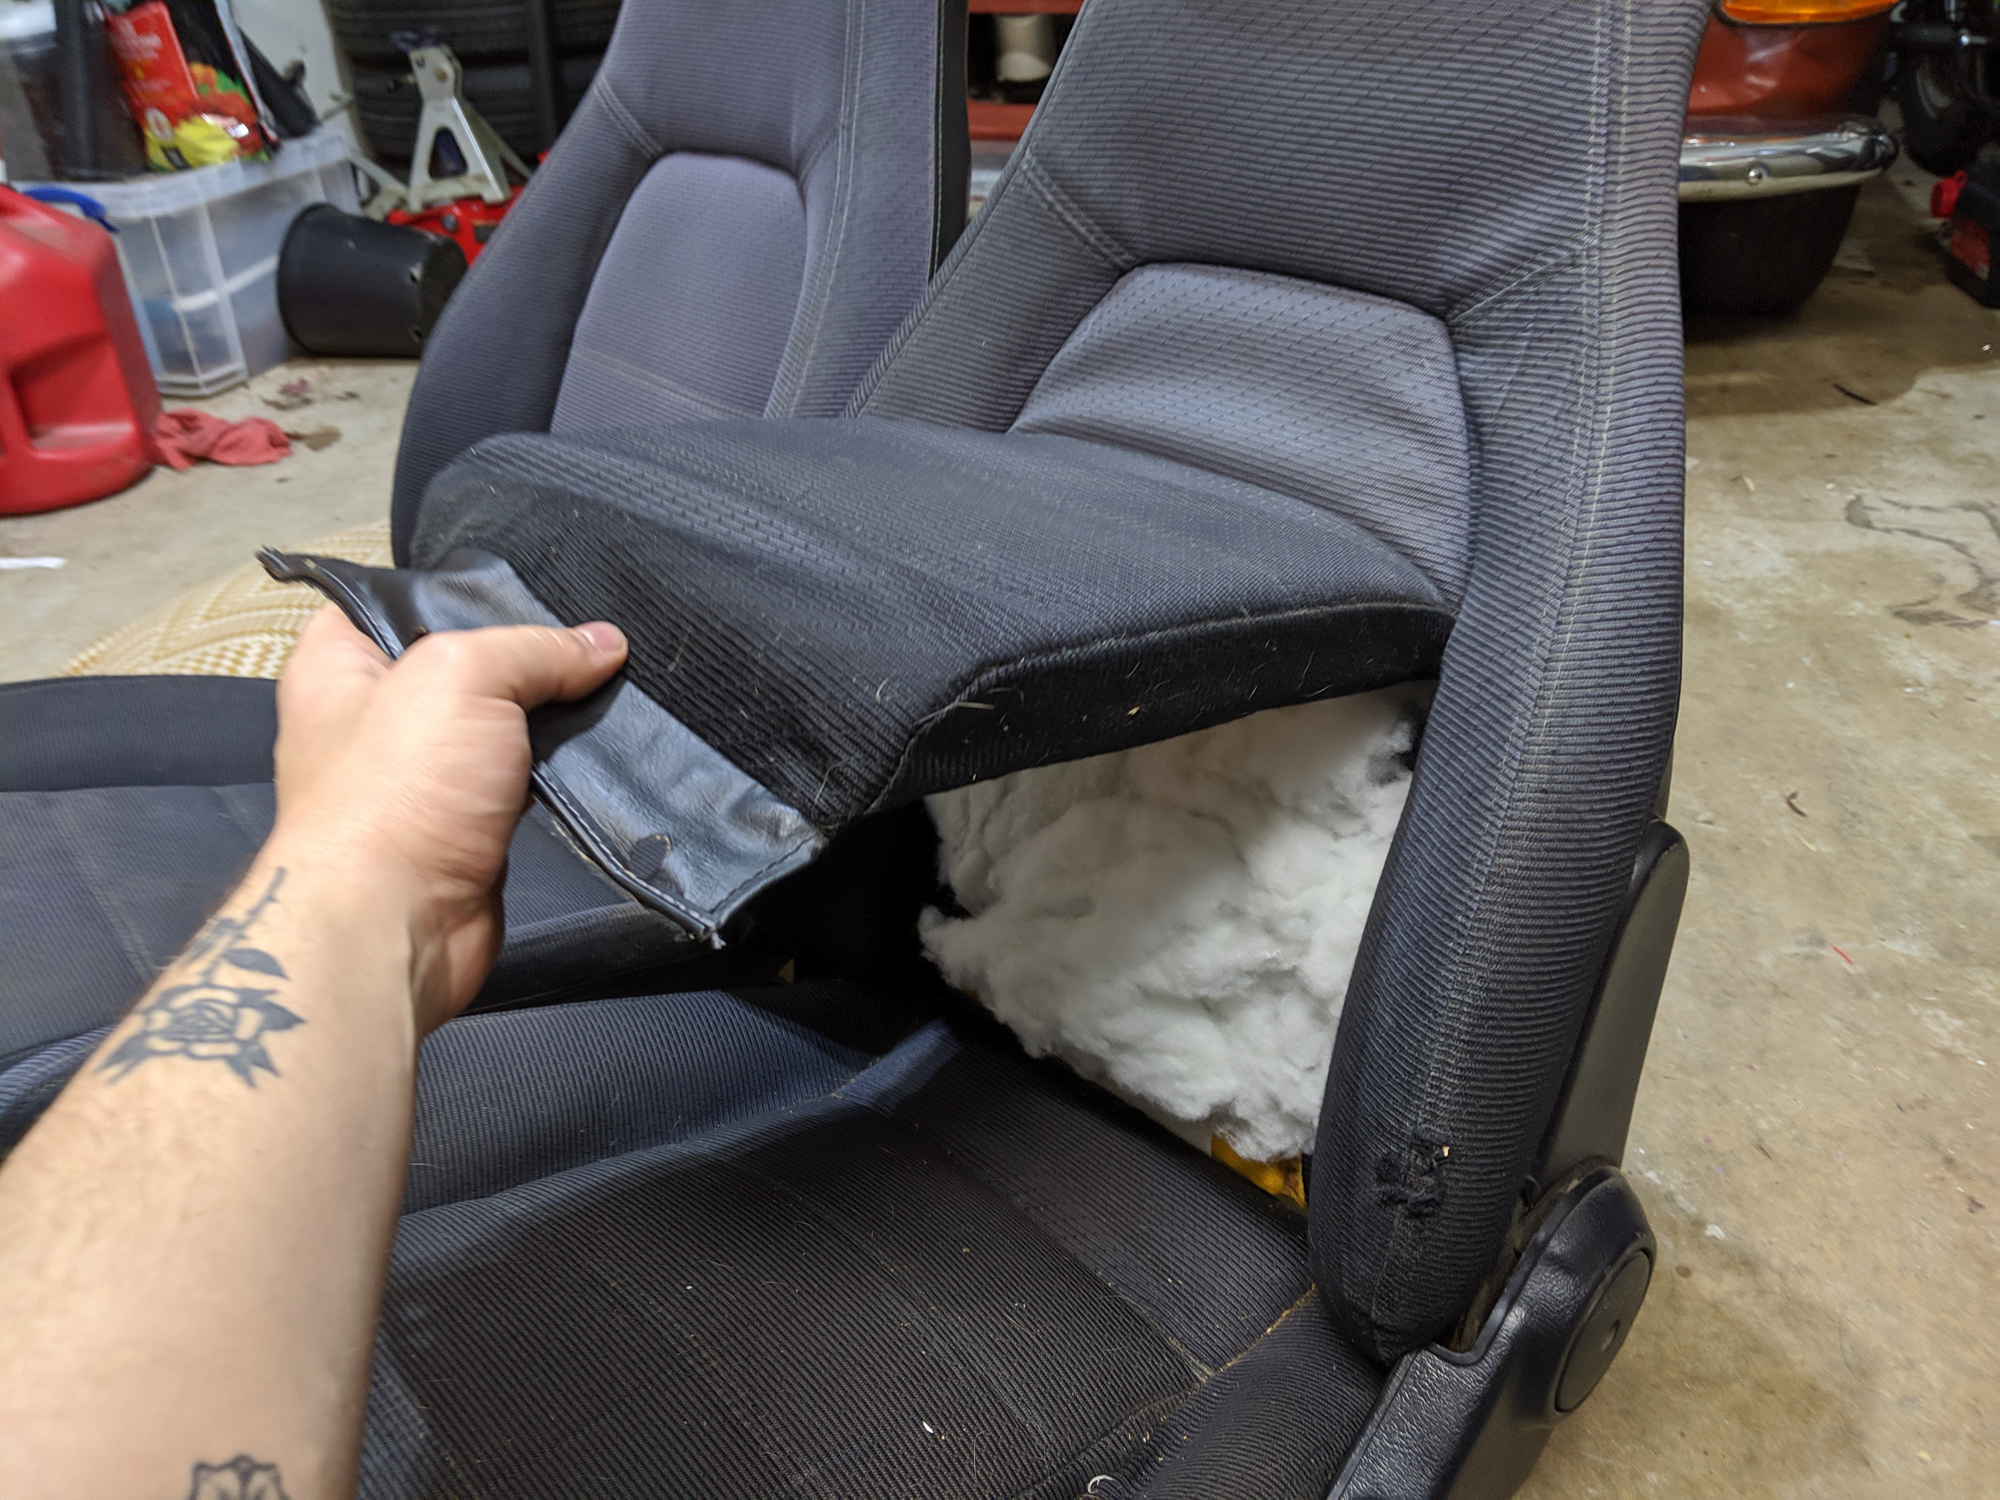
Expect some “tunnel massage” with the lowest mounts. The brackets sit on the factory floor humps, and many kits assume a little hammer-and-dolly persuasion at the forward inner ear so the mount sits dead flat. Touch up any bare metal with primer and paint afterward. When you install, center the seat to the steering wheel, not the tunnel, then verify full clutch travel and a clear sight line under your helmet if you’ll be tracking the car. Do your test sit before torquing hardware; a common ballpark for seat-to-floor bolts is around the high-20s to high-30s ft-lb, but always confirm with your factory manual. For street driving, keep the stock three-point belts unless you have proper rollover protection and a harness setup installed to motorsport standards.
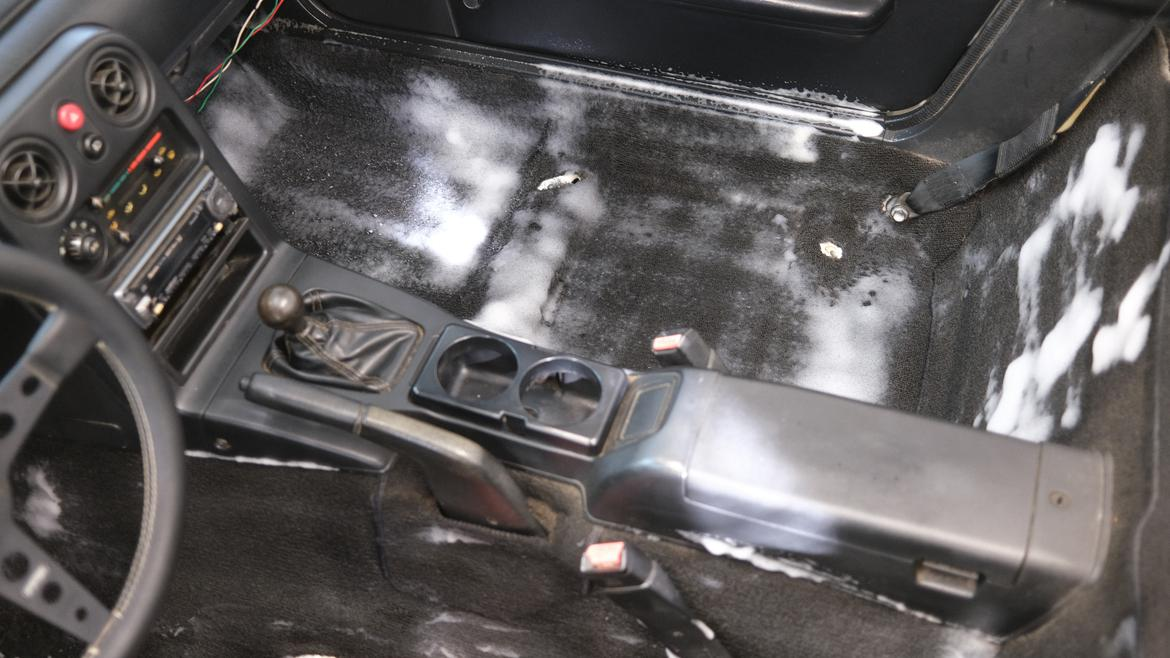
Carpets: Molded vs. One-Piece, Dash-In vs. Dash-Out
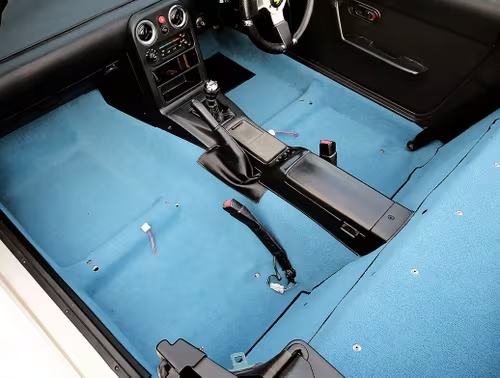
A good Miata-specific molded carpet is worth it. It’s formed for the tunnel humps and rear shelf, usually arrives with the holes you need, and is designed to install with the dash still in place. Most molded kits come in three pieces, left floor/tunnel, right floor/tunnel, and the rear parcel shelf, which makes life easier and gives you cleaner seams. Replace the crumbly factory jute with a dedicated underfelt kit while you’re in there; it adds plushness and a small but noticeable drop in noise.
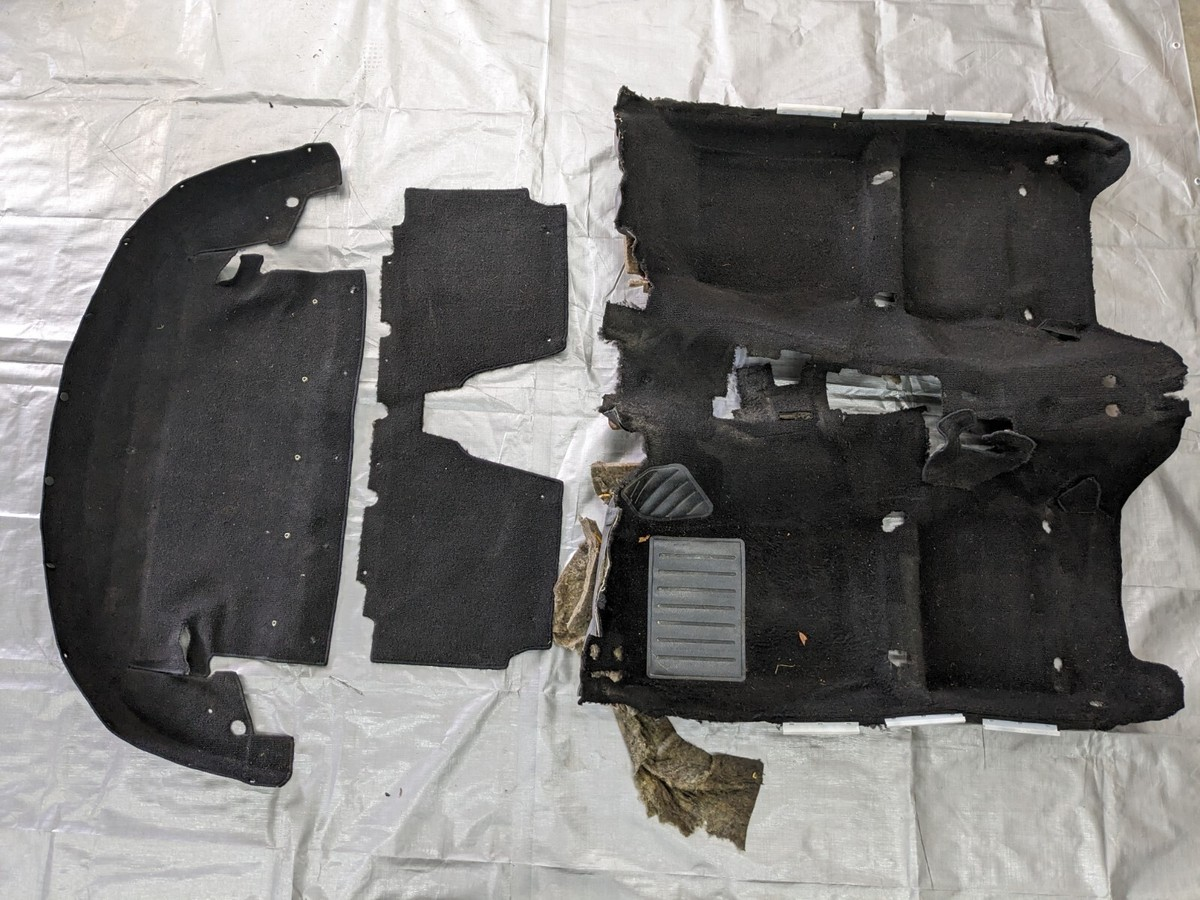
One-piece carpet or combined insulation kits sometimes tuck under the center stack, which can make a totally seamless swap a dash-out job. If you’d prefer to leave the dash alone, stick to molded, multi-piece kits. The flow is simple: strip the interior, peel up the old carpet and backing, treat any surface rust, and paint as needed. Dry-fit the underfelt first, then the rear shelf, then the main floor/tunnel pieces. Trim minimally at edges and bolt holes, follow the kit’s guidance on clips or adhesive, and cut holes from the back side with a sharp blade for clean edges.
Gauges and Lighting: Faces, Needles, and Bulb Sizes
Upgrading gauge faces is a satisfying finish to the cabin refresh. Premium NA face sets are laser-cut polymer with crisp, screen-printed markings and typically include needle pry tools and no-glue needle stoppers to help you re-zero accurately. For lighting, most clusters use 194/T10 for the main illumination and 74/T5 for the tiny indicators and HVAC backlight, but verify your year before ordering LEDs. Cool-white LEDs tend to keep numerals sharp; match polarity when you test.
The workflow is straightforward. Before you pull anything, photograph the cluster with the key on so you can note needle positions. Remove the tombstone and cluster, unplug carefully, and gently pry the needles using the supplied tools. Fit the new faces and stoppers, swap bulbs, and bench-test illumination before final assembly. Reinstall the cluster and trim, then check speedometer and tachometer accuracy on a short drive.
Pro Tips
Try the foamectomy first if headroom or thigh support is your main gripe; it’s free and makes your seat shopping smarter. Always dry-fit carpet pieces before committing adhesive, even if they’re molded and pre-cut. Concentrate CLD on the big, flat “drum skins” rather than double-layering; extra thickness rarely helps as much as smarter placement. Label every bag of hardware by zone so reassembly is painless. And treat SRS components with respect: battery off, wait for discharge, and never probe yellow connectors.
The Shortlist: Five Interesting Product Picks
PCI low mounts for NA/NB are among the lowest Miata-specific brackets and are a go-to when you need every millimeter of headroom. They commonly assume a small amount of tunnel massaging at the forward inner ear; done carefully and painted, the result is sturdy, low, and clean.

DCBE Tech Elise/Exige adapters let you bolt Elise-pattern seats to the factory sliders, keeping fore-aft adjustment while dropping the hip point dramatically compared with late-NB seats. It’s a classy OEM-plus route that saves real weight without shouting “race car.”
Molded carpet kits from reputable Miata suppliers come in three pieces, left and right tunnel/floor plus rear shelf, with pre-cut holes and dash-in instructions. Paired with a dedicated underfelt set, the cabin feels richer underfoot and a touch quieter without adding much complexity.
A premium 2 mm butyl CLD tile is the backbone of any Miata sound plan. Look for strong adhesion, a wide temperature range, and an automotive flammability compliance spec. On floors, the tunnel, and the rear shelf, it delivers the most noticeable reduction in resonance for the least effort.
Quality NA gauge faces, especially sets that include needle tools and no-glue stoppers, make the cluster look new again and keep re-zeroing simple. Combined with fresh 194/T10 and 74/T5 bulbs or LEDs, the cluster gains both legibility and a subtle, modern glow.
Follow the sequence, deadener, underfelt, carpet, seats, gauges, and the cabin will feel tighter, look fresher, and fit you better. Take photos as you go, label everything, and test-fit before you glue or torque. That patience is what turns a basic refresh into an overhaul you’ll be proud of every time you buckle in.


