
DIY Miata Audio System Upgrades: Transform Your MX-5 Sound System
Want better sound without losing that lightweight feel? Upgrading your NA/NB Miata’s audio system is the perfect OEM-plus mod. From sound-deadening to crisp new speakers and stealthy subwoofer installs, this guide helps you ditch the rattles and enjoy every note—top down or windows up.


Want your Miata to sing as sweetly as it corners? Upgrading the stock NA/NB audio setup is one of the easiest ways to add daily-drive joy without piling on weight or losing that OEM-plus look. This guide walks you through every stage, from sound-deadening to speaker swaps and stealth subwoofer options, so you can cruise with crystal-clear vocals and punchy bass instead of tin-can rattles.
Laying the Foundation
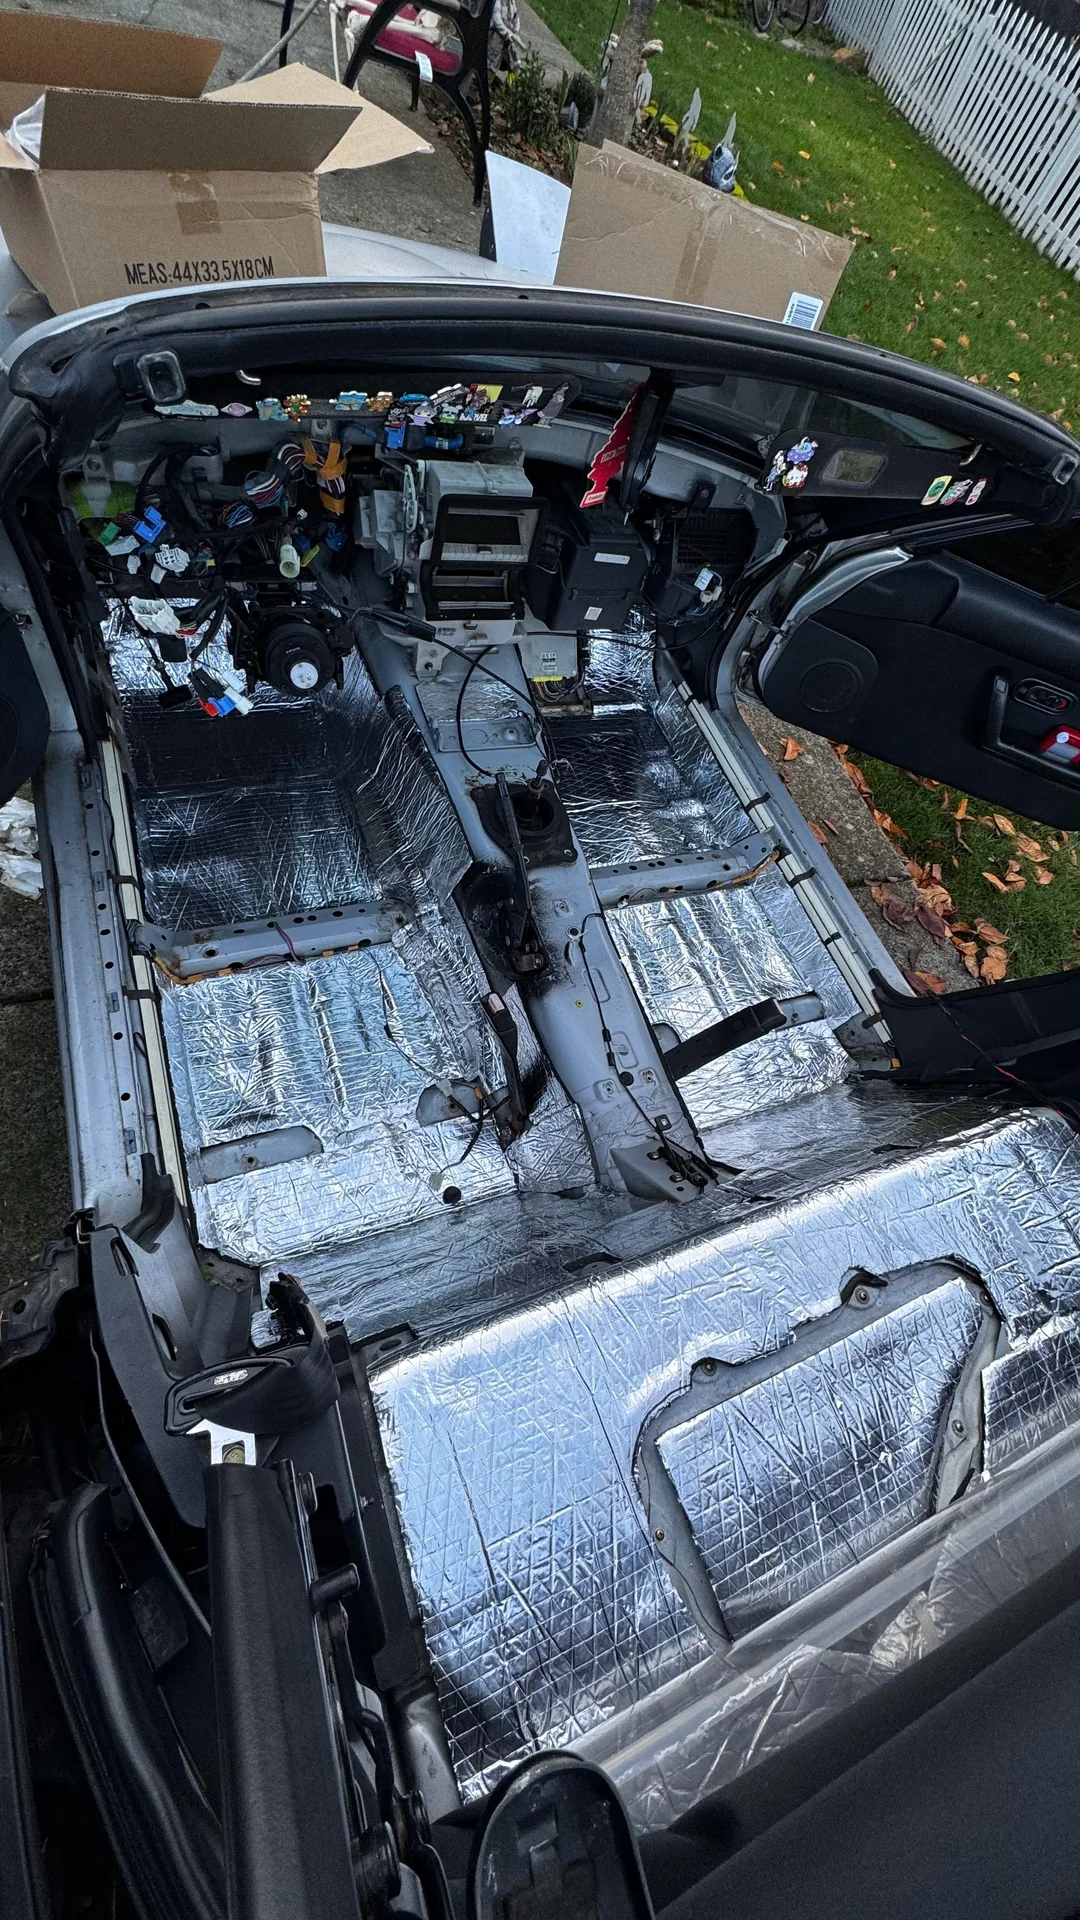
Before you even think about swapping speakers, treat the Miata’s metal shell like an empty drum and deaden it. Plan on a full weekend for first-timers. Pull the seats, door cards, rear parcel-shelf trim, and as much carpet as you can manage. Vacuum every nook, then wipe all exposed metal with isopropyl alcohol until the rag comes back clean, grime keeps butyl sheets from sticking. Cut 35–40 ft² of Dynamat, Silent Coat, or any reputable butyl mat into manageable patches; aim to cover about 70 percent of each large panel, because chasing 100 percent only adds weight without audible gain. Warm the sheets with a heat gun if the weather’s cool, press them into place, and roll them flat from the center outward to chase out air bubbles. Once the butyl is down, follow with a layer of 6 mm closed-cell foam on the broader surfaces and especially behind future speaker locations. Expect 10–12 man-hours if you’re meticulous, long, messy, but absolutely worth it.
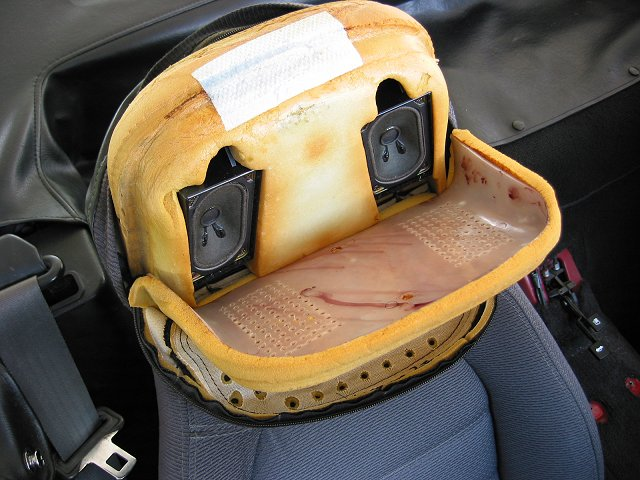
Upgrading the Headrest Speakers
NA and NB seats hide a pair of pint-sized drivers inside each headrest, and after two decades those paper cones are toast. Unzip the leather around the headrest insert, snip the melt-tabs or remove the tiny screws, and yank out the old drivers. Cut 12 mm ABS or birch rings to act as spacers, this lets modern 3.5-inch coaxials (Hertz DCX 87.3, for instance) sit flush without rattling. Bolt the new speaker through the spacer and the factory pod with M4 hardware, run fresh 18-gauge oxygen-free copper down the seat frame, and tie everything neatly with zip-ties so it never rubs on the springs. Wire the pair in each seat in series, bumping the impedance to a head-unit-friendly eight ohms per side. Finish by replacing the tired foam ring that supports the leather skin, zip it all closed, and label each seat “driver” or “passenger” so the bolsters end up on the correct side later. Budget half a day per seat if you’re careful.
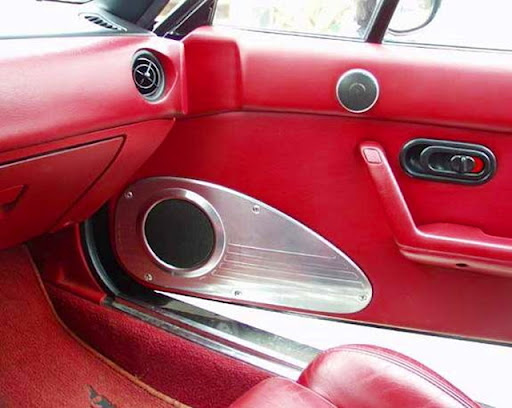
Door Speakers & Weatherproofing
Now that the cabin is hushed, it’s time for real firepower up front. A quality 6.5-inch component or coaxial set, think Focal EC 165K, Alpine Type-R, or Polk MM1, will slide into the Miata door with minor persuasion. Trace the speaker’s template on ¾-inch MDF or ABS, cut a spacer ring, and test-fit it to ensure the window glass clears when fully lowered. Seal the ring to the door’s inner skin with a thin bead of closed-cell foam tape, then add a silicone baffle to keep splash water off the cone. Because Miata doors like to leak, slit the bottom of the baffle so any trapped moisture drains away, and touch the exposed speaker tabs with dielectric grease to ward off corrosion. Wire with 16–18 AWG to wherever you’ll stash the amplifier. Hand-tighten the screws, MDF will split if you overdo it. A full day covers both sides, including panel cleanup and test fitting.
Bass Without Baggage
Miatas aren’t famous for cargo room, so choose one of two stealthy routes. Option A is a pair of 5-inch subs mounted in clear acrylic tubes that nestle on the rear parcel shelf: they stay invisible under the carpet and only rob a sliver of trunk height. Cut 140 mm outer-diameter Perspex tube to roughly 170 mm, epoxying 12 mm plywood end-caps and adding a Neutrik connector for quick disconnect. Stuff lightly with poly-fill to nudge the 0.9-liter internal volume toward the driver’s ideal. Option B is a powered 8-inch enclosure, Rockford’s P300-8P or Alpine’s PWE-S8, bolted to a small plywood riser in the passenger footwell. Run 10-gauge power wire straight from the battery, with a 30-amp fuse no more than eight inches from the positive post. Either solution takes only a few hours and unbolts easily when you need every inch of trunk space.
Hiding the Amplifiers
Tiny class-D amps are a godsend in cramped roadsters. A Pioneer GM-D1004 four-channel nestles behind the glovebox cross-bar with nothing more than heavy zip-ties through factory loom holes. For the sub, a GM-D110 mono amp slides in front of the fuel-tank bulkhead and wedges snugly once you add a thin EVA foam pad, no drilling required. Run battery power down the driver’s sill inside corrugated conduit, snake RCA signal cables down the passenger side to avoid noise, and cross the car at the rear bulkhead. Ground each amp to a scraped-clean seat-belt anchor using the same gauge as the feed. Keep wiring neat with cloth tape every six inches so nothing buzzes against the body.
Dialing in the Details
A modern double-DIN or single-DIN mech-less deck with built-in DSP transforms the system. Solder a Metra 70-7901 harness so the factory plugs stay intact and flash the latest firmware before reassembly; many Bluetooth quirks vanish after an update. Start with basic crossover points: set the sub low-pass at 80 Hz, high-pass the door mids at the same 80 Hz, and keep the headrest drivers high-passed around 150 Hz. Measure ear-to-speaker distances in centimeters and feed them into the deck’s time-alignment menu, yes, it actually matters in a tiny cabin. For gains, play a 0 dB 1 kHz sine wave, crank the deck to 75 percent volume, and tweak the amplifier gains until a multimeter shows the correct RMS voltage for your target wattage; then back them off a hair for headroom. All told, four leisurely hours will see your dash back together and tunes playing.
What Two Weekends Really Cost
Expect to spend roughly $1,300 on hardware and around 32 hours of labor if you’re fussy. The sound-deadening soaks up the most elbow grease, followed by door-speaker fitment. Subwoofer choice swings the budget $150 either way, but everything else is fairly fixed: about $200 for headrest upgrades, $350 for premium door drivers, $260 for two compact amps and wiring, and $150 for a solid head unit and fascia kit. If you split the work into two long weekends, stripping and deadening first, hardware the next, you’ll keep your sanity and your back muscles intact.
Common Pitfalls
Skipping deadening is the number-one rookie error; even a $600 set of Focals will sound thin and buzzy if the panels ring. Copper-clad aluminum wire saves pennies but overheats, corrodes, and drops voltage, go all-copper. Always scrape the paint under ground lugs or you’ll chase mystery noise forever. Mark every positive lead red before you solder; a single reversed driver kills bass. And finally, resist the urge to bury wood screws with an impact gun, MDF and ABS only need snug, not brutal.
After reassembly, slam each door firmly; silence means success. Take a top-down highway blast at 100 kph with volume hovering near 70 percent. Vocals should stay clear, bass should stay punchy, and nothing should rattle. Feel the amp heatsinks after thirty minutes, warm is normal, too hot to keep a finger on suggests gain or airflow problems. Finish by hosing the window beltlines and checking for water behind the door card; reseal the vapor barrier if you see a single drop near your new speakers.
When that first chorus drops and the dash doesn’t buzz, every hour of rolling sticky butyl and crimping terminals will feel justified. A Miata is already a grin factory; now it finally has the soundtrack to match. Cue up your favorite playlist, crack the throttle, and enjoy the best-sounding wind-in-the-hair drive you’ve ever had.


