
CFD 101 for Miata Aero: Spoilers, Diffusers & Skirts
A practical CFD playbook for NA–ND MX-5s: how to model, what to sweep, and turning plots into corner speed. Anchor Cd (stock mid-0.3x; modded ~0.39–0.52). Prioritize balance—small rake/ride-height changes and rear devices can shift ~0.5° and move aero a lot. ND RF glass/buttresses alter local Cp.


A practical CFD playbook for NA–ND MX-5s, how to model, what to sweep, and how to turn plots into corner speed
Before you bolt virtual aero onto a Miata, anchor your expectations. Stock cars typically sit in the mid-0.3x Cd range depending on generation and trim; track-biased add-ons often trade drag for downforce and can nudge Cd into the 0.4x band. Community coast-down and tunnel reports on modified Miatas commonly span roughly 0.39–0.52, which is a good “sanity window” for your baseline and your “after” cases. Balance matters as much as raw numbers: Miatas are sensitive to small rake and ride-height changes, and a rear device can shift rolling rake by around half a degree, enough to move aero balance more than you’d expect. If you’re working with an ND RF, remember the buttresses and greenhouse details change local pressures compared with a soft-top, so don’t over-read Cp differences around the rear pillars and A-pillars.
CFD setup that works on Miatas
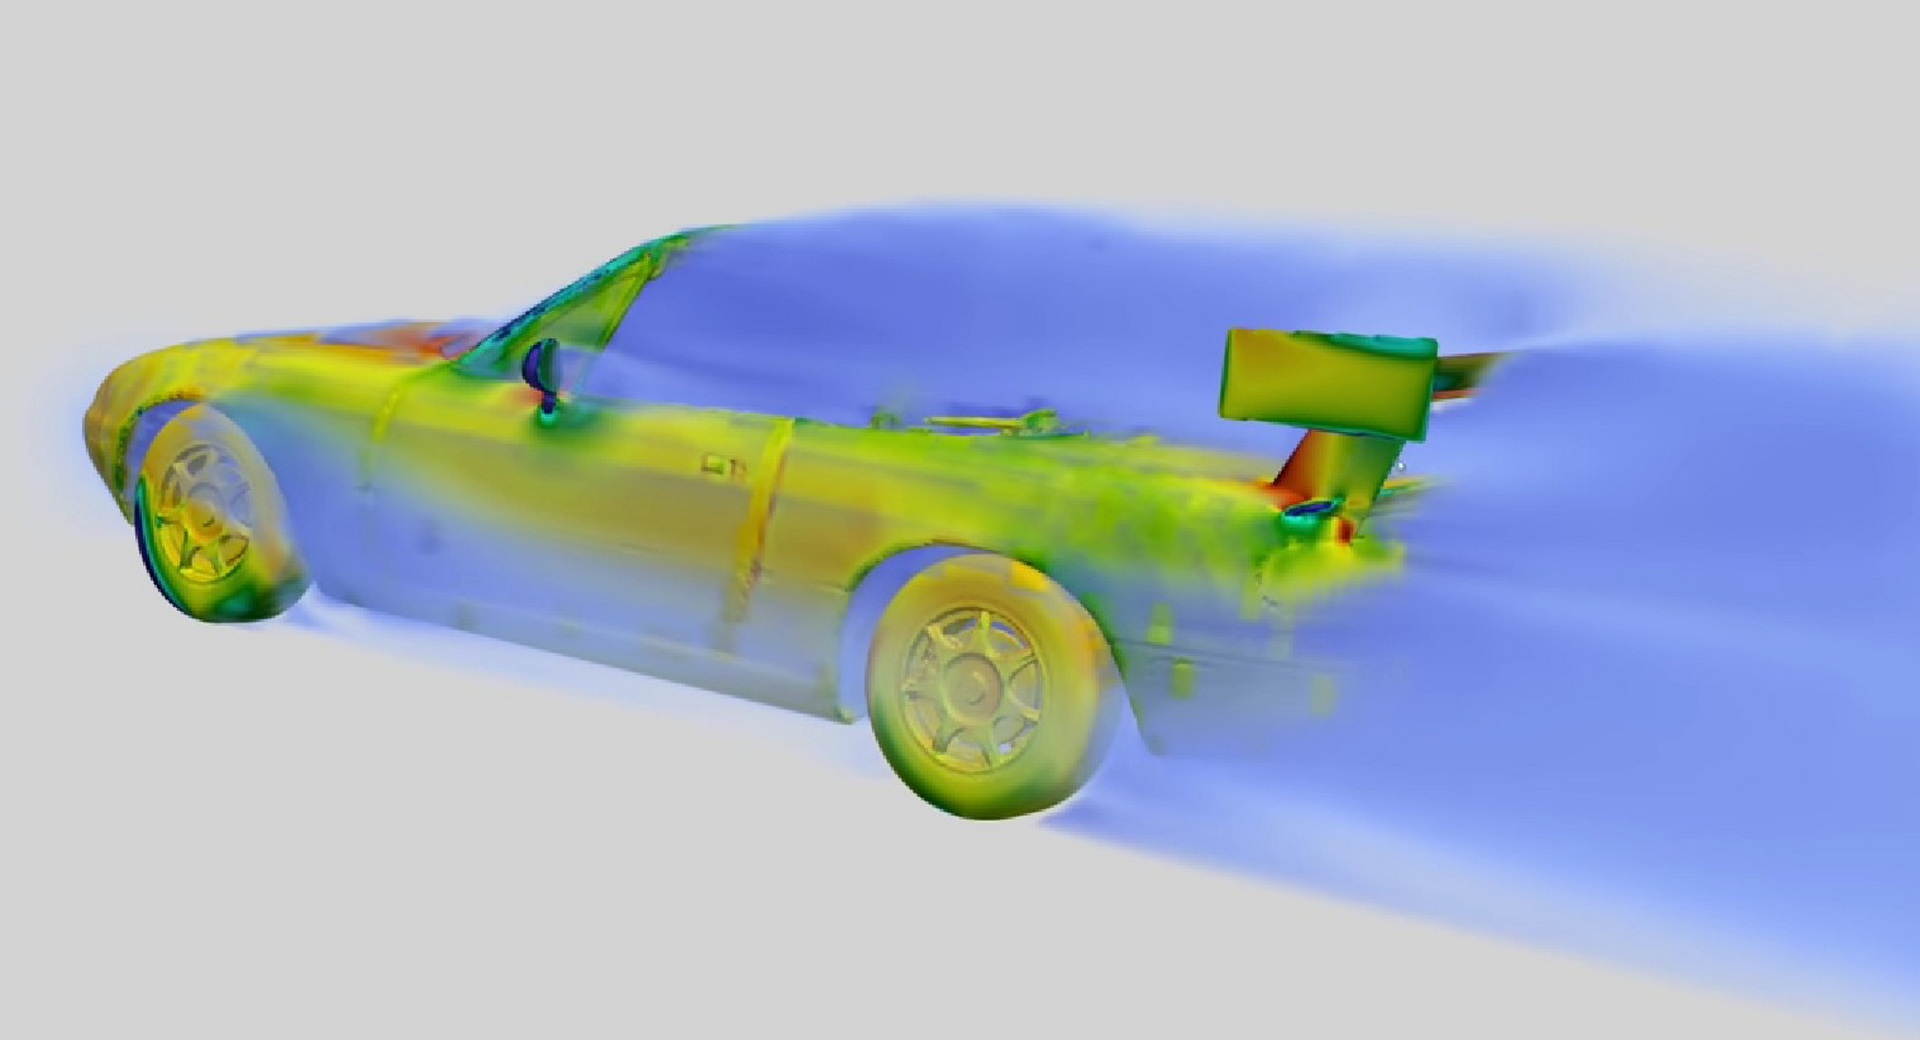
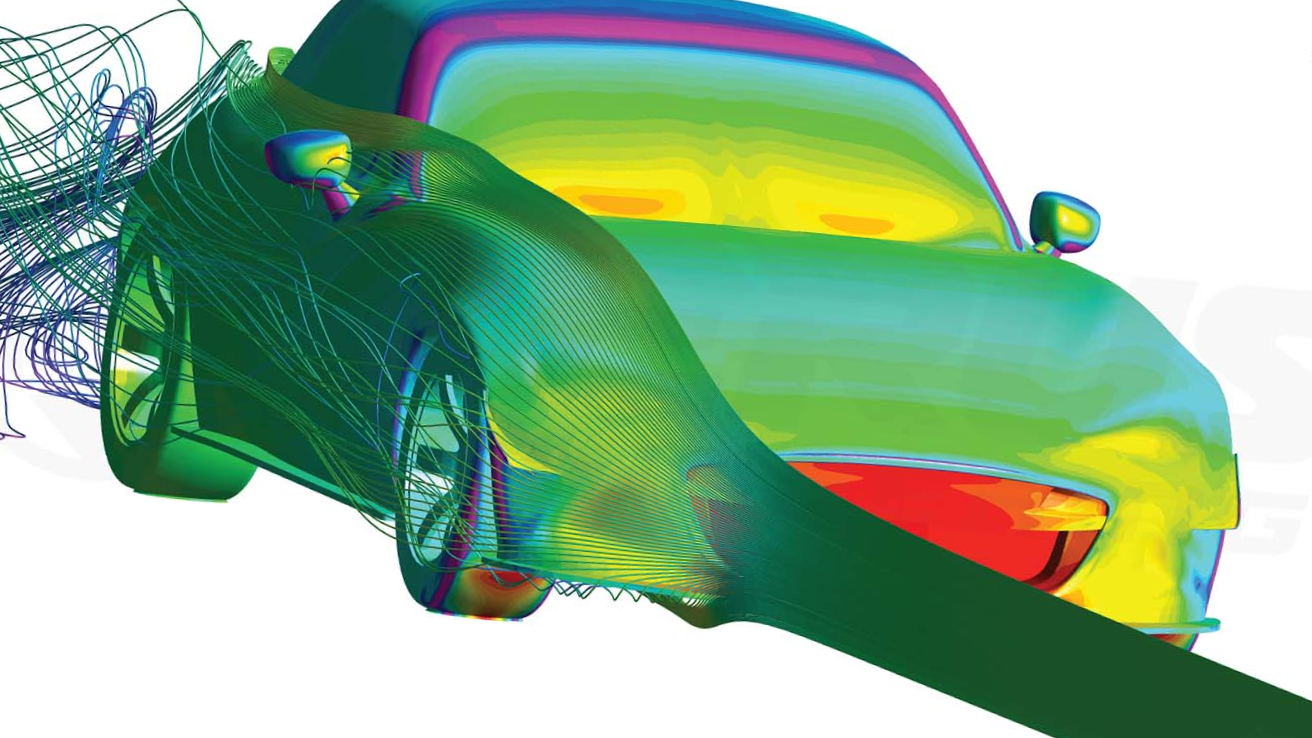
Start with steady RANS using the k–ω SST model. It’s a robust first pass for separation-prone bits like spoilers, the rear bumper, and diffuser entrances, and it gives you a practical path to grid independence before you escalate to hybrid DES/LES studies. For the underbody and diffuser, either resolve the viscous sublayer with y+ near 1 or commit to proper wall-function bands; parking in the gray zone will muddy your conclusions. Use a moving ground and rotating wheels, the wheelhouses dominate sill leakage and underbody energy, and your diffuser results will be night-and-day different if the wheels are static. For a Miata-sized domain, place the inlet at least three car lengths upstream, the outlet eight to ten downstream, and keep at least three car widths/heights to the side and ceiling boundaries. Track residuals and force histories, then re-run your best case on a finer mesh and publish both to prove grid independence.
What to measure (and how to report it)
Report drag coefficient (Cd), total lift coefficient (Cl, with downforce as −Cl), front and rear axle Cl, and aero balance as the front share of total. Normalize forces with dynamic pressure and reference area so anyone can reproduce your numbers. Efficiency belongs up front in your tables, use L/D or −Cl/Cd to compare spoilers, wings, diffusers, and combined packages. For visuals that actually tell the story, include Cp maps on the deck, floor, and diffuser ramp; velocity and total-pressure deficit slices in the wake; and a vortex-ID plot (Q-criterion or λ2) to reveal sill, strake, and bumper-edge structures.
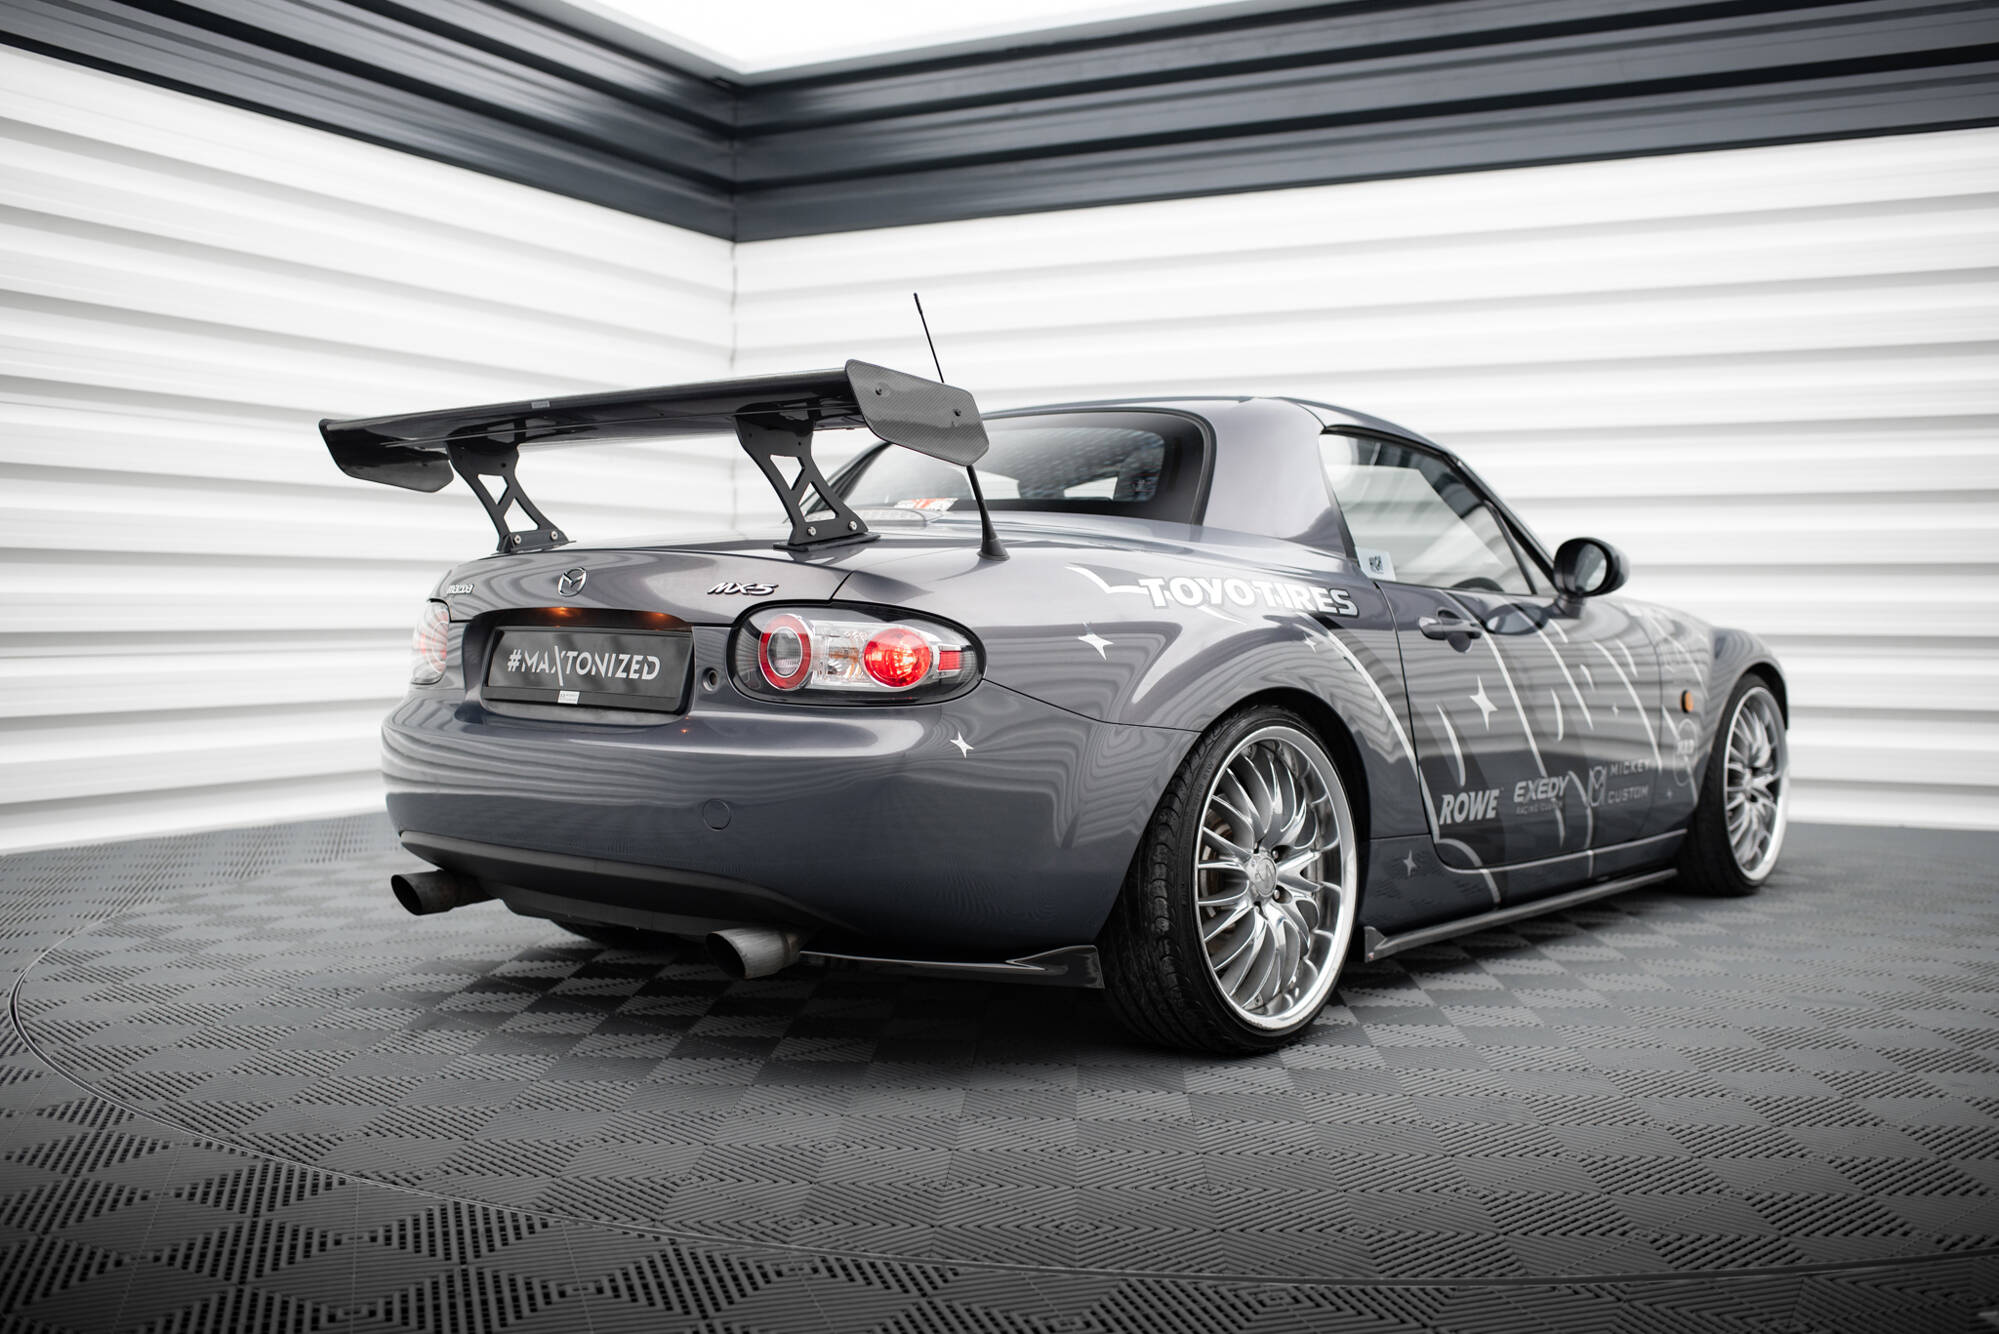
Spoilers on Miatas
Think of a spoiler as a pressure-side device: it trims rear lift by raising local pressure on the deck and shifting base pressure in the wake. Expect meaningful rear downforce with some drag penalty. Wings typically beat spoilers on efficiency, but spoilers are simple, light, often class-legal, and easy to package on a street car. In CFD, sweep height, angle, and deck setback. Watch rear-deck Cp, wake base pressure, Cl_rear, and whole-car balance. The “good street” picks usually sit at modest height and angle with a tidy wake; “max track” choices bias balance rearward and accept a little more drag.
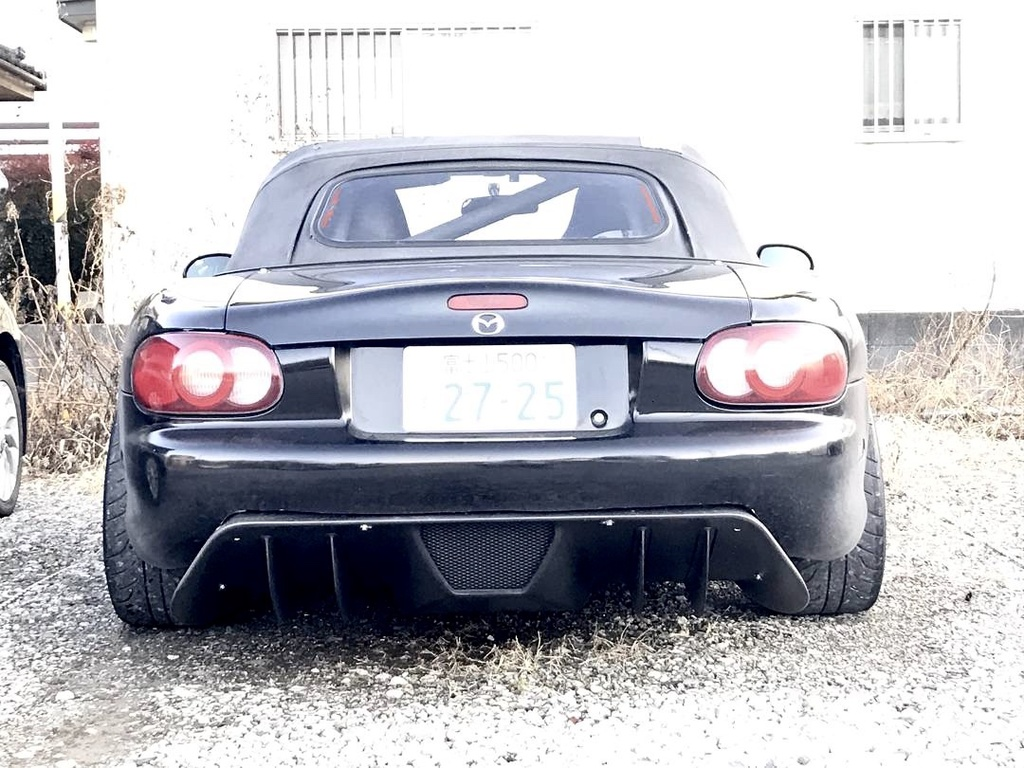
Diffusers on Miatas: where gains come from (and when they don’t)
With a smoothed underbody, panels from the front subframe to near the rear axle, the diffuser can extract more clean mass flow, lower floor pressure, and add downforce efficiently. That setup often shows a small but real drop in Cd plus a respectable increase in −Cl. Without a flat floor, a late-start diffuser fights turbulent inflow and underbody clutter; it may still add rear downforce, but often less efficiently than simply adding rear wing area or angle. When you tune the diffuser, pull the classic knobs: throat height, ramp angle, expansion ratio, and strake layout. Keep ramp sweeps conservative (about 5–9 degrees) and verify attachment with wall-shear lines and streamlines. If you see a big separated bubble on the ramp, back off the angle or improve the floor.
Skirts and side sealing
NA/NB/NC floors are busy; ND is better but still not flat. Side sealing, physical skirts, fences, or vortex-based “virtual skirts”, cuts leakage, boosts mass flow through the floor, and enhances diffuser effectiveness. The interaction is non-linear: a decent diffuser becomes a good diffuser once sealing is sorted. In CFD, run a gap sensitivity study across realistic ride height, try fence shapes ahead of the diffuser, and make sure your splitter or front under-tray ties neatly into the skirts. Plot −Cl versus skirt gap and highlight where stall shows up.
Interaction effects specific to Miatas (don’t tune parts in isolation)
Rear devices talk to each other. A taller spoiler can raise base suction and help the diffuser extract, or it can contaminate the diffuser’s inflow if it sheds a large separated bubble. Any time you change the rear device, re-evaluate the diffuser. Better side sealing increases diffuser mass flow but raises pitch and ride sensitivity, follow sealing changes with a rake and ride-height matrix. And after you add rear help, expect to chase front balance with a splitter, front under-tray edges, tire-wake control, and sometimes small fender/liner tweaks.
Turning CFD data into lap time improvements
Translate your force coefficients into speed using simple physics your readers can follow. For a representative corner, estimate the extra lateral grip from added normal load using tire load-sensitivity; even small downforce gains compound when they stabilize balance. On straights, compare the power required at your new CdA with available wheel horsepower to see whether you “spent” too much drag for the downforce you gained. Present both the straight-line cost and the cornering benefit so the trade is obvious.
Evidence to reality-check against
Expect modest but measurable Cd improvements from CFD-guided underbody panels on NDs and meaningful efficiency gains when a diffuser is paired with a smoothed floor. Miata drag bands from community testing provide a reality check for your baseline. Diffuser underperformance on bumpy floors is common and explains why wings often look better on efficiency until the floor is cleaned up.
Don’t celebrate a half-percent Cd change unless you can reproduce it with tighter convergence and a finer mesh, it’s probably numerical noise. Never ignore ride/rake coupling; rear devices alter rolling rake, so resweep the front splitter and front ride height after big rear changes. Avoid bolting on a diffuser before underbody prep on NA/NB/NC. And don’t chase spoiler angle forever expecting “free” downforce; if you need efficiency, a proper wing usually wins on a Miata.


